Airy Mobile
Overview
Our Airy Mobile theme is made with mobile-first approach in mind. This theme will be especially suitable for stores with a big catalog of products like eBay or Amazon.

The theme is fully responsive. Your website will display beautifully and intuitively across all devices.
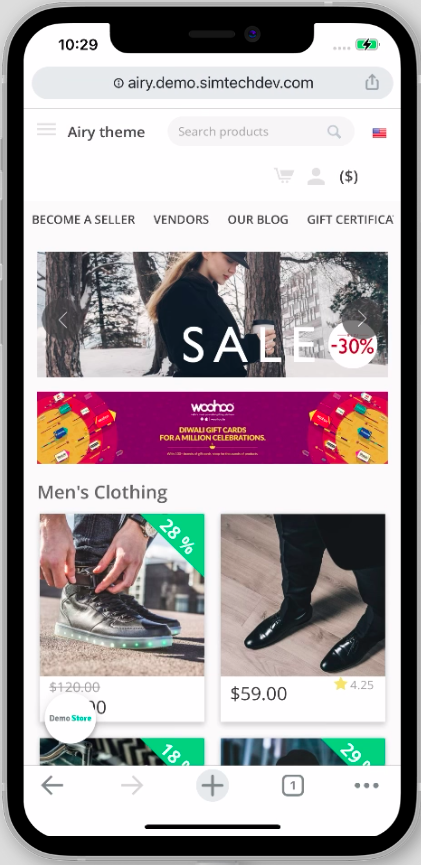
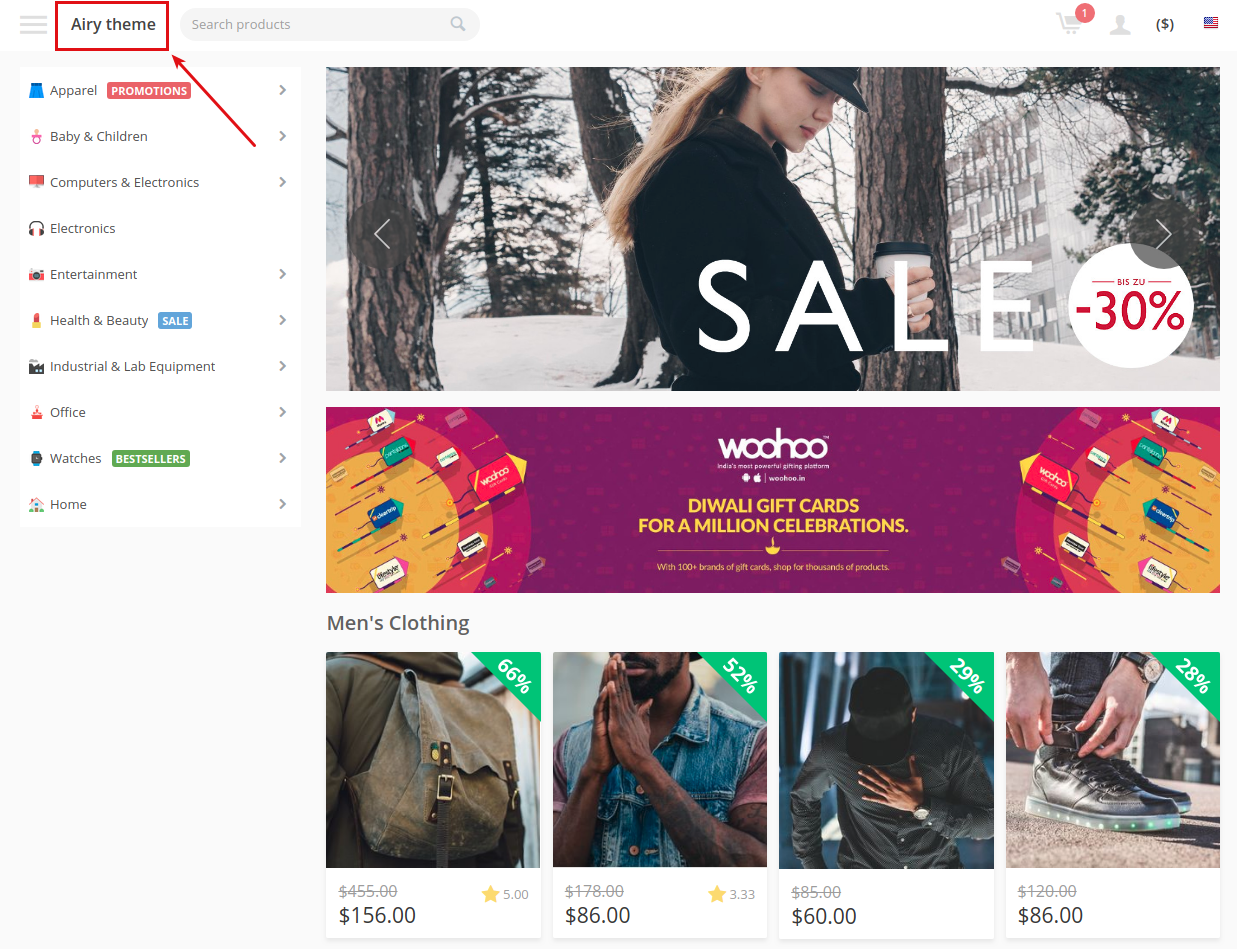
Home page
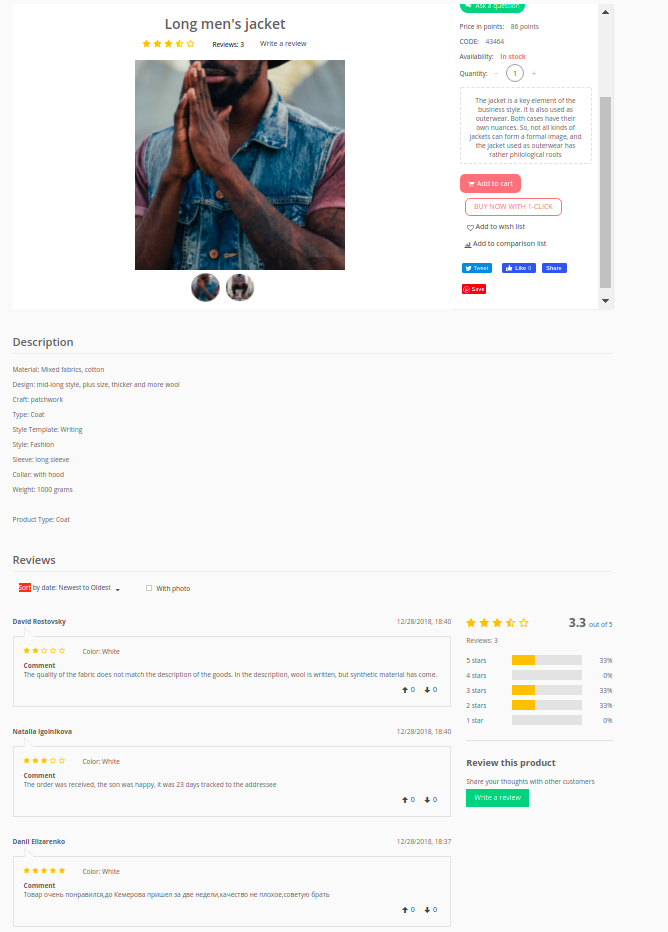
Product page
Category sidebar

The Airy Mobile theme comes with 3 add-ons to enhance your customer experience:
- Airy Mobile
- Smart Mega Menu
- Enhanced Social Login
Compatibility
The theme is compatible with CS-Cart and Multi-Vendor 4.7 and above, but only versions 4.11.x, 4.12.x and 4.13.x are supported.
Don’t know what archive to download to install the add-on? Read here.
Support
This theme is created and published by Simtech Development Ltd., a CS-Cart developer. You are guaranteed a quality theme supported by the future versions. If you need help, please contact us via our help desk system.
Demo store
Check out our Airy Mobile to show you a glimpse of the store look and feel.
Note
Every half an hour the demo store is reset to the default state.
Installation and setup
Installing and setting up the theme
You can learn how to install and set up the theme in the User guide.
Installing and setting up the add-ons
The theme comes with a set of add-ons. You can configure the add-ons up to your needs. Below, you will find detailed user guides.
Airy Mobile add-on
Adds custom blocks to the store.
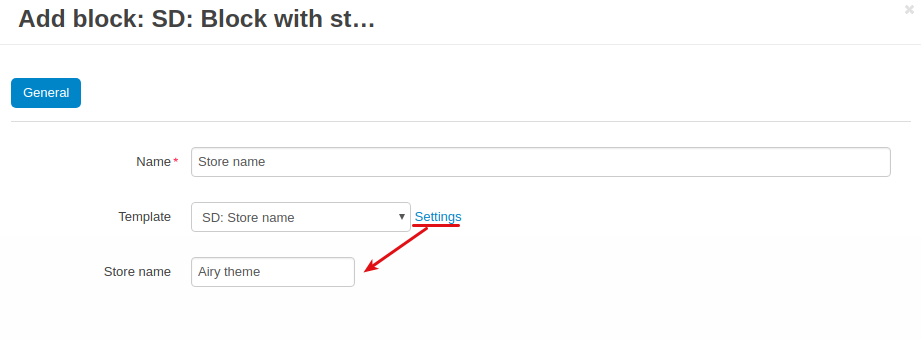
Store name
To add a store name, follow these steps:
- Go to Design > Layouts.
- Navigate to the layout you would like to add the block to.
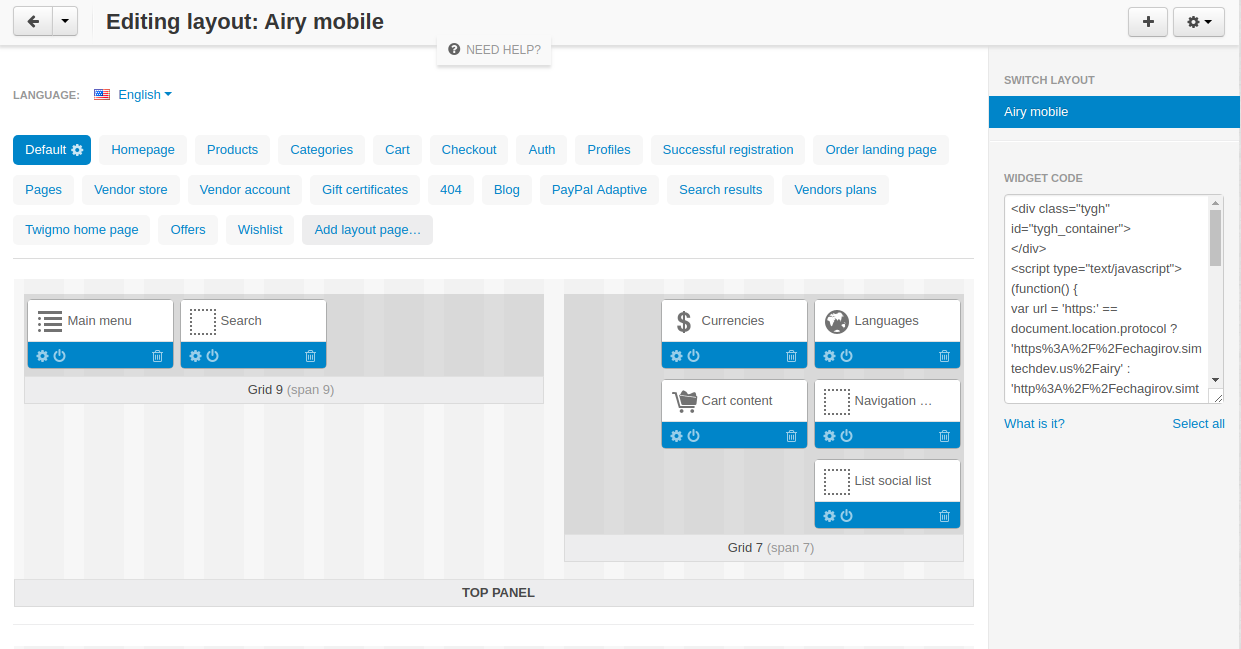
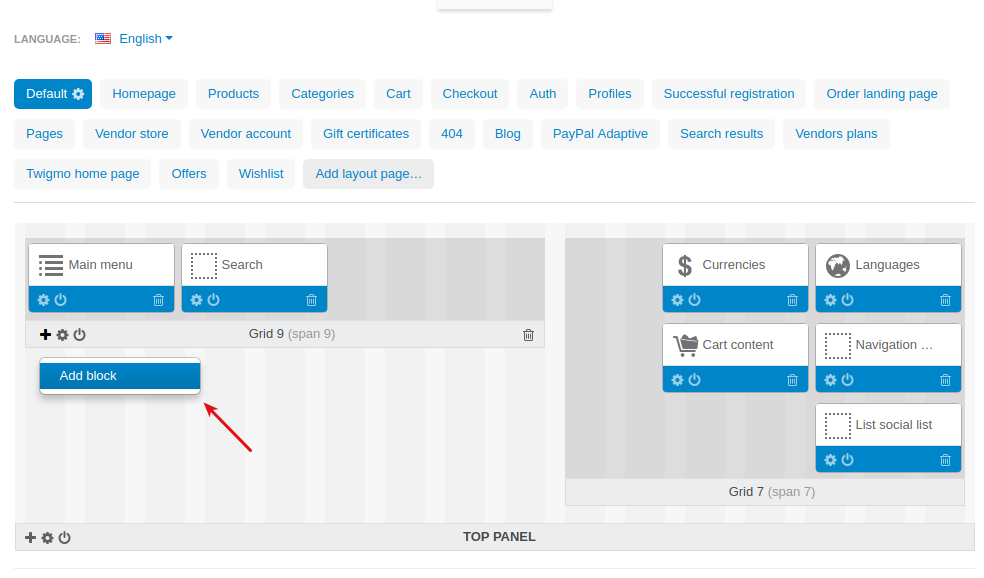
- Locate the necessary container and click the + button to add a new block.
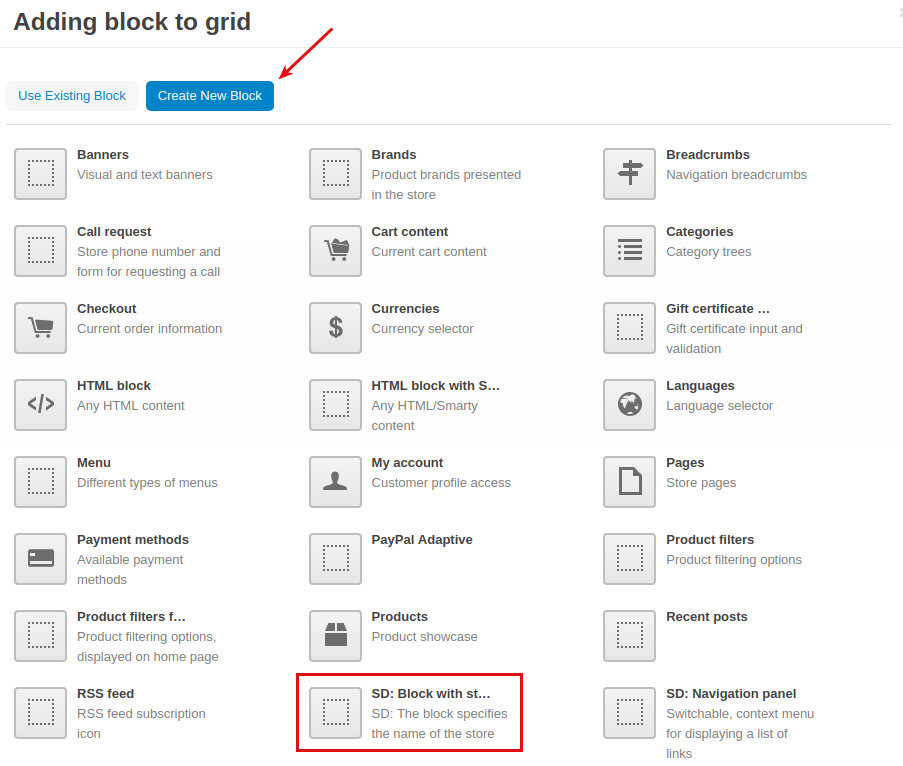
- Switch to the Create new block tab and select the SD: Block with store name block.
- Enter a name for the block, select the SD: Store name template. Then, click on the Settings and enter the store name to the corresponding field.
- Click Create.
- Here’s the result:
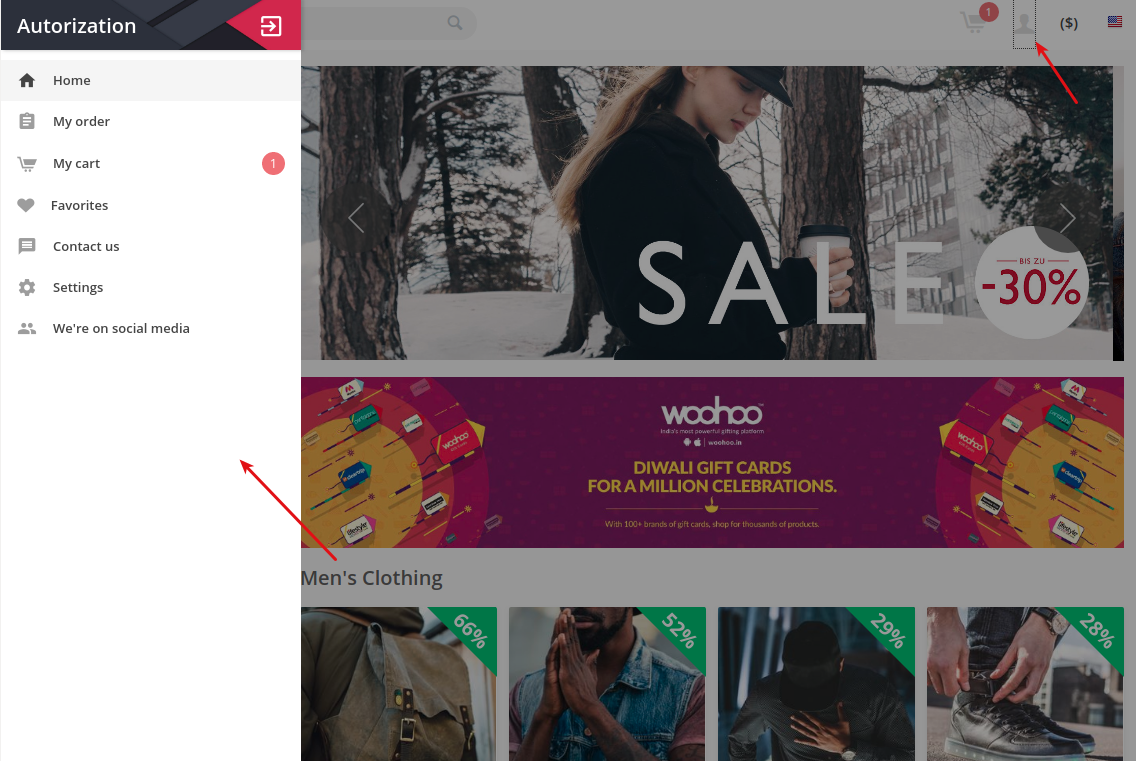
Navigation panel
To add a navigation panel, follow these steps:
- Go to Design > Layouts.
- Navigate to the layout you would like to add the block to.
- Locate the necessary container and click the + button to add a new block.
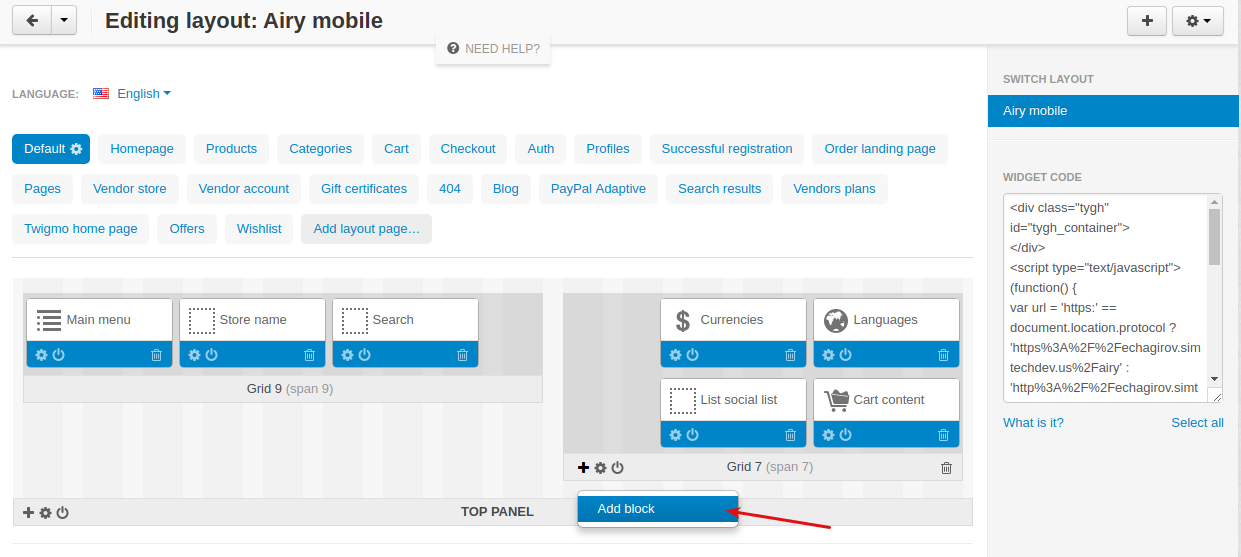
- Switch to the Create new block tab and select the SD: Navigation panel block.
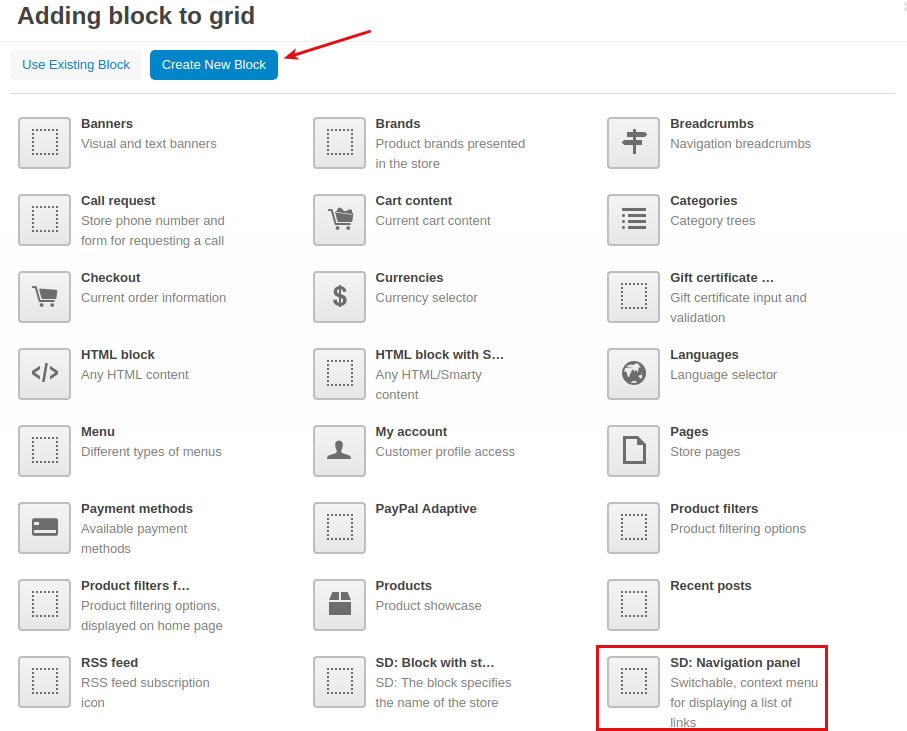
- Enter a name for the block and select the SD: Navigation panel template.
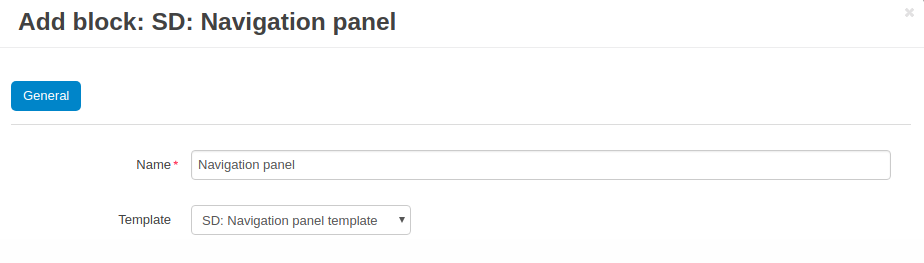
- Click Create.
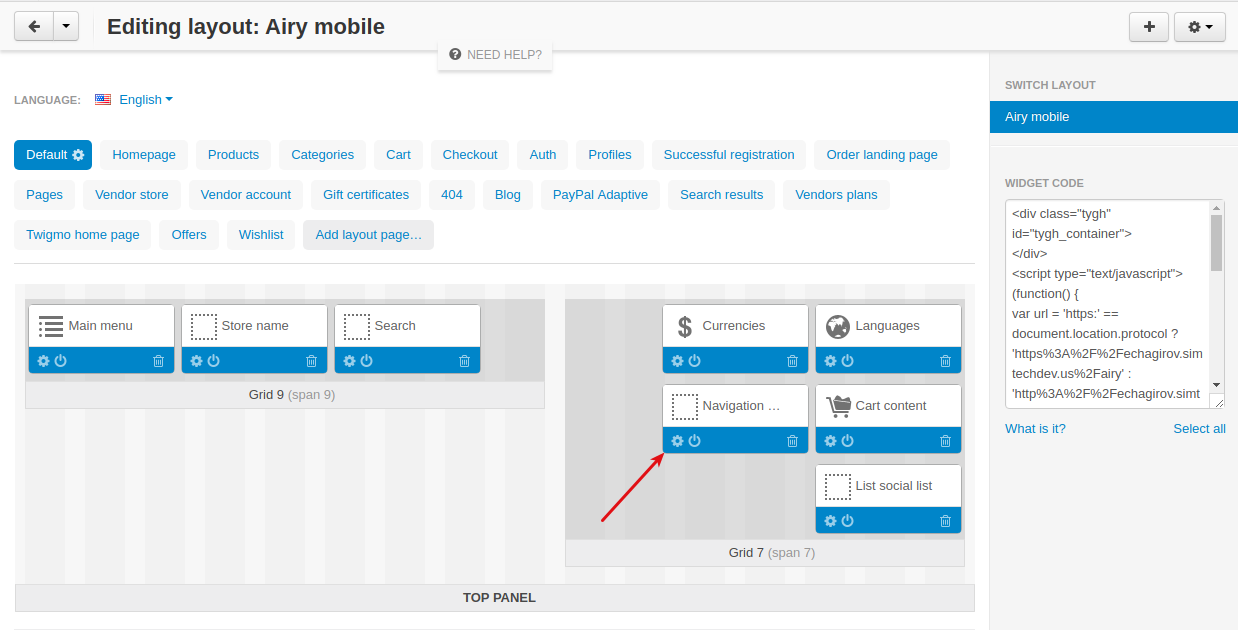
- Here’s the created block in the block manager:
and here’s the created block on the storefront:
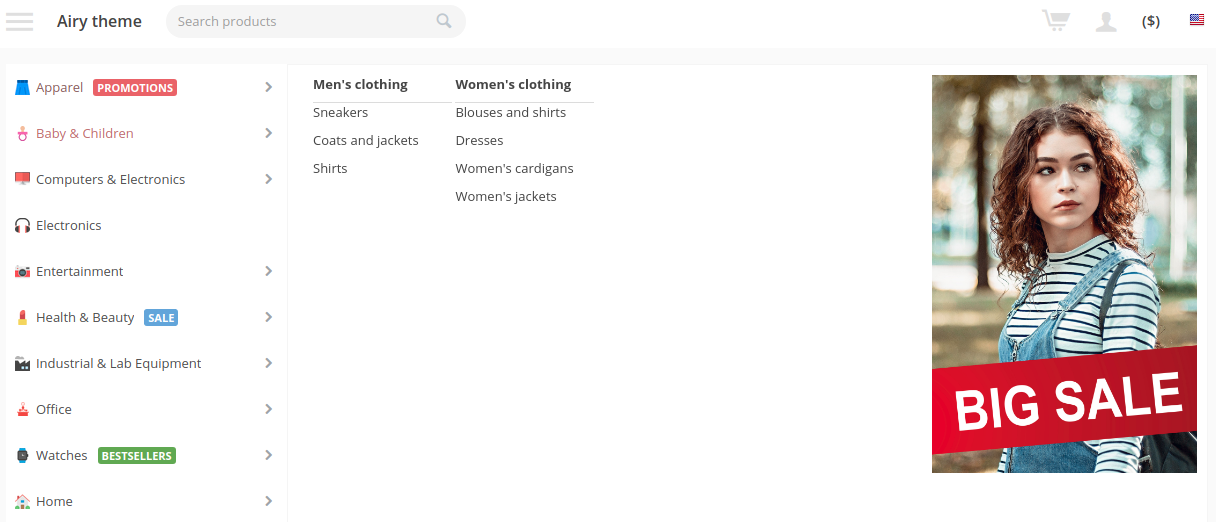
Vendor information
To add a block with vendor information (vendor logo, number of vendor products, and Contact vendor button):
- Go to Design > Layouts.
- Navigate to the Vendor store layout or another layout where you would like to add the block.

- Locate the necessary container, create a grid if necessary and click the + button to add a new block.
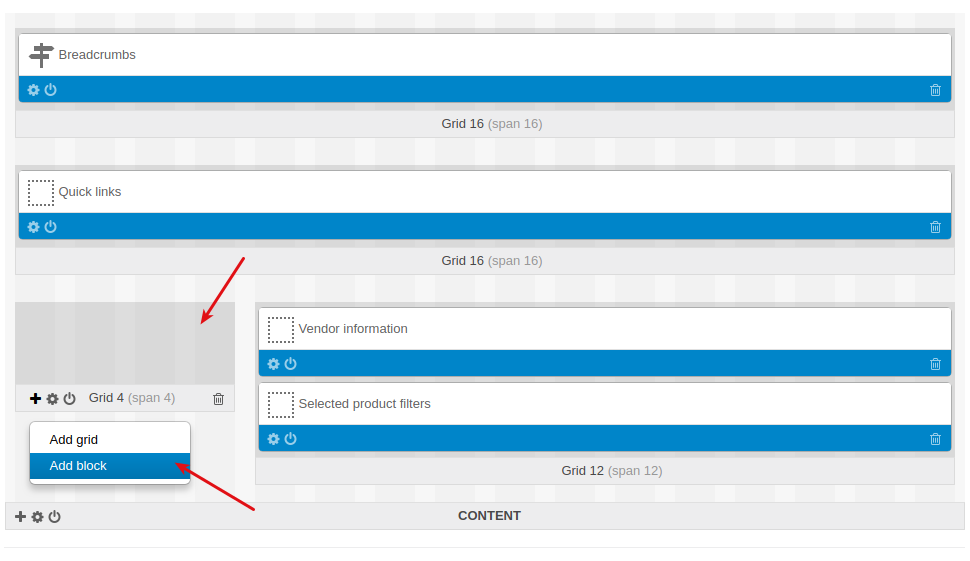
- Switch to the Create new block tab and select the SD: Vendor information block.
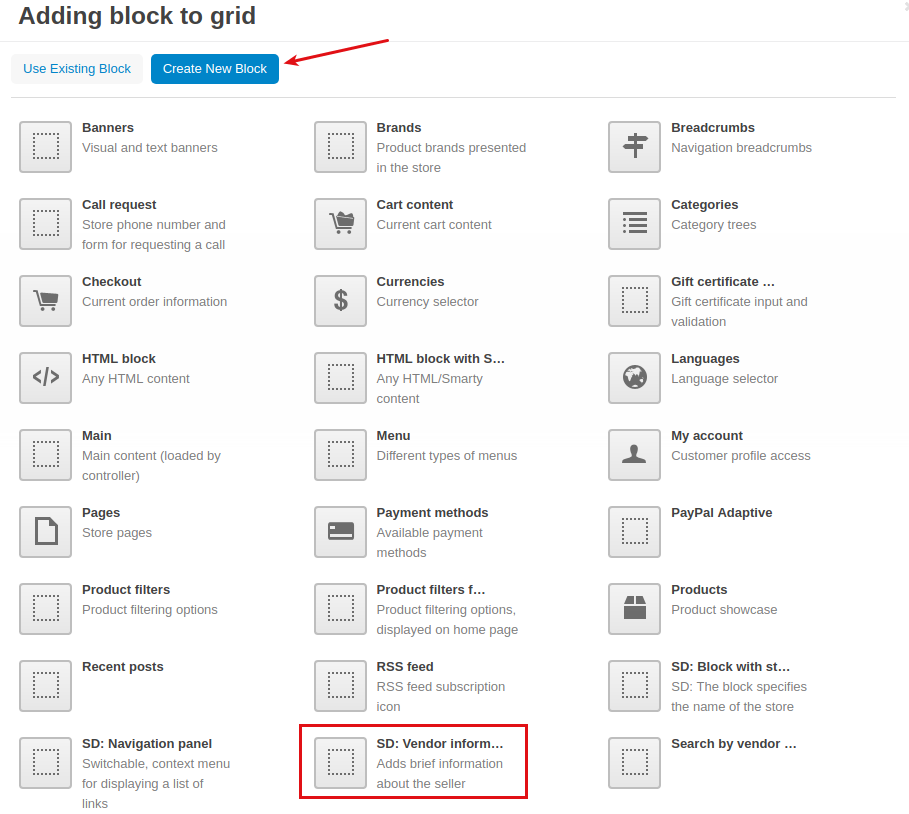
- Enter a name for the block and select the SD: Template with information about the seller template.
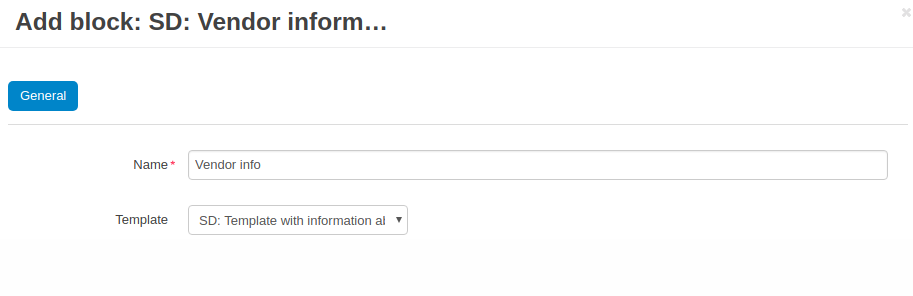
- Click Create.
- Here’s the created block in the block manager:
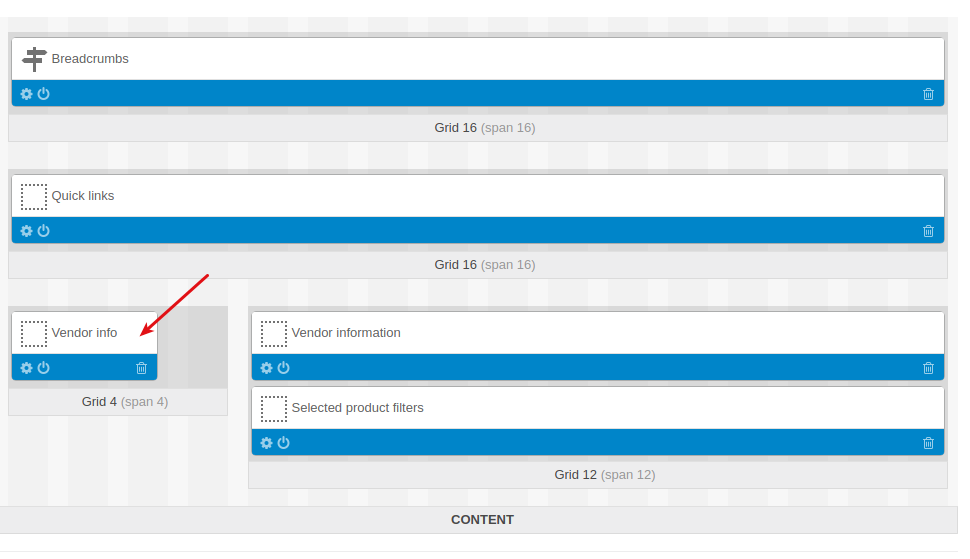
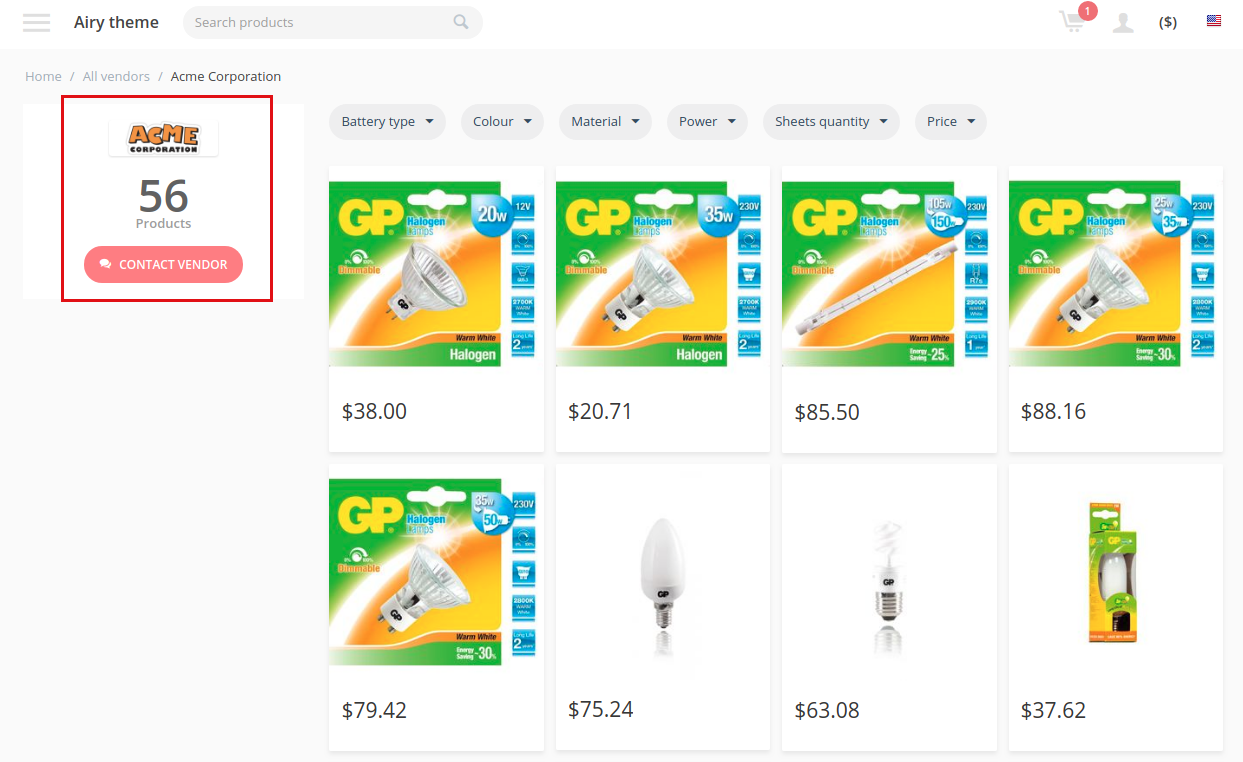
and here’s the created block on the vendor page:
Smart Mega Menu
Creates an attractive menu that can be customized by adding icons, labels, and banners to categories and subcategories.
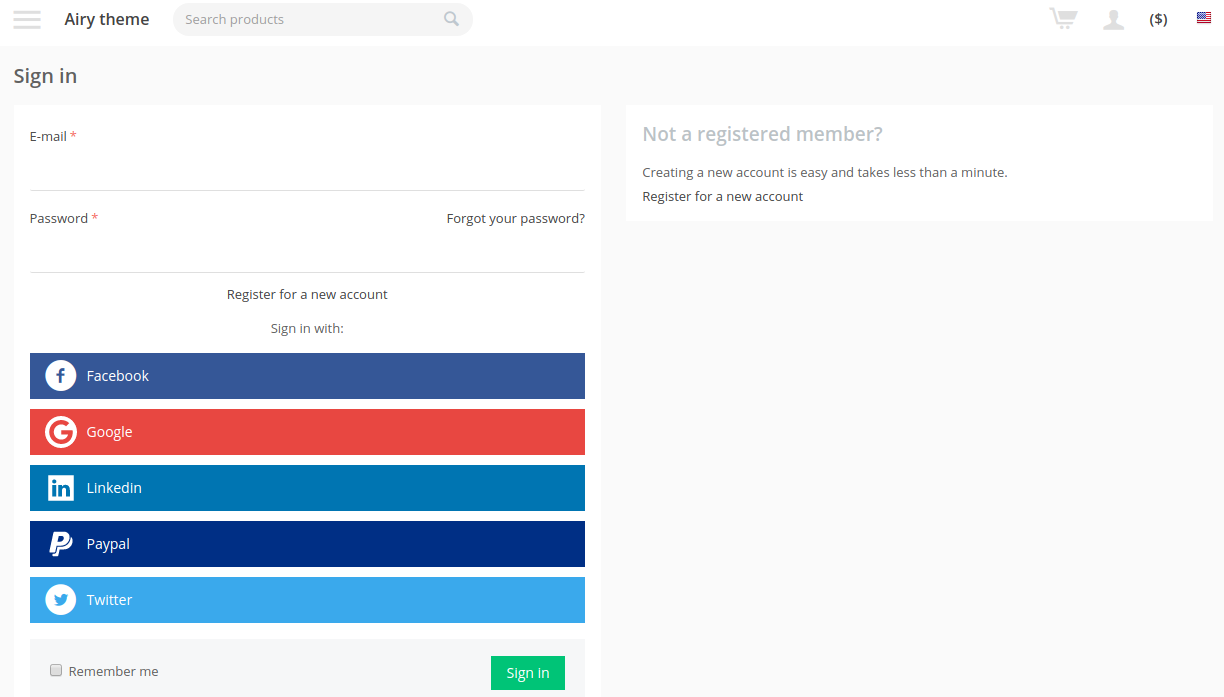
Enhanced Social Login
Allows customers to sign up using their accounts on social networks.