
How To: Work with Components
This section contains all the information regarding the extension and reuse of the react-components of the application.
Direct Embedding into React Components
To embed components in the render process, use render subscriber from the PWAjet API: pwajet.core.renderSubscriber
Documentation may be found from the IDE hints
This customization method allows you to:
- Add your component before or after the selected application component.
- Add your component to the beginning or end of the selected application component.
- Exclude component from rendering.
- Get and use the props of the selected application component.
Registration of New Blocks (Block Manager)
There are two objects available in the PWAjet API:
layoutService
It is the service for registering blocks. Blocks added to it will be automatically displayed if a block with a suitable code is returned in the backend response:
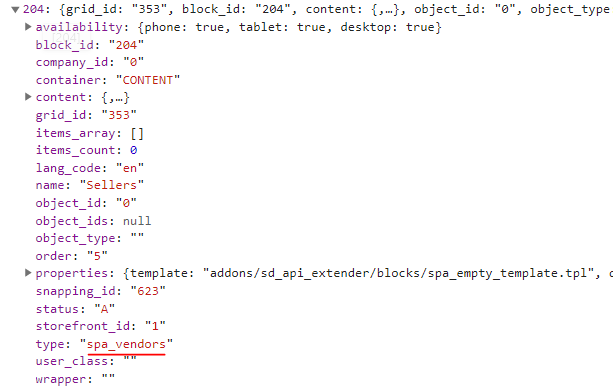
Let’s say a block with the spa_vendors type comes in a request for blocks for the main page, so you need to register such a block:
import { layoutService } from 'pwajet'
const VendorsBlock = React.lazy(() => import('./blocks/vendors-block/VendorsBlock'))

layoutService.registerBlock({
  code: 'spa_vendors',
  component: VendorsBlock,
  factory: async () => {
    const {default: factory} = await import('./blocks/vendors-block/vendorsBlockPropsFactory')
    return factory
  },
Here VendorsBlock is a regular react component that displays a list of vendors in the required form. Its peculiarity is that it must be loaded dynamically using React.lazy.
A factory is a function that initiates the loading of a chunk if necessary, which contains the logic for transforming the properties of the API block into the properties of the React component. This is what a factory might look like:
const vendorsBlockPropsFactory = async (data: any) => {
  return {
    title: data.title,
    vendors: await castListItems(data.content.items, castVendor),
    hideTitle: !data.shouldShowTitle,
    disposition: data.disposition,
  }
}

export default vendorsBlockPropsFactory
ESM Registration
layoutService automatically searches for files that can be used to display the new block. The block component for the spa_logo block can be found in the file registered with esmExtensions (refer to the article).
It is important that assets/extensions/core/blocks/1dd72c96.spaLogoBlock.js was located in the blocks subdirectory and had spaLogoBlock at the end of the filename:
new RegExp(`.*/blocks/\\w*.${blockName}Block.js`)
The factory for properties can be located in the same place, but with a different name:
new RegExp(`.*/blocks/\\w*.${blockName}BlockPropsFactory.js`)
Note
Block codes are transformed to camelCase: spa_logo in the API data matches spaLogo in file structure.
layoutHandlerSubscriber
It is a tool for creating and subscribing to events. This can include any events related to the block processing.
It is recommended to include all this logic in the same file as the factory.
layoutHandlerSubscriber.on<IBlockFactory>('block.factory.create', async (block) => {
  if (block.type !== 'spa_vendors') {
    return
  }

  block.props.vendors = await Promise.all(block.props.vendors
    .map(async (vendor: IVendorFactory) => {
      try {
        return await createVendor(vendor)
      } catch (error) {
        console.warn(error)
        return null
      }
    }).filter(notNull))

  block.props.vendors.map(persistVendor)
})
The block data processing event is used here. First, select only the block that you need. Then two things happen:
- The dataset is converted to Vendor instances (createVendor)
- They are saved to the database.
Registration of New Screens (Screen Manager)
To register your screen, use the following service from the `pwajet api: screenService.
Example:
import React from 'react'
import { screenService } from 'pwajet'
const ProductScreen = React.lazy(() => import('./screens/ProductScreen))

screenService.registerScreen({
  route: '/:language([a-z]{2})/products/:itemId',
  component: ProductScreen,
})
To be able to refer to the created screen through a link, use the following function, also available in the pwajet api: createLinkUrl:
import { createLinkUrl } from 'pwajet'

const productScreenUrl = createLinkUrl('/:language([a-z]{2})/products/:itemId', { itemId: 'iphone-x' })
Then in productScreenUrl you will get a link /en/products/iphone-x, if the user has English enabled. The language code will be substituted automatically. Pass values for other parameters, as in the example with itemId.
How To: Extend Redux
Adding a reducer
import pwajet from 'pwajet'

pwajet.core.store.injectReducer({ 'reducerKey': newReducer})
Note
It is recommended to choose keys with extension prefixes not to create collisions.
Refer to official redux documentation for more information.
Adding epic
import pwajet from 'pwajet'

const epics = [
  epic1,
  epic2,
  ...
]

pwajet.core.store.injectEpics(epics)
Find more info in redux-observable.
Configuring state initialization only when needed
If the extension refers to critical resources and can be used only when necessary, you can initialize a new piece of store only when loading the component that uses it.
For example, the state for a product block sold by various vendors (Common products) can be initialized as follows:
const VendorProducts = React.lazy(() => {
  const componentPromise = import('./components/vendor-products/VendorProductsContainer')
  const reduxPromise = import('./redux/reducers/commonProductsReducer')
  const epicsPromise = import('./redux/epics')

  reduxPromise.then((reducer) => pwajet.core.store.injectReducer({'CommonProducts': reducer.commonProductsReducer}))
  epicsPromise.then((epics) => pwajet.core.store.injectEpics(epics.commonProductsEpics))

  return Promise.all([componentPromise, reduxPromise, epicsPromise]).then(results => results[0])
})
Use the function from pwajet.core.store.dynamicImportComponentWithRedux to make things easier:
const VendorProducts = React.lazy(() => dynamicImportComponentWithRedux('commonProducts')(
  import('./components/vendor-products/VendorProductsContainer'),
  import('./redux/reducers/commonProductsReducer'),
  import('./redux/epics')
))