
Cron Settings
Cron is a utility used for scheduling commands at a specific time, i.e. running scheduled backups, monitoring disc space, deleting no longer required files, running system maintenance task.
Simtech Development add-ons use crons for the systematic update and synchronization of relevant data.
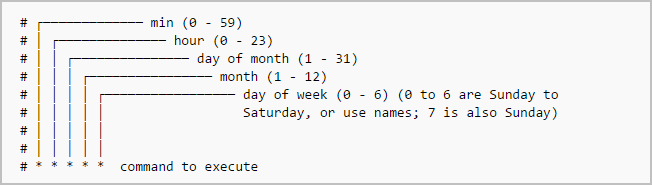
The typical format of a cron job in Simtech add-ons is:
To display the contents of the crontab file of the currently logged in user: $ crontab -l To edit the current user’s cron jobs, do: $ crontab -e
If it is the first time, you will be asked to choose one of the editors below to edit the cron jobs.
- /bin/nano <—- easiest
- /usr/bin/vim.basic
- /usr/bin/vim.tiny
- /bin/ed
Run ‘select-editor’ to change later.
Cron setup in cPanel
To add a cron job in cPanel, follow these steps:
- First, you’ll need to log in to cPanel
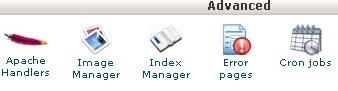
- From the dashboard, either search for Cron Job or navigate to the Advanced menu and click on the icon for Cron Jobs
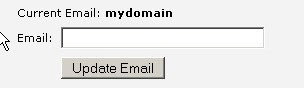
- Next, you’ll need to select an email where you’d like to receive cron output. If the email address listed beside Current Email is valid, simply leave it. If you’d like to use a different email address, enter it into the form field next to Email and click Update Email once you’ve finished
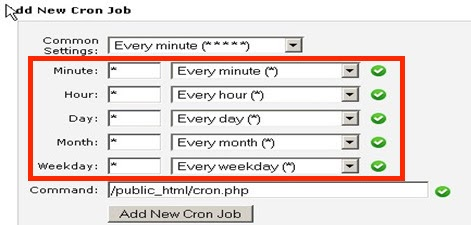
- In the section labelled Add New Cron Job, you can specify what command you’d like to run as well as its frequency. Start by entering your desired command in the bottom form field labelled Command. You can list any Linux command here or, if you have a file you’d like to run at a certain time, simply provide the path to the file you’d like to run
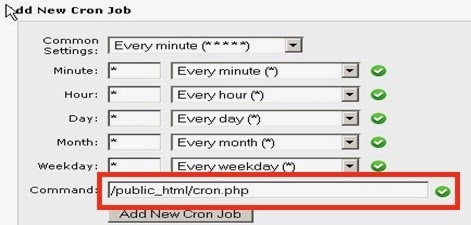
- Next, move back up to the form field labelled Common Settings and select which frequency you’d like the command to run at from the available options listed in the dropdown menu. This will automatically update the other time settings according to your choice

- Alternatively, you can choose to enter your recurring frequency manually by adjusting the individual time settings. Minute, Hour, Day, Month, and Weekday can all be modified to achieve your intended results
- When you’ve finished making your selections, simply click the Add New Cron Job button to finalize the process
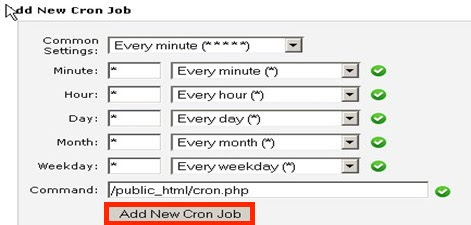
And now you’ve successfully scheduled a command using the Cron Jobs tool within cPanel. If you have other commands that need to be set, simply repeat this process for any other commands.
Crontab Syntax Generator
As you can see, scheduling cron jobs is much easier. Also, there are few web-based crontab syntax generators available to make this job even easier. You don’t need to memorize and/or learn crontab syntax. The following two websites helps you to easily generate a crontab expression based on your inputs. Once you generated the line as per your requirement, just copy/paste it in your crontab file.
Crontab.guru is dedicated website for learning cron jobs examples. Just enter your inputs in the site and it will instantly create a crontab syntax in minutes.
Crontab guru - A quick and simple editor for cron schedule expressions This site also provides a lot of cron job examples and tips. Do check them and learn how to schedule a cronjob.
Note
In case you have found the information above not clear enough, copy the command and hand it to your hosting-administrator
Simtech Add-ons
- Cron is included in such add-ons as:
Support
Setting up the add-on cron is a peculiar task and depends on several factors such as source of data, amount of data, type of data etc. All the necessary instructions can be found in the relevant page of add-on documentation. You can also contact our managers to install and set up the add-on.