Pay with Amazon
Important
Pay with Amazon add-on IS NOT officially supported since 2020, January 22. You can purchase its source code. Note, the free support is not provided for the item.
Overview
Allow your customers to make secure payments using the Amazon Pay payment gateway. It lets Amazon customers log in and pay on your site with information stored in their Amazon account.
Note
Integration with Amazon Pay is available only for businesses based in the following countries:
- United States
- United Kingdom
- Denmark
- France
- Germany
- Hungary
- Italy
- Netherlands
- Portugal
- Spain
- Sweden
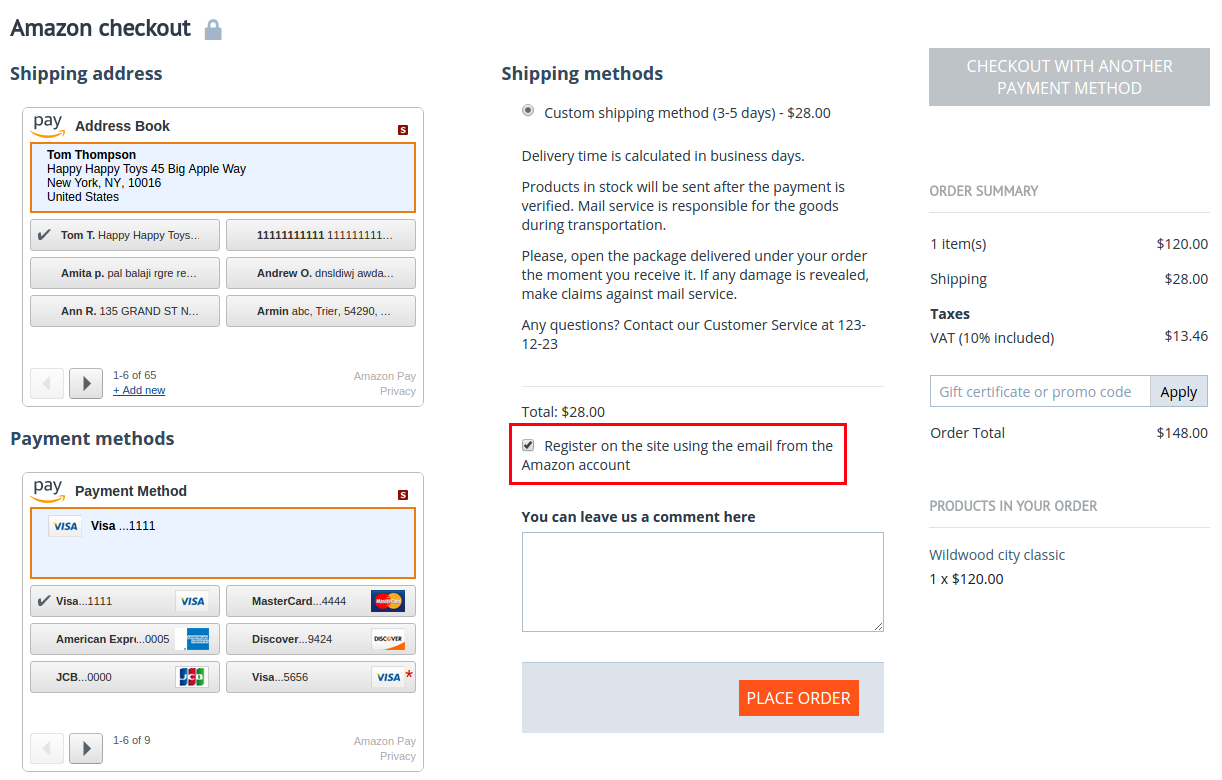
The add-on simplifies the checkout process. Customers can access the shipping information from AddressBook widget and payment information from Payment method widget stored in their Amazon accounts to quickly complete their purchases.
The shipping address will be taken from the customer’s address book.
Note
Amazon Pay is a paid service. See Amazon Pay Fees for more details.
Follow the guide below that will walk you through the setup process.
Compatibility
The add-on is compatible with CS-Cart and Multi-Vendor 4.3.6 - 4.9.3.
Don’t know what archive to download to install the add-on? Read here.
Support
The add-on is developed and published by Simtech Development Ltd., a CS-Cart developer. You are guaranteed the ability to buy quality add-ons to support future versions. If you need help, please contact us via our help desk system.
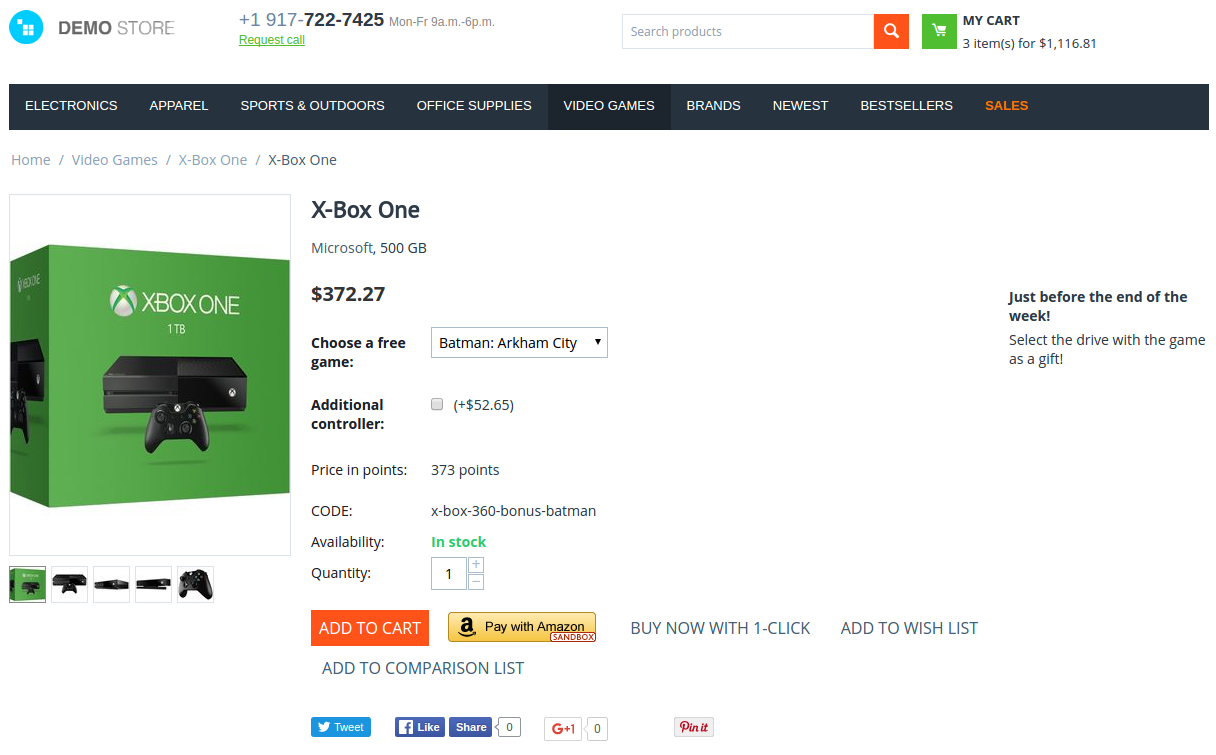
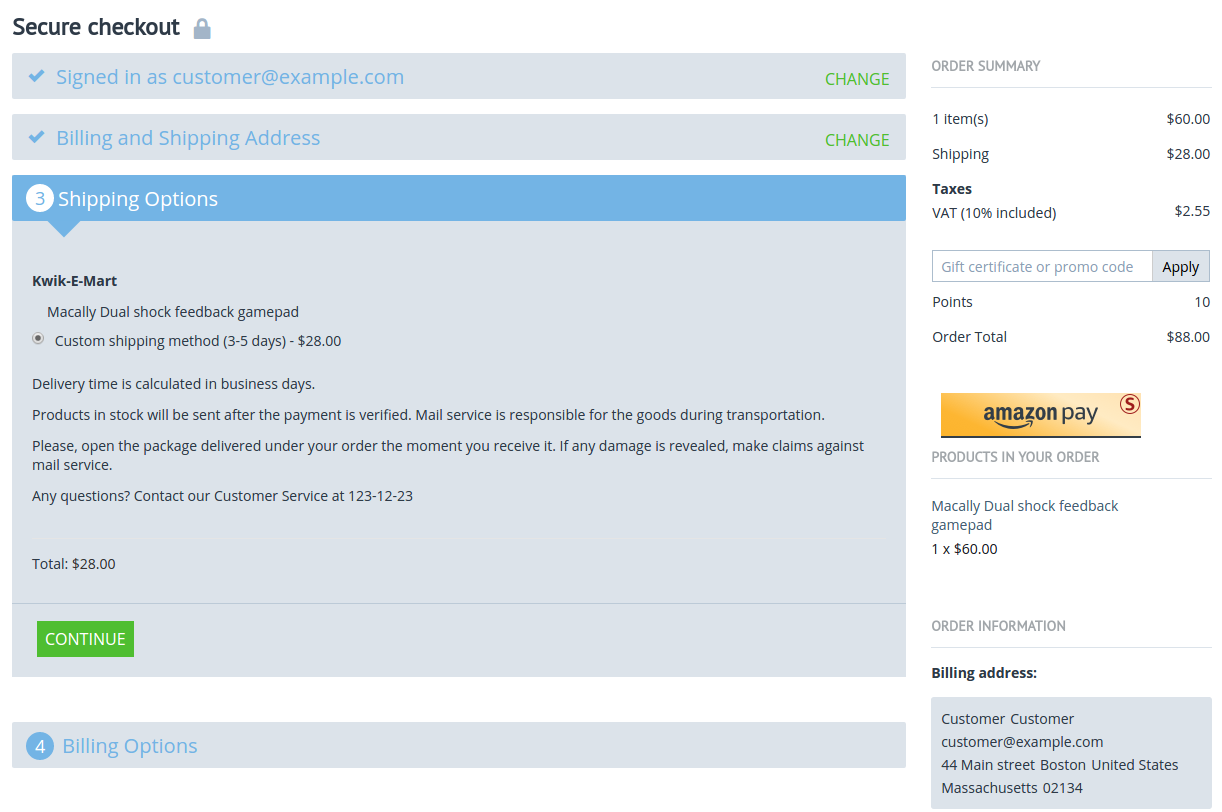
What the customer will see
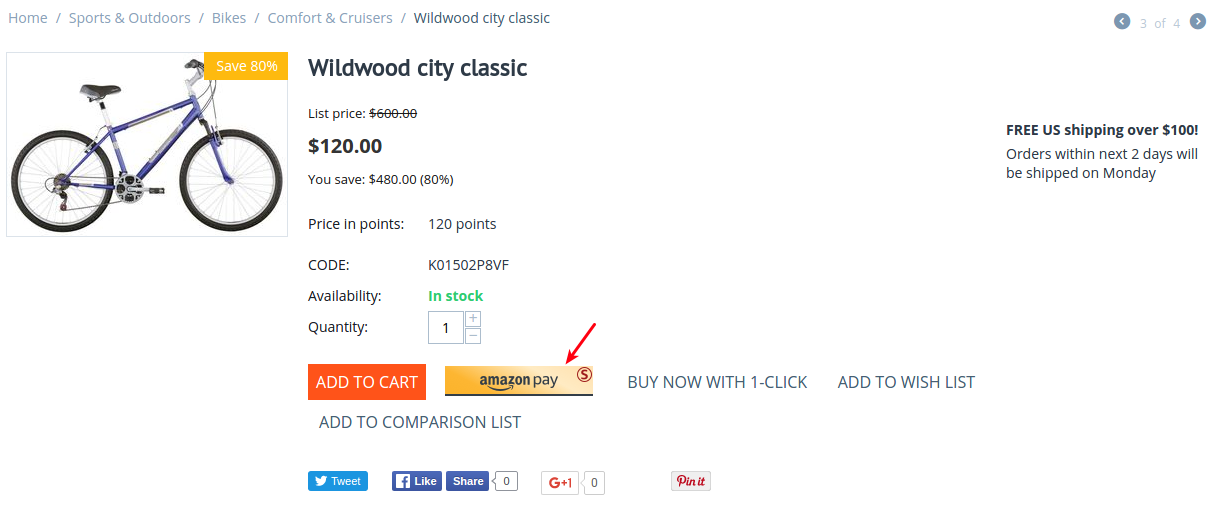
Once you’ve set up the Pay with Amazon payment gateway in the store, the “Pay with Amazon” button will appear on the product details page.
Clicking the “Pay with Amazon” button will add the product to cart and a “Sign in using your Amazon account” pop-up will appear.
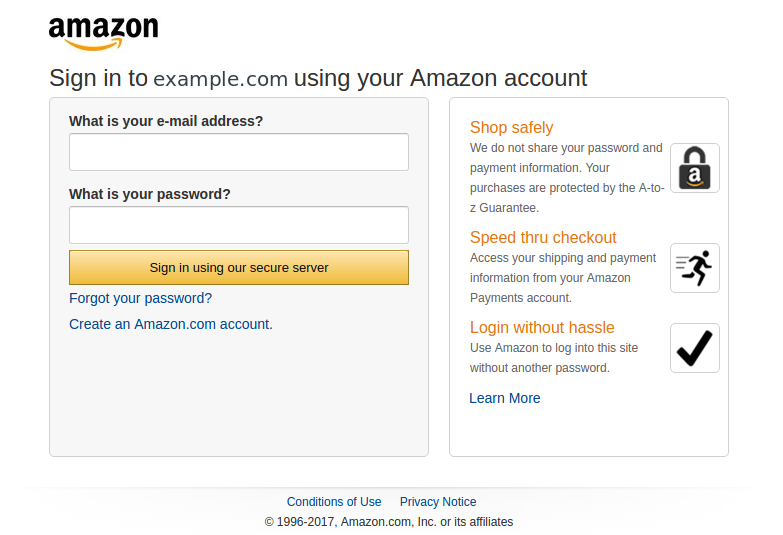
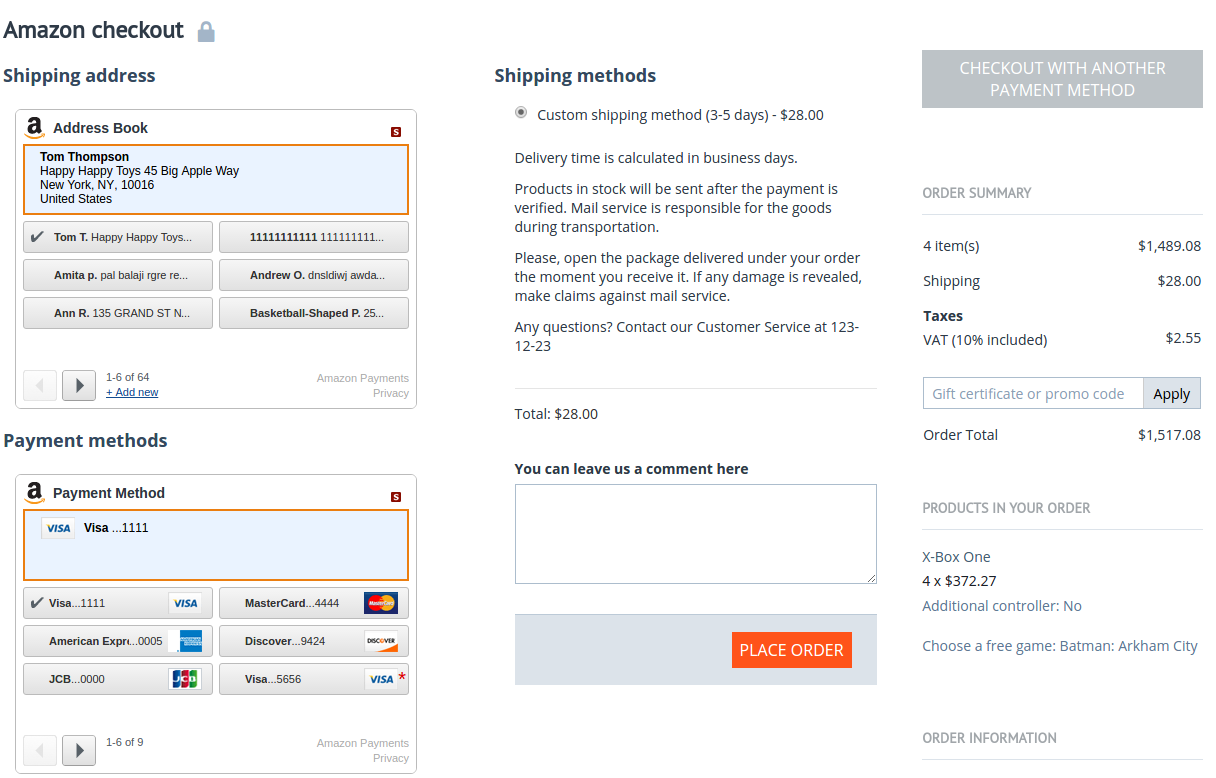
After successful authorization the customer will begin the checkout process.
The customer chooses an address from the AddressBook widget and a credit card from the Payment method widget and then places an order.
Unregistered users can sign in to your site and pay using their Amazon credentials while sharing their profile information and full shipping address with you before completing a transaction.
They can register on the site using their email from the Amazon account.
Start selling with Amazon Pay
To start accepting payments with Amazon Pay, you will need to create a Merchant account. To do so, follow the instructions on the Get Started with Amazon Pay page. If you already have created an account, skip this step.
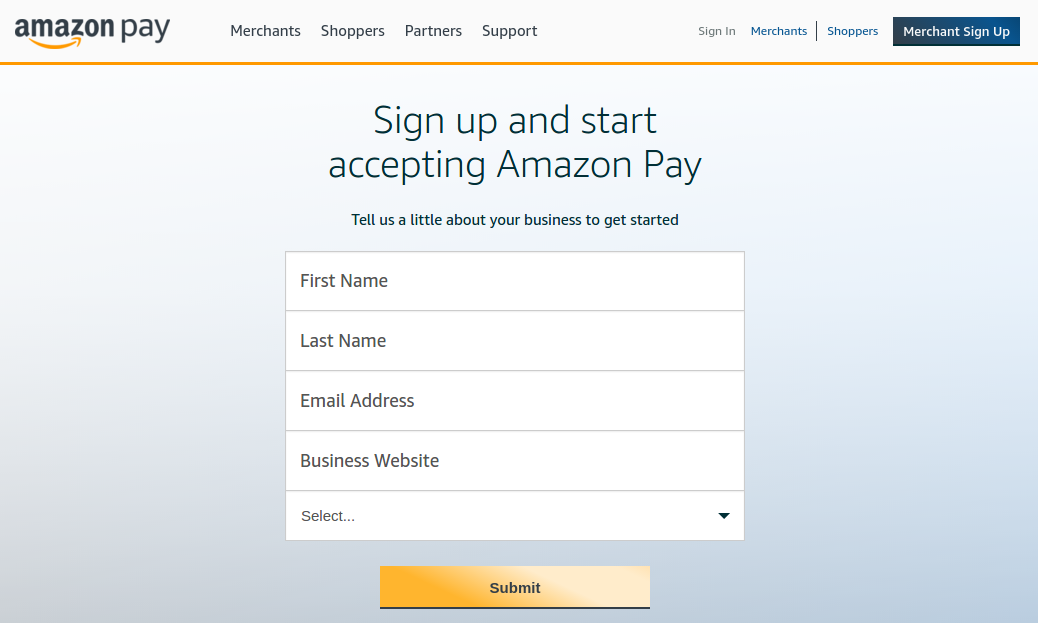
Fill in all requested information about your merchant account. Be careful to provide correct data. All information you provide will be verified by Amazon Pay and incorrect information will delay the verification process.
For more information on how to sign up for Amazon Pay, refer to this article from the Amazon Help Guide.
Managing in the admin area
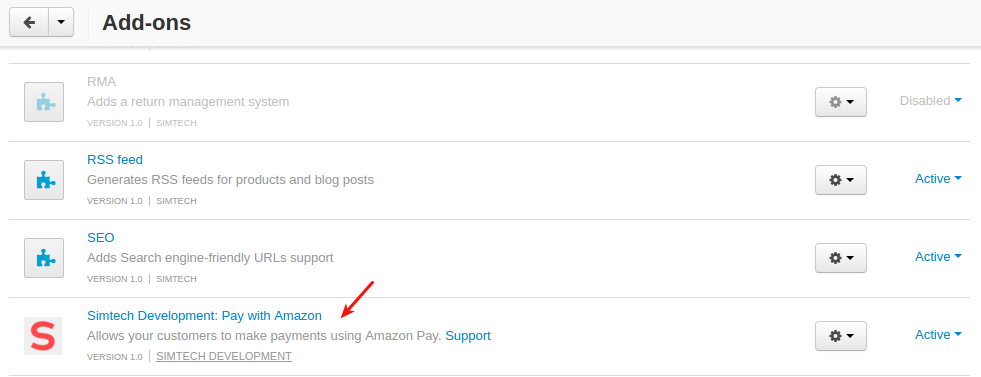
Installing the add-on
Install the Amazon Pay add-on on the add-ons list page (Add-ons → Manage add-ons). Click the + button in the top right corner, select an archive and click Upload & install. You can now find the installed add-on in the list of installed add-ons, just make sure it is set to Active.
Setting up the add-on
In the settings of the add-on in the General tab, you should enter the data of your payment account: Amazon Client ID, Amazon Client Secret, Amazon Merchant ID, etc. You can find the necessary details in your Amazon Pay merchant account.
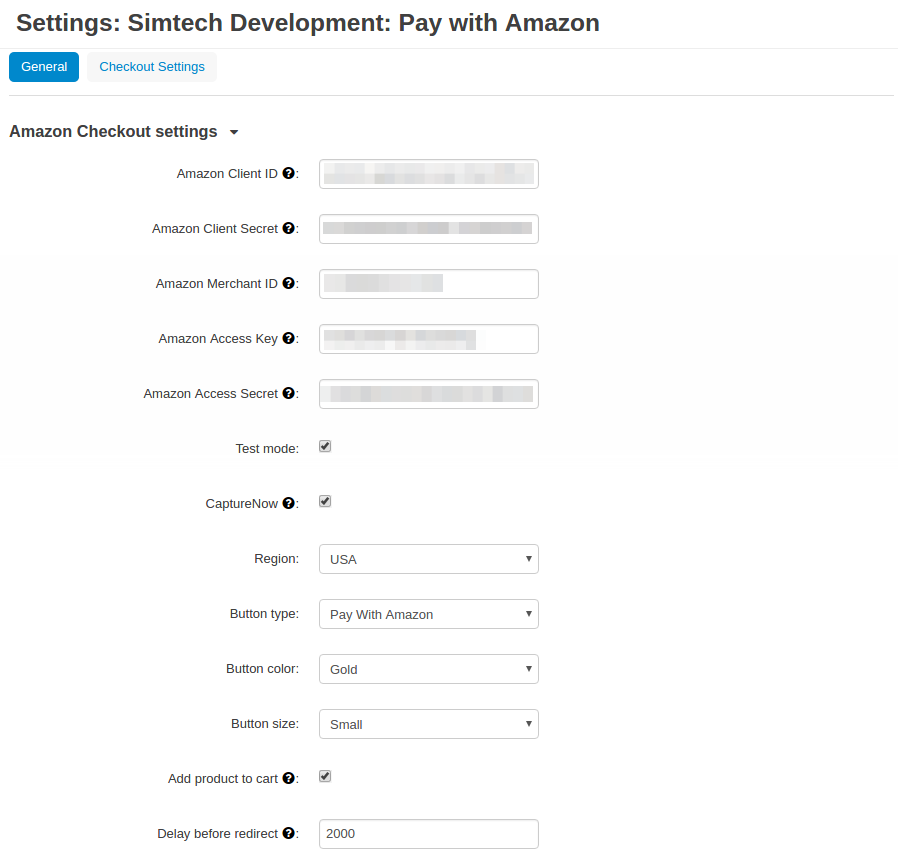
Also, configure other settings.
CaptureNow—Transfer the buyer’s money to your account immediately.
Region—Select the region of your business. Available options are: Germany, UK, Japan, USA.
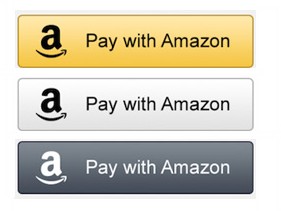
Button type—Pick a type of the “Pay with Amazon” button:
- Pay with Amazon

- Pay

- Just Amazon logo

Button color—Pick a color for the “Pay with Amazon” button: gold, light gray, or dark gray.
Button size—Pick a size for the “Pay with Amazon” button.
Add product to cart—If selected, clicking the “Pay with Amazon” button on the product details page will add products to cart and a “Sign in using your Amazon account” pop-up will be opened.
Note
The “Pay with Amazon” button will appear on the product details page if you select the Add product to cart setting.
Delay before redirect—Delay before the redirect after clicking the “Pay with Amazon” button in milliseconds, e.g. 2000 milliseconds = 2 seconds.
Note
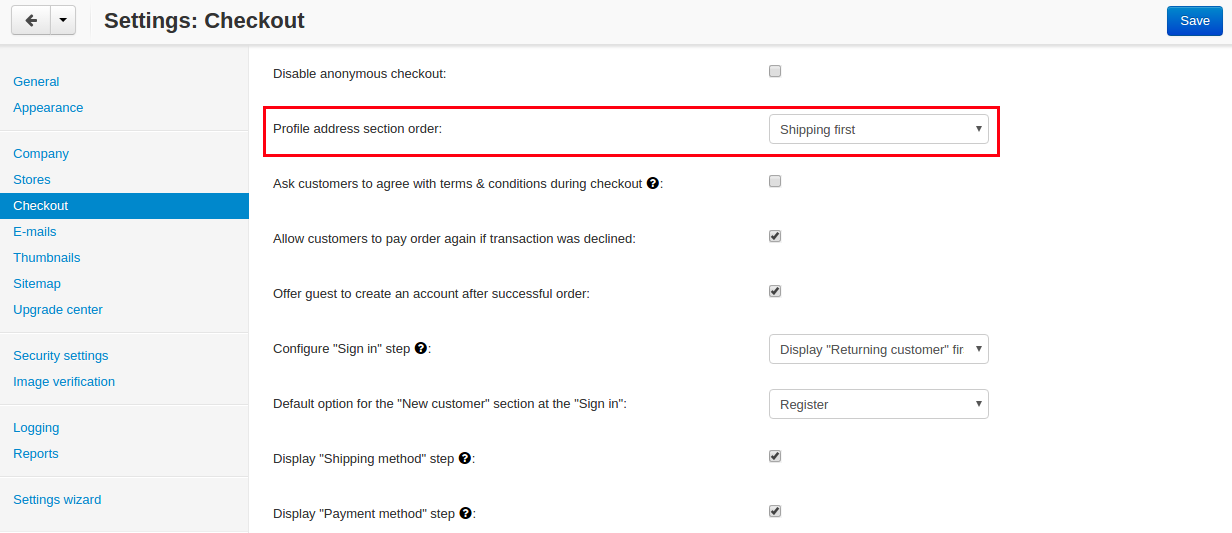
For correct performance of the add-on, make sure that the setting: Settings -> Checkout -> Profile address section order is set to Shipping first.
Creating a payment method
A payment method is created on the payment methods list page (Administration → Payment methods).
Use the + button to create a new payment method.
In the General tab, name the payment method, select PayWithAmazon in the Processor field, and configure the rest of the settings.
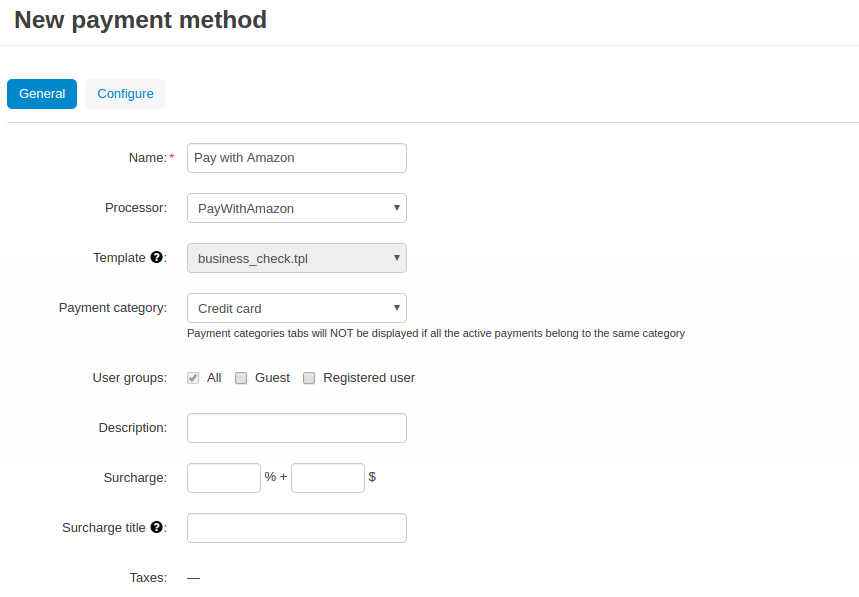

Note
Select the Pay with Amazon payment method box to allow using this payment method for orders placed via Amazon checkout.
The Configure tab should be empty as necessary details for the payment getaway are specified in the add-on settings (see Setting up the add-on section).
Click Create.
That’s it! The Pay with Amazon payment method is now available to your users.
If you run into any issues along the way, contact Merchant Support team and they’ll be happy to help: Contact Amazon Pay Merchant Support.
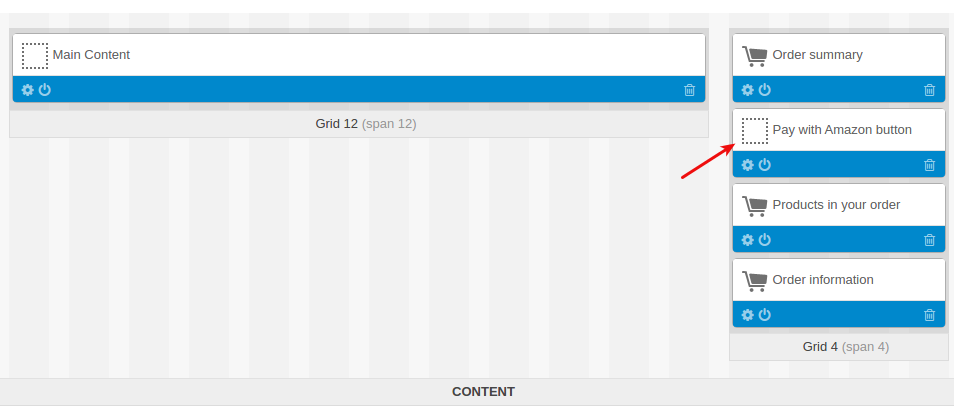
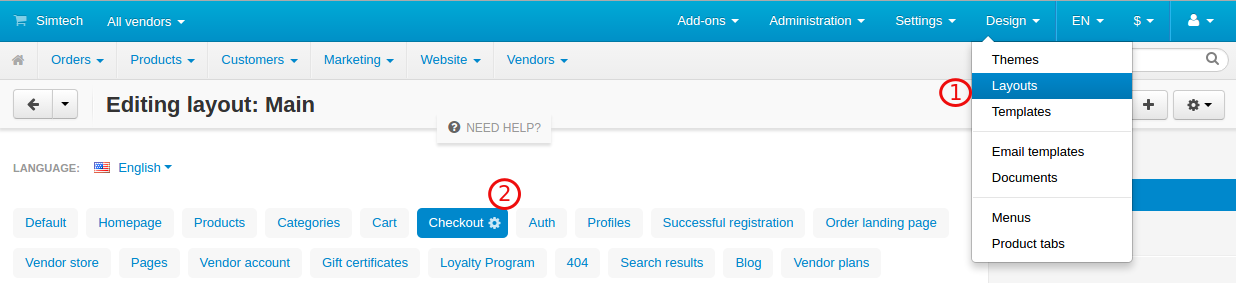
Adding Pay with Amazon button to checkout
- Go to Design > Layouts and switch to the Checkout tab.
- Click + to add a new block.
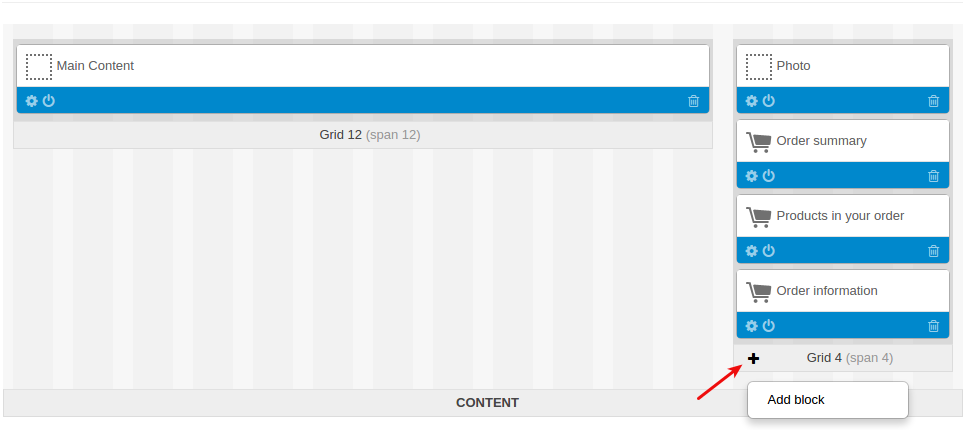
- In the Create new block tab, select the Amazon checkout buttons block.

- Name the block and select the Amazon buttons template.

- Click Create.
Here’s the created block: