
PayPal Adaptive Payments
Important
The PayPal Adaptive Payments add-on IS NOT officially supported since 2020, January 22. If you’re interested in this modification, please contact sales or your manager.
Overview
The PayPal Adaptive Payments add-on enables a customer to send a single payment directly to multiple vendors in one order.
The customer pays the store owner (root administrator) an amount. The store owner keeps part of the payment and pays vendors the remainder. The customer only sees you as the store owner. You allocate the payment for your commission and the actual cost of services provided by vendors. PayPal then deducts money from the customer’s account and deposits it in both your account and the vendors’ accounts.
The customer only knows about the store owner as a primary recipient, not the vendors. The vendors only know about the primary recipient, not the customer.
The payments made via PayPal Adaptive Payments must be authorized and approved by the customer. Adaptive Payments uses the web redirect approval method, in which web stores redirect the customer to PayPal.com to log in for approval.
Note
The store owner must have a PayPal Business account.
Compatibility
The add-on is compatible with Multi-Vendor 4.1.1 and above.
Don’t know what archive to download to install the add-on? Read here.
- Server Requirements:
- TLS version 1.2
- OpenSSL version 1.0.1 or higher
Note
If these requirements are not met, the PayPal Adaptive Payments add-on will not be installed and a corresponding warning will be displayed.
To learn more about security-related requirements, you may want to check out this article on the PayPal developer blog.
How it works
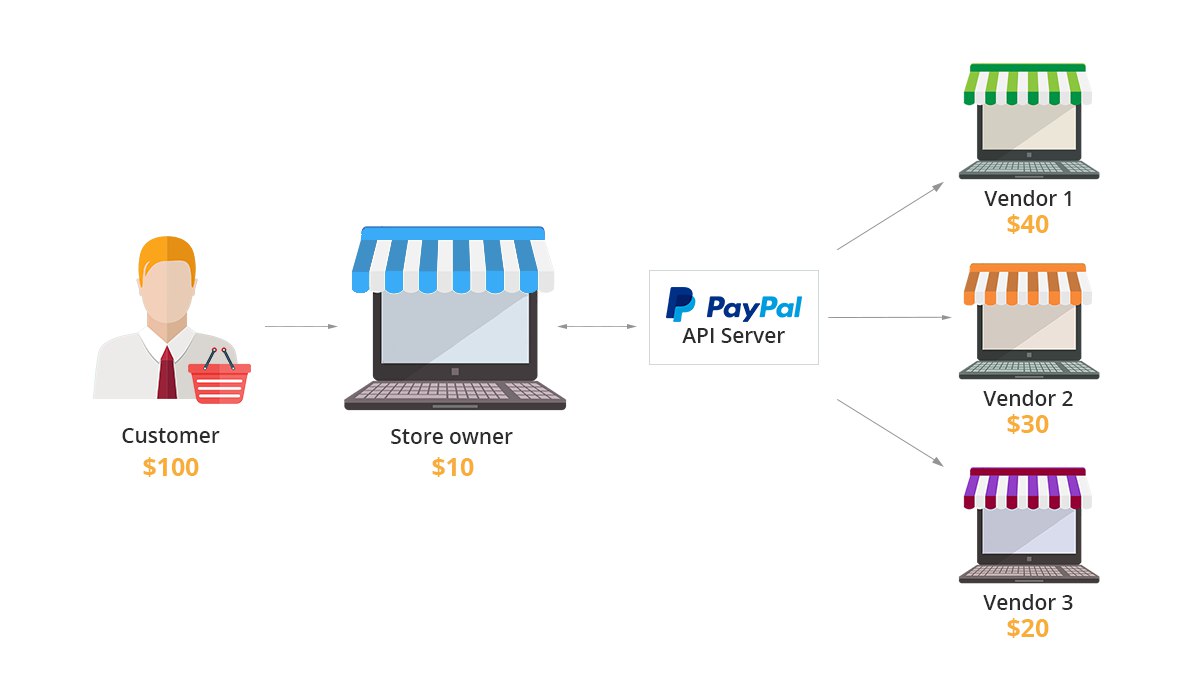
When a customer pays for an order that consists of products from different vendors in one cart, PayPal automatically divides the money between the vendors, leaving the commission on the account of the store owner. After the payment is made, the money is transferred to the account of the store, and then PayPal divides it between the vendors. The add-on automatically calculates the amounts of money that should be transferred to the vendors for their products in the order.
You no longer have to worry about how the money is divided between your vendors; Multi-Vendor and PayPal Adaptive Payments will do it for you. All you need to do is set a commission to be charged from each vendor.
Abilities
- The add-on works with PayPal commissions in two ways:
- Primary receiver - The administrator pays all commissions.
- Each receiver - Each vendor pays the commission for themselves.
- Unlimited number of vendors in one order
- The maximum quantity of vendors processed by PayPal at a time is five (a limitation set by PayPal). This is why our add-on splits an order into several steps if there are more than five vendors in the order. For example, if a customer buys products from 12 vendors in one order, the payment will be automatically split into three steps, so the customer can buy anything they want in one order.
Support
This add-on is developed and published by Simtech Development Ltd., a CS-Cart developer. You are guaranteed a quality add-on supported by the future versions. If you need help, please contact us via our help desk system.
Note
Please note that we are not PayPal developers. If you have any questions about PayPal fees, chained or parallel payments, PayPal terminology, etc, please contact the PayPal support , or refer to the PayPal documentation.
Start selling with PayPal
Details of creating PayPal accounts will be described in this chapter. Also, it will be specified how to get API username, API password and other data required at creating the “PayPal Adaptive” payment method.
Creating a Business account
So, we are on the home page of PayPal.
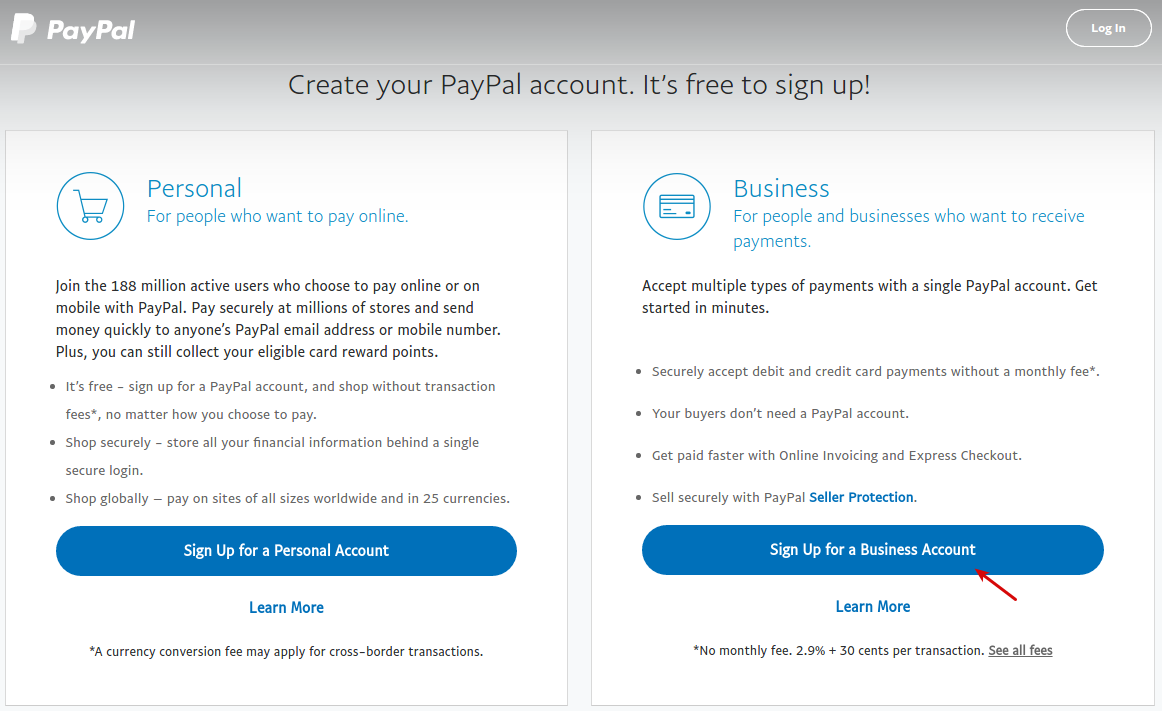
Use the “Sign Up” button to create a new account. You will be redirected to the page on which you will be offered two alternatives of creating an account: “Personal account” and “Business account”. Select “Business account” and click the corresponding button.
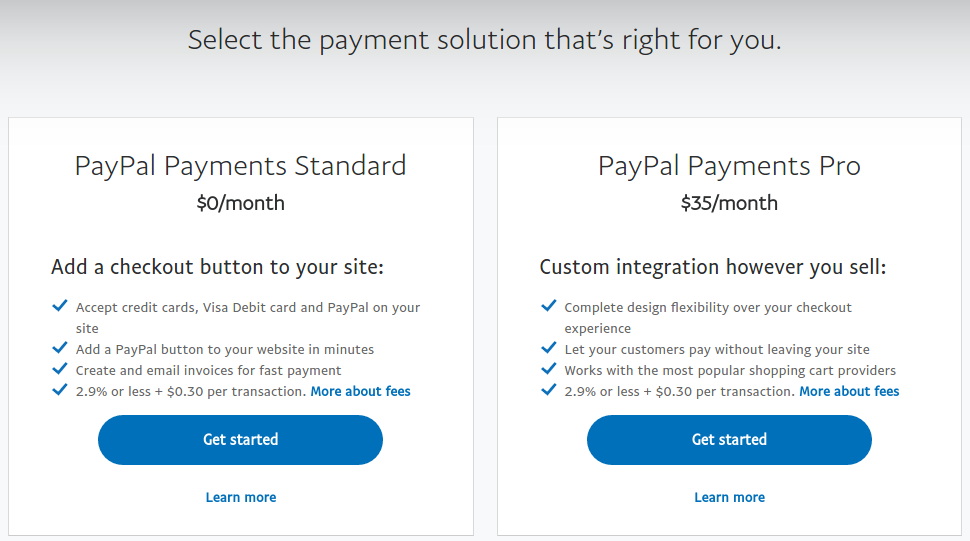
Select the suitable payment plan:
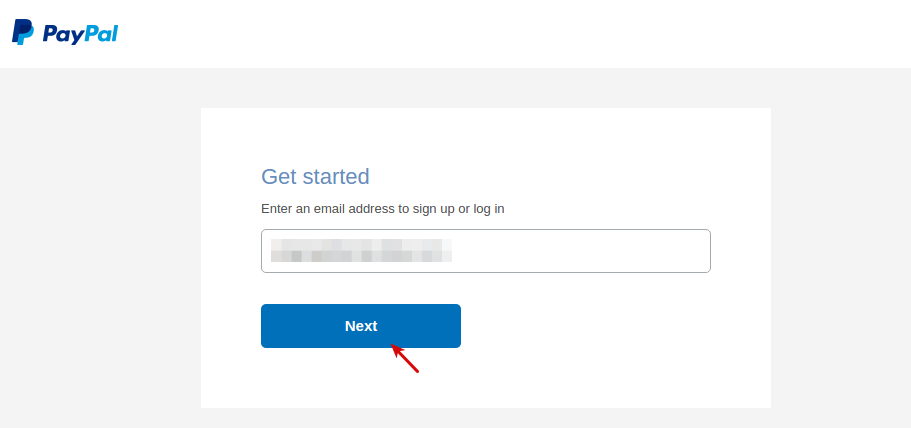
Next, you will be asked to enter your email:
At the first step of the account setup, specify general information.
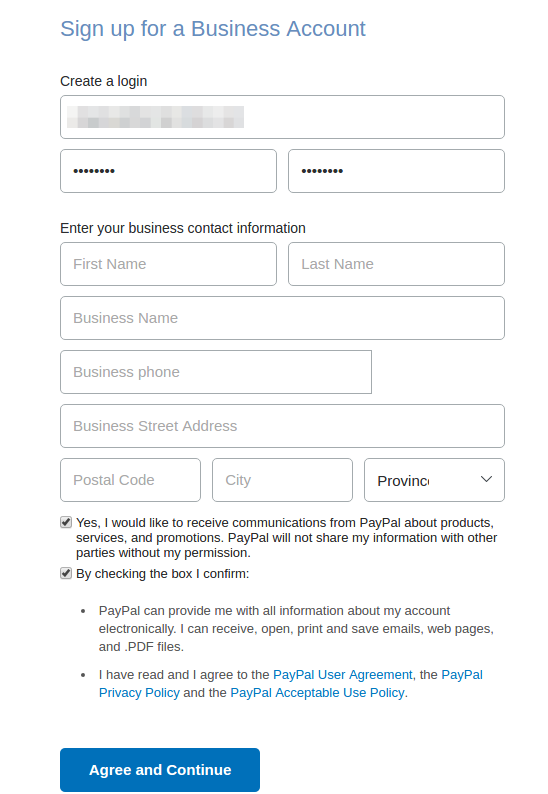
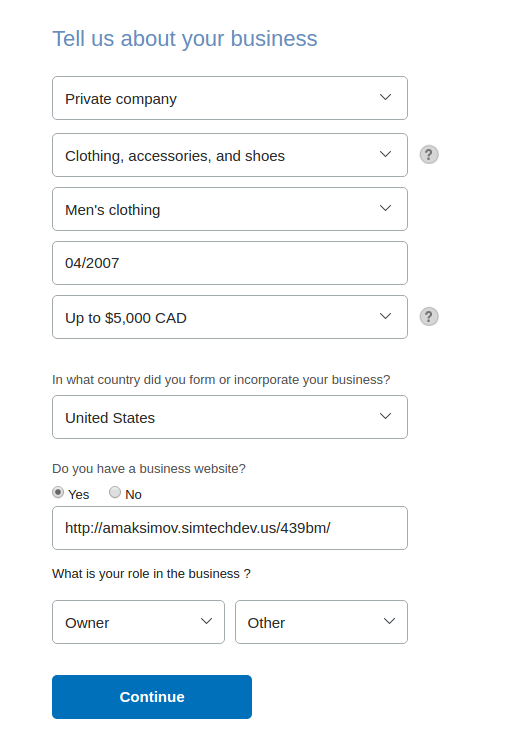
At the second step, you should enter information about your business.
And finally, enter personal information of the account owner.
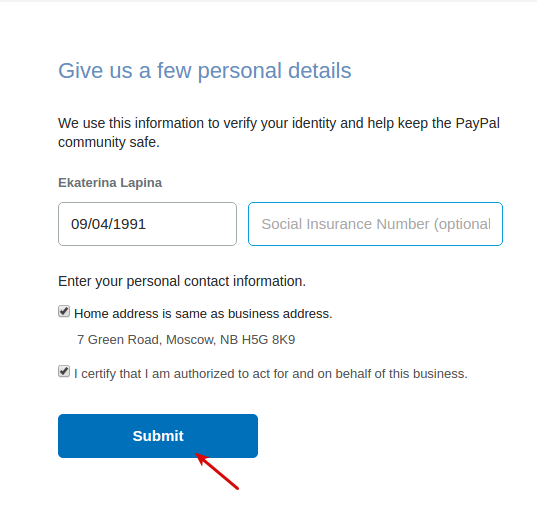
After successful registration you will be redirected to the dashboard. Now you should get the data required for creating the payment method in Multi-Vendor.
Getting API username, API password, and signature
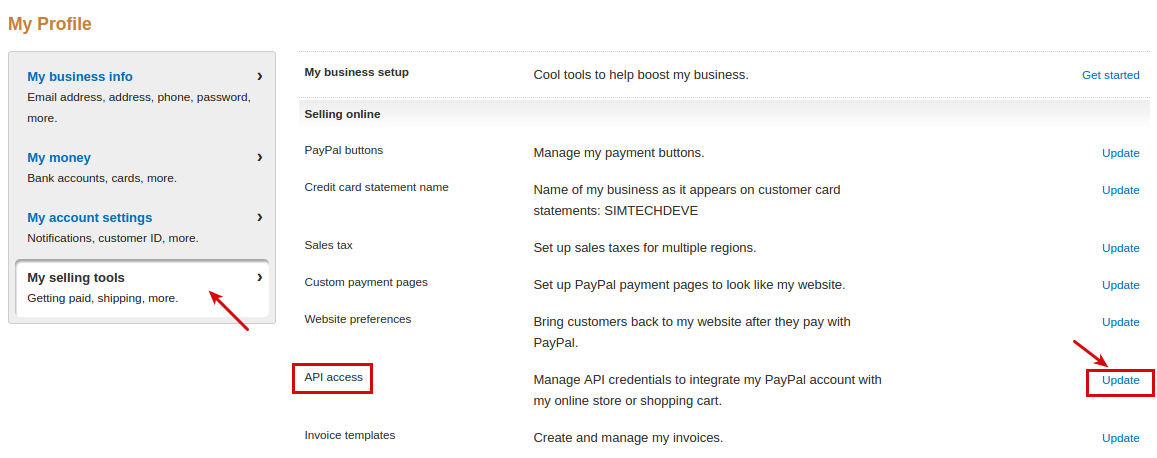
To get API username, password, and signature follow these quick steps:
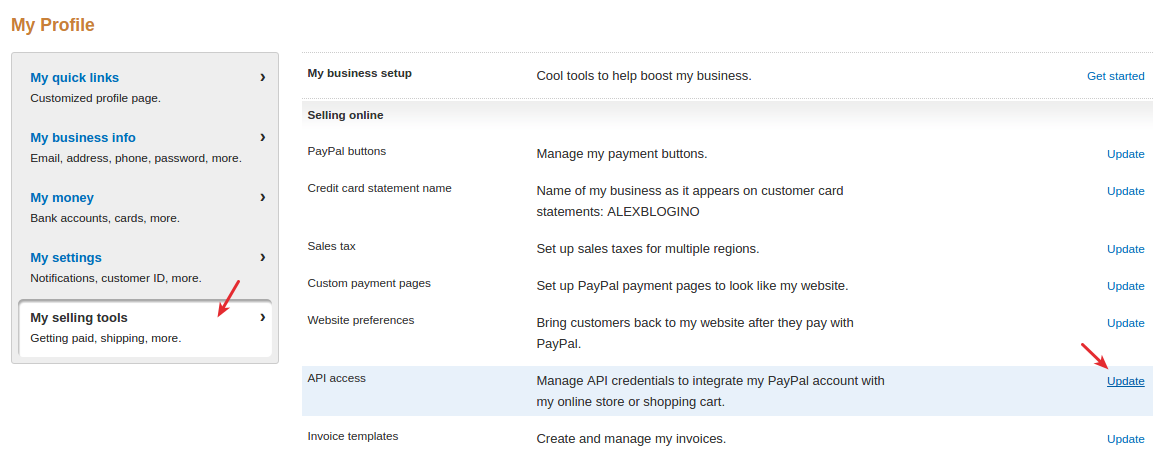
- Under your Profile navigate to Profile and settings.

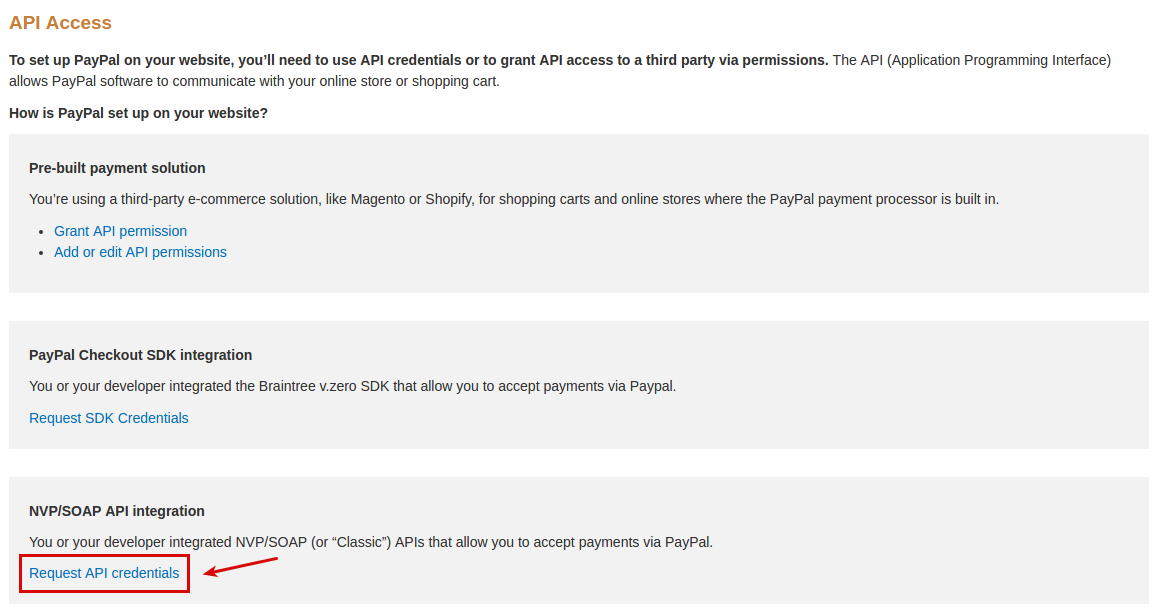
- On the left, select My selling tools. Click Update next to API access.
- On the opened page, click Request API credentials.
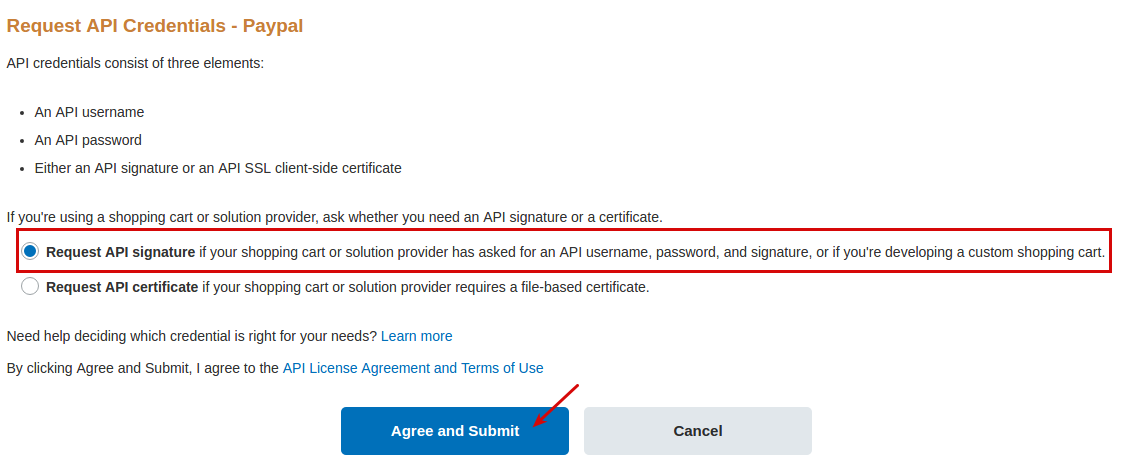
- Select the first option as shown in the screenshot:
- Finally, you should see your API username, API password, and signature by clicking Show.
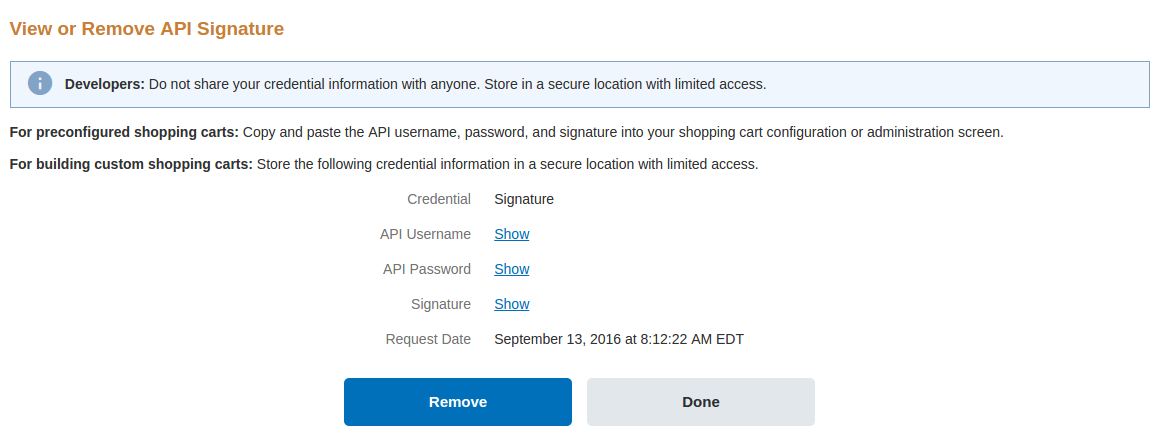
Note
API credentials should be specified in the add-on settings when creating the PayPal Adaptive payment method (see the Creating a payment method section).
Getting Application ID
When using “PayPal Adaptive” in the “Live” mode, it is necessary to specify Application ID in the payment method settings (see the Creating a payment method section).
The process of getting Application ID is described in detail in PayPal official documentation in the “Submitting your application” section.
Alternatively, you can follow the steps described below.
- Log in to the PayPal Developer website using the credentials of the PayPal account registered to the application owner.
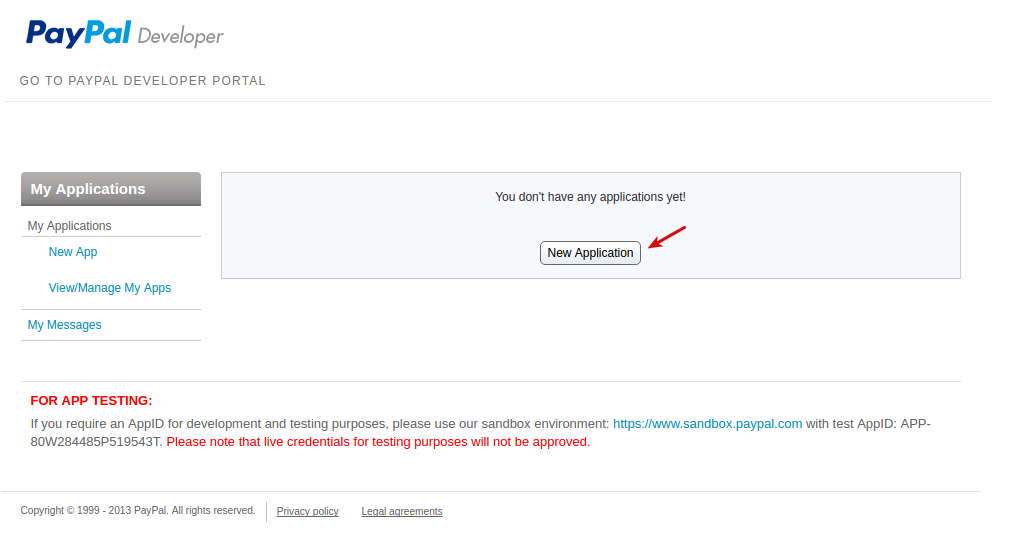
- Go to the My Applications page.
- Navigate to the NVP/SOAP API apps section and click Manage NVP/SOAP API apps.

- On the opened page, click the “New application” button.
- A form will appear that you need to fill in with the required information. In the Title field, enter a name for the application. In the next field, describe the functionality you are going to use.
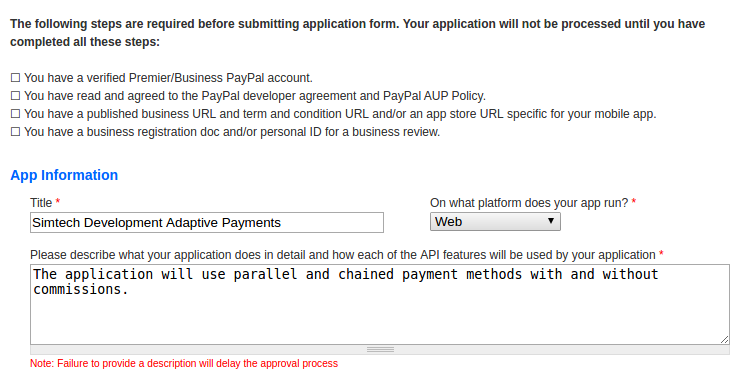
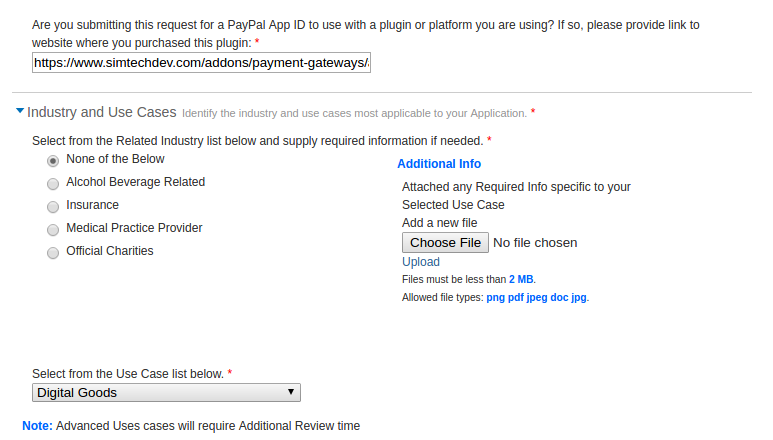
- Provide the link to the Simtech Development Marketplace, where you purchased the add-on: https://www.simtechdev.com/addons/payment-gateways/adaptive-payments-by-paypal.html
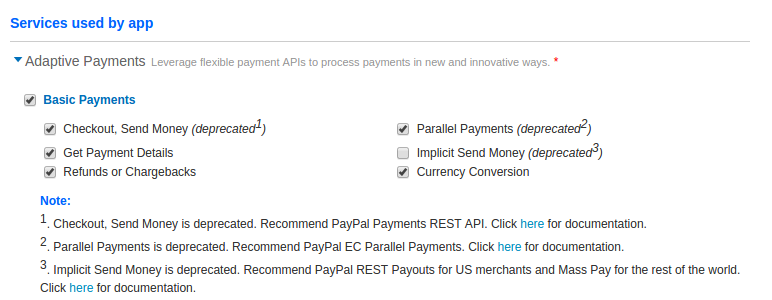
- Proceed to the next step of the form and click Basic Payments. Select all checkboxes except for Implicit Send Money.
- Click Chained Payments and select the Instant option.
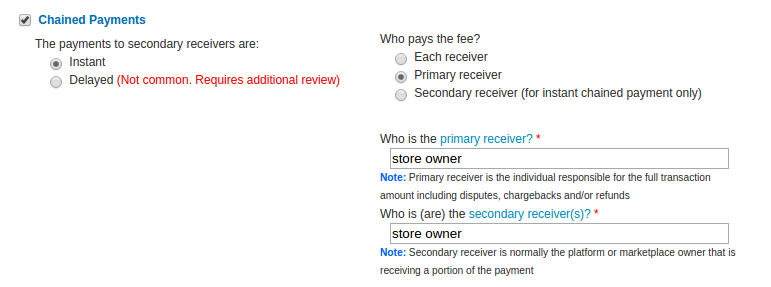
For the Who pays fees? question, you can choose Each Receiver or Primary Receiver. The “Secondary Receiver” option is not supported by the add-on.
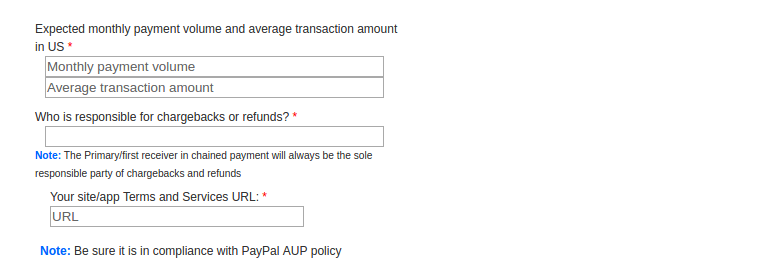
- Give information about expected monthly payment volume and average transaction amount in the US, and the person responsible for chargebacks and refunds.
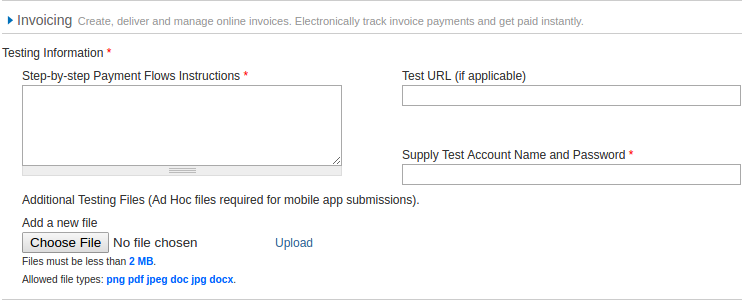
- In the Invoicing section, add Step-by-step Payment Flows Instructions. Screenshots of a test payment are required to do this.
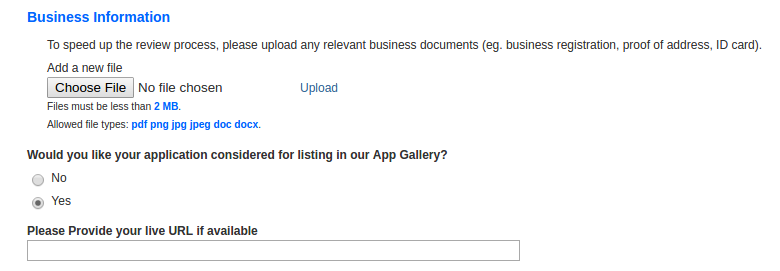
- Provide PayPal with relevant business documents in order to speed up the review process.
- Once all the required information is given, click Submit App.
Note
PayPal recommends to provide detailed and accurate information about your store when completing this form. This will allow to speed up the process of verifying your store by the PayPal specialists and getting Application ID.
Managing in the admin area
Installing the add-on
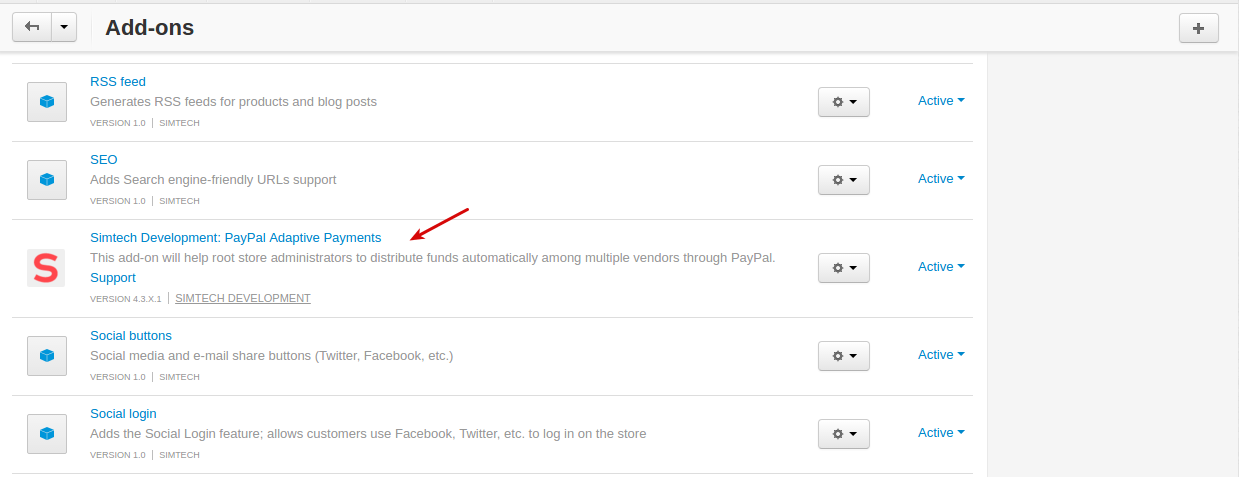
Install the “PayPal Adaptive Payments” add-on on the add-ons list page (“Add-ons” → ”Manage add-ons”). Click the + button in the top right corner, select an archive and click Upload & install. You can now find the installed add-on in the list of installed add-ons, just make sure it is set to Active.
Setting up the add-on
Here are available settings of the “PayPal Adaptive Payments” add-on:
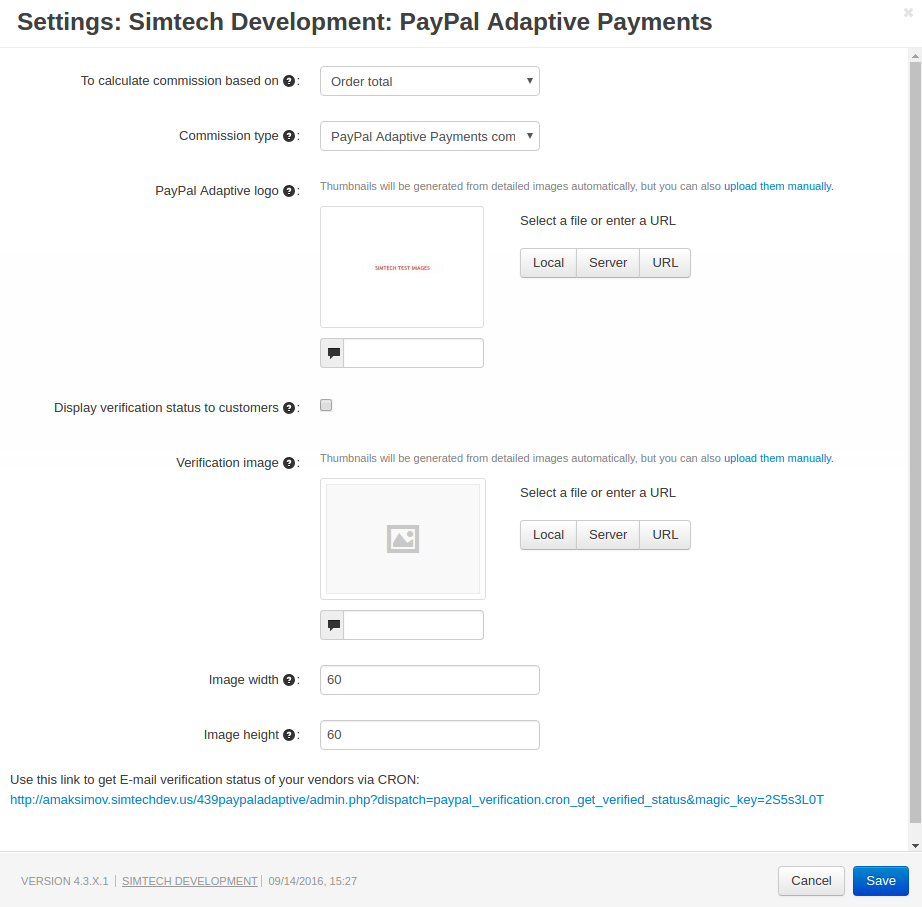
- To calculate commission based on—Indicates the amount based on which the commission is calculated: order total or order subtotal.
- Commission type—The setting allows to select the way commission is charged to the vendor when using the PayPal Adaptive payment method. If Vendors commission is selected, commission will be charged in the amount that is specified in the corresponding field of the vendor. If PayPal Adaptive commission is selected, a separate field will be used to avoid confusion with standard commissions. It will be used only for the PayPal Adaptive payment method. If the ‘Vendor commission’ add-on is not installed/disabled, ‘PayPal Adaptive Payments commission’ will be used.
- PayPal Adaptive logo—Use a valid graphics format, such as .gif, .jpg, or .png. Limit the image to 190 pixels wide by 60 pixels high. PayPal crops images that are larger. PayPal places your logo image at the top of the cart review area.
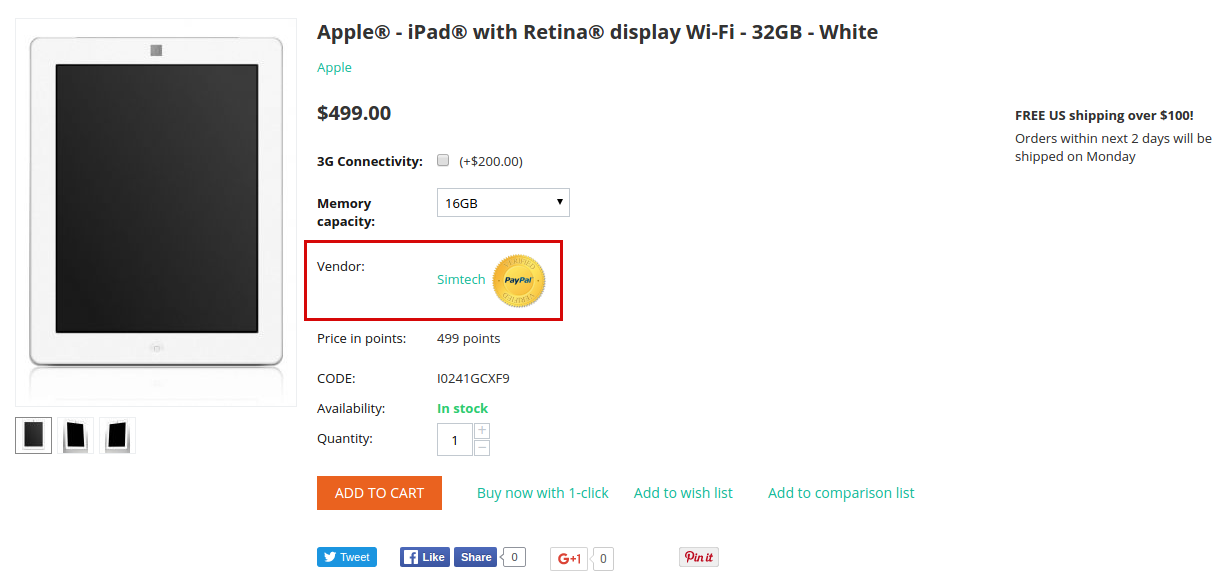
- Display verification status to customers—The setting allows to display the verification status at the product details page on the storefront. If the vendor email is not verified, the status will not be shown to the customers.
- Verification image—The setting allows to display a verification image instead of the text status at the product details page on the storefront. If an image is not uploaded, the status will be shown as text.
- Image width—The width of the verification image.
- Image height—The height of the verification image.
Creating a payment method
A payment method is created on the payment methods list page (“Administration” → “Payment methods”).
Please use this button

to create a new payment method.
To use the “PayPal Adaptive” payment gateway, it is necessary to select the appropriate value in the “Processor” field in the General tab.
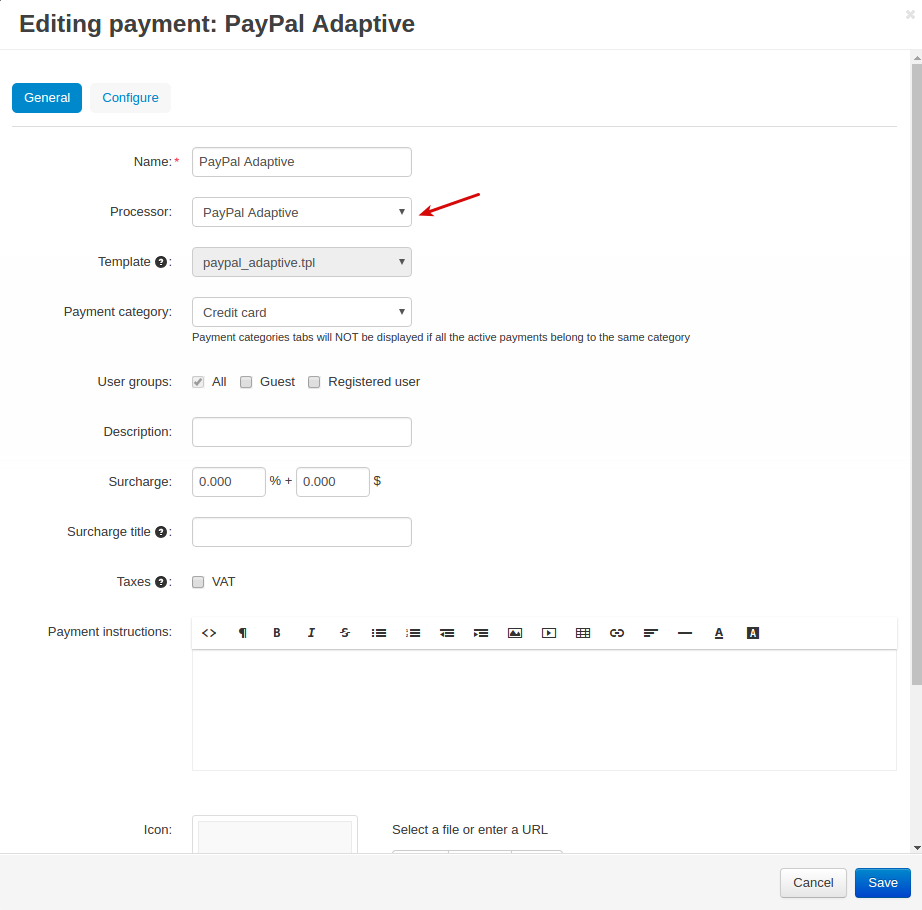
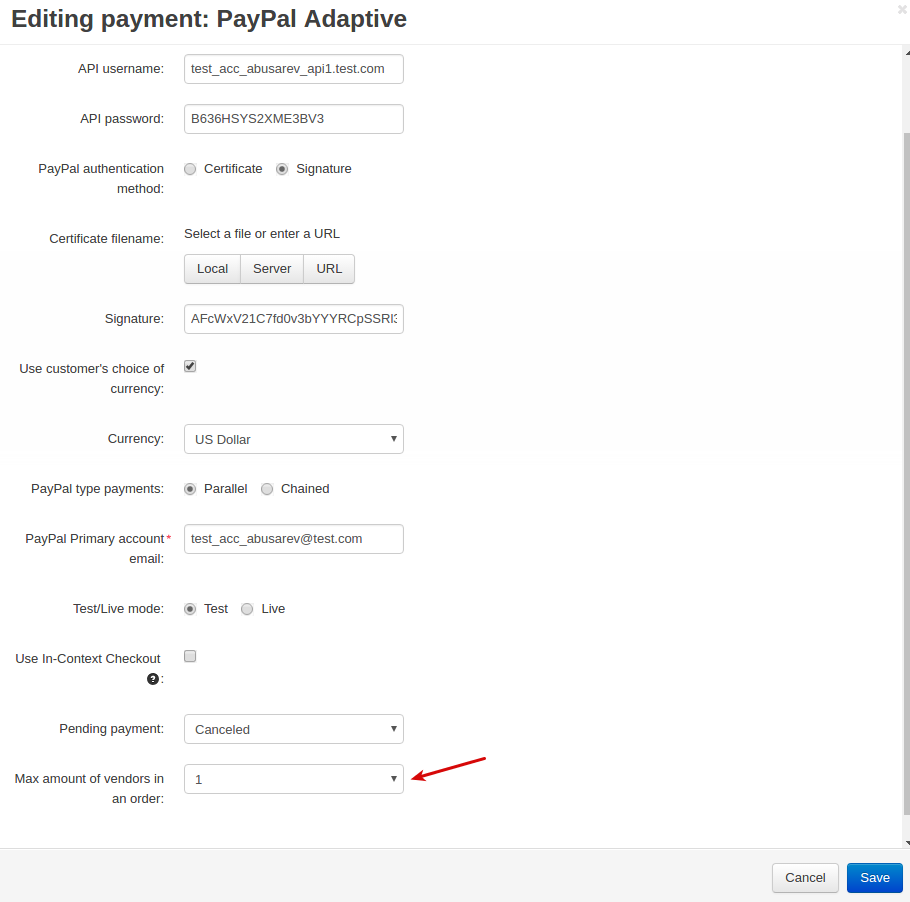
In the Configure tab, the store administrator should enter the data of their payment account: API username, API password, Signature, and Application ID. To get these credentials, have a look at the Getting API username, API password, and signature and Getting Application ID sections.
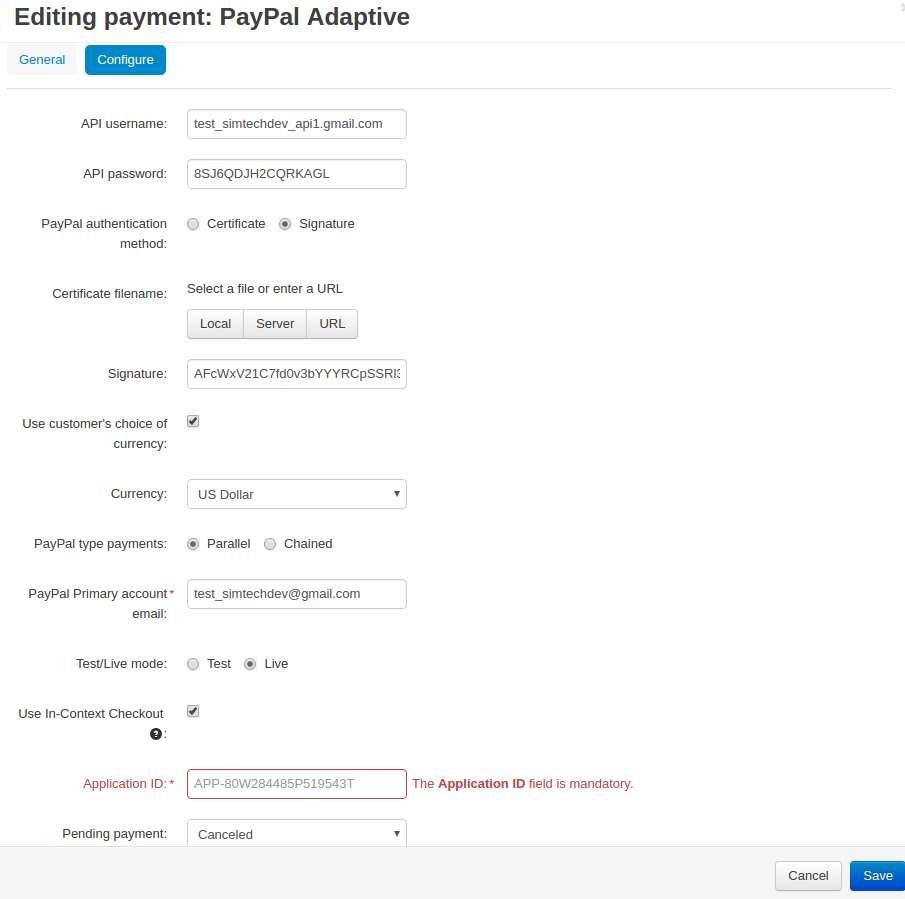
- Use customer’s choice of currency—If you have set up to accept payments in US Dollars in PayPal, but the customer pays in Euro, the payment amount will be automatically converted. If this checkbox is not selected, the payment method will decline the payment and ask to pay in the currency specified in the settings.
- Use In-Context Checkout—If this checkbox is selected, the customer will not be redirected to the PayPal site, but a new small window will be opened, where the customer should enter all the necessary information. Note that it doesn’t work in the Safari browser and on iOS devices.

- Max amount of vendors in an order—The number of vendors in one transaction. Example: if you select ‘1’ for this field, it will mean that there can be no more than 1 vendor in one transaction. That is why, if there are products of more than 1 vendor in the customer’s cart, the whole cart will be split into several cases by vendors and the whole order will be paid in several steps.
Settings for vendors
The add-on adds the following fields to the vendor details page in the admin area (Vendors - Vendors):
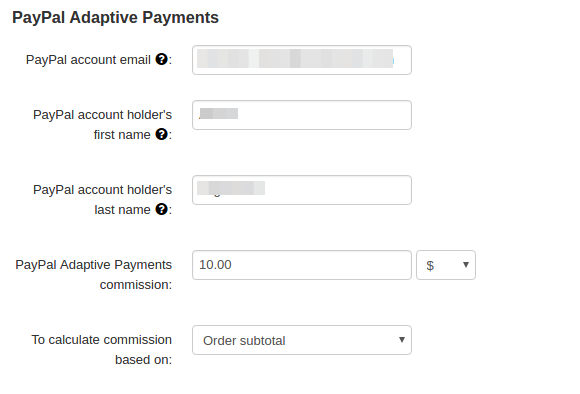
The first three settings are used to verify that a vendor is indeed the holder of the PayPal account information that was supplied.
- PayPal account email—The entered email should match the email registered in the PayPal Business account. If this field is empty, the main vendor’s email address will be used to identify the vendor when an order is being paid. Both the store administrator and the vendor can edit this field.
- PayPal account holder’s first name—The vendor’s first name specified in the PayPal Business account (may not match the first name in the vendor profile in the admin panel).
- PayPal account holder’s last name—The vendor’s first name specified in the PayPal Business account (may not match the last name in the vendor profile in the admin panel).
- PayPal Adaptive Payments commission—The administrator can specify the commission to be given directly to the store administrator when a transaction is being made.
- To calculate commission based on—Indicates the amount based on which the commission is calculated: order total or order subtotal.
Processing refunds
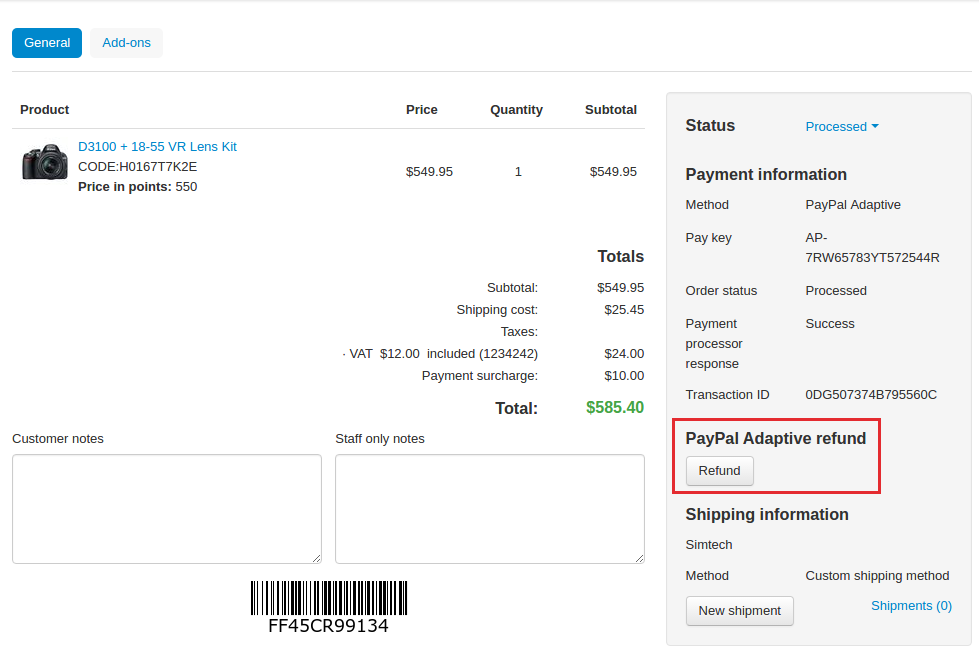
The PayPal Adaptive Payments add-on lets you issue refunds right from the admin panel.
To do this, first go to Orders - View orders and open an order you want to issue a refund for.
Then click the Refund button on the right.
You will see a Refund pop-up window.
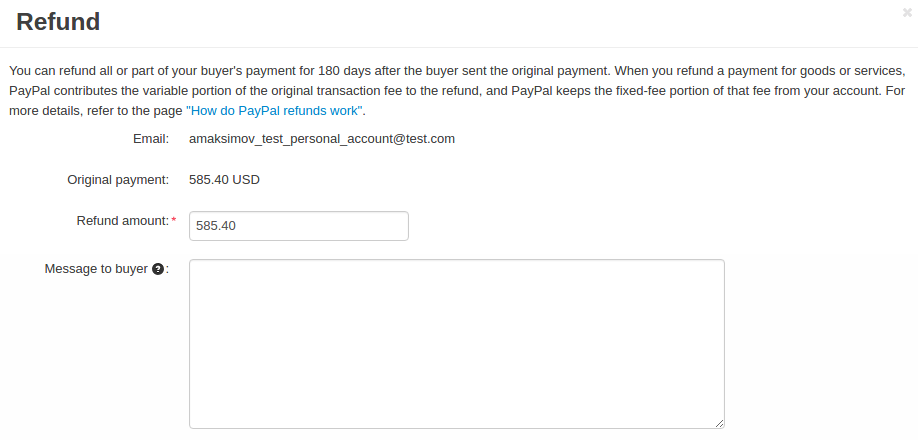
You can edit the refund amount. You can also enter information in the Message to buyer text box to let the buyer know why you are sending the refund. This message has a limit of 255 characters.
Note
To make a refund, vendors should be granted third-party access. For more details, see the Granting third-party access section.
Granting third-party access
Vendors need to set up third-party access in their PayPal account to make refunds. To do that, they should complete these steps:
- Under PayPal account, open My selling tools and click Update next to API access.
- Click Add or edit API permissions.

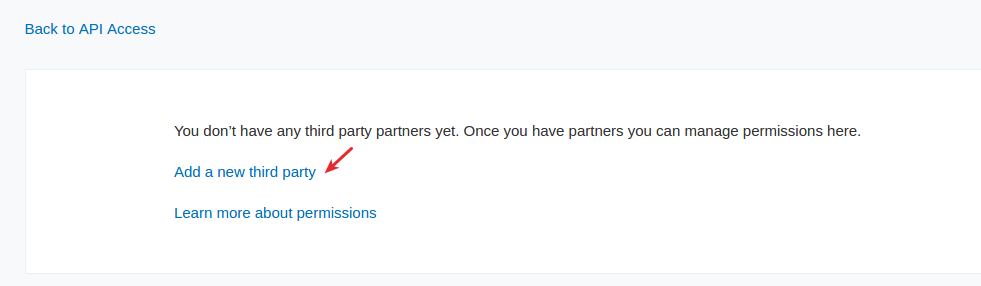
- Click Add a new third party.
- In the Third Party Permission Username field, enter the admin’s API username. Click Lookup.
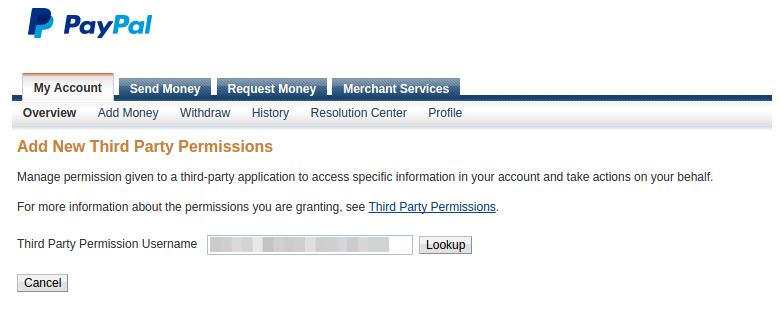
Tip
To know how to get the API username, see the Getting API username, API password, and signature section.
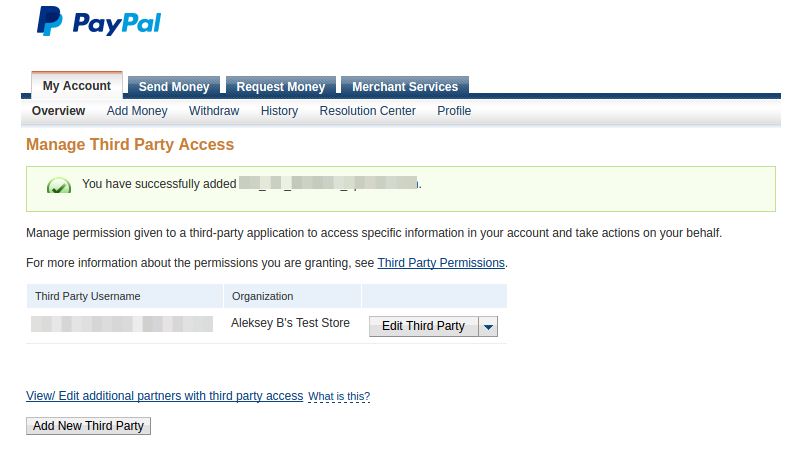
- Select permissions as shown in the screenshot and click Add.
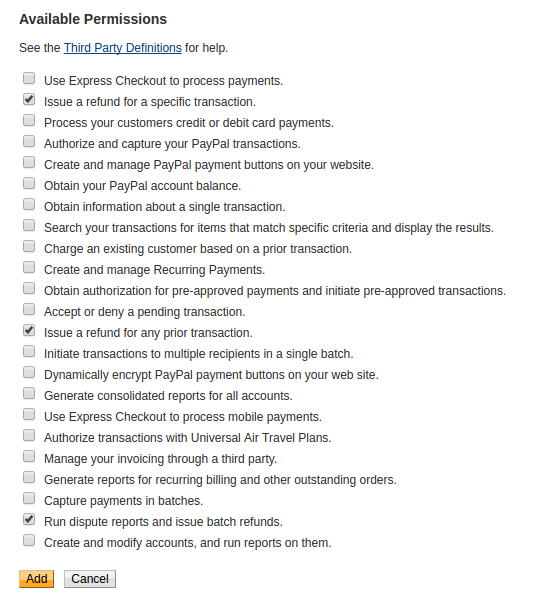
- PayPal should display a notification saying that the third party has been added successfully.
Done! Now your vendors can issue refunds to customers.
What the customer will see
As specified in the Overview section, all the details of distributing money stay behind the scenes and are not available to the user. Nonetheless, the specific character of operation of the “PayPal Adaptive” payment gateway requires making some changes to the order payment process.
These changes are related to the fact that “PayPal Adaptive” imposes restrictions on the number of vendors in one transaction. The maximum number of vendors in an order can be set in the payment method settings (Administration - Payment methods - PayPal Adaptive)
Example: if you select ‘1’ for this field, it will mean that there can be no more than 1 vendor in one transaction. That is why, if there are products of more than 1 vendor in the customer’s cart, the whole cart will be split into several cases by vendors and the whole order will be paid in several steps.

After successful payment of the first case with products the customer will be suggested to pay the rest products.
This peculiarity of payment using the “PayPal Adaptive” payment gateway is the only difference from other payment gateways.
Try it
Access to the test store
You can try the PayPal Adaptive payment gateway in our demo store.
Setting up the payment method
Use the following data to set up the payment method:
API username test_simtechdev_api1.gmail.com API Password 8SJ6QDJH2CQRKAGL PayPal authentication method Signature Signature AFcWxV21C7fd0v3bYYYRCpSSRl31A5s7v3ZB7rGKXiVeN4SY3tq8aLW0
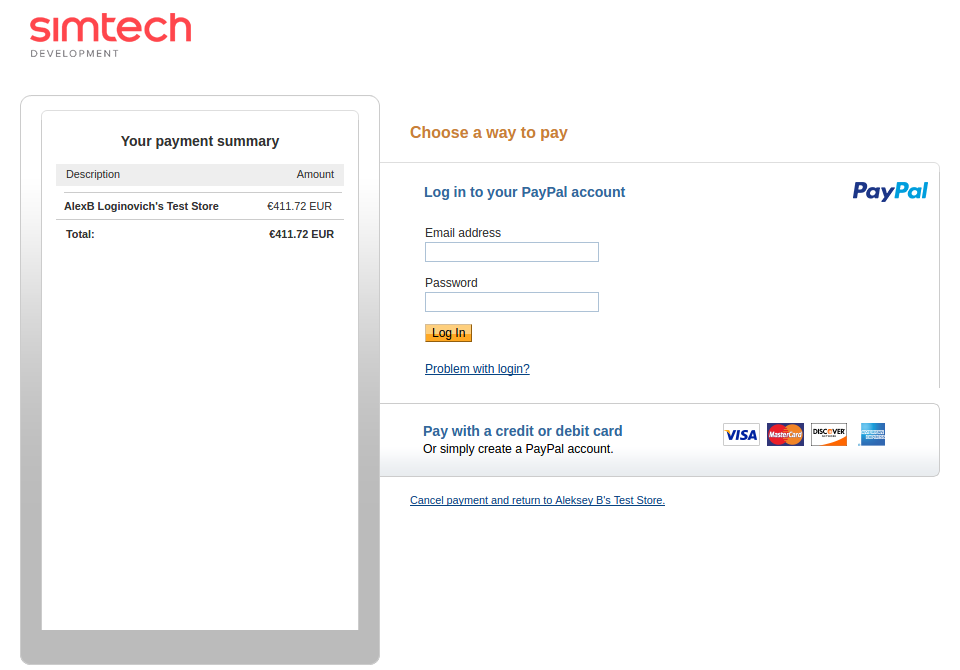
Customer data for order payment
The payment process is performed on the PayPal site. To complete the payment, the customer needs to log in on PayPal. Please use the test data to complete the payment in the demo store.
Email address test_simtechdev_vendor1@gmail.com Password test_simtechdev Email address test_simtechdev_vendor2@gmail.com Password test_simtechdev Email address test_simtechdev_vendor@gmail.com Password test_simtechdev