
Amazon Synchronization
Important
The following integration supports the registered in the Amazon Marketplace Web Service clients only. Selling Partner-API profiles support is temporarily unavailable.
Overview
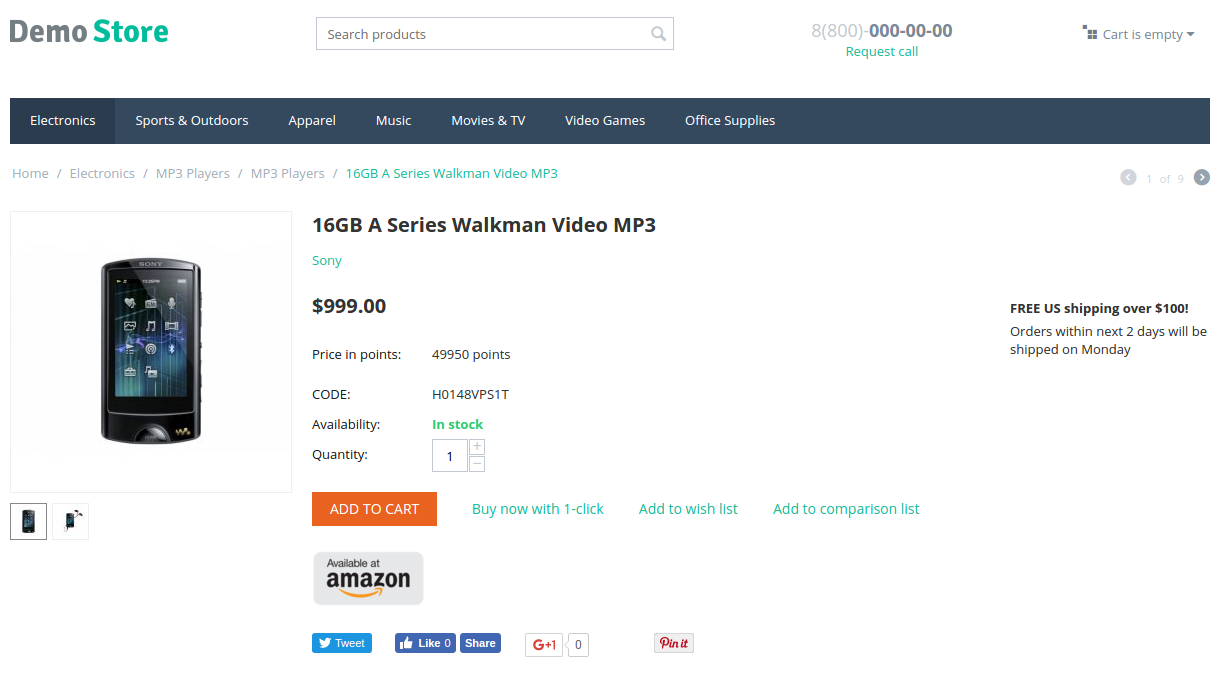
The Amazon Synchronization add-on lets you synchronize products and orders in your CS-Cart store and Amazon.com in minutes. Product names, in-stock quantity and prices, as well as order information, users will be synchronized. The Available at Amazon button will appear on the product page.
If you do not have an Amazon seller account yet, sign up for it. Check out the pricing.
Important
The add-on comes with installation and configuration of the default settings of the add-on. We can also provide you with the custom development service on a paid basis if any modification is required. Contact us for a free quote for the Amazon integration service.
Note
The add-on synchronizes CS-Cart product-related data with Amazon.com: product name, product quantity, and product price. It does not import or export products.
Here’s a video showing how it works:
Key features
- Automatic products synchronization between CS-Cart and Amazon.com.
- Ability to import Amazon orders.
- Bulk synchronization of products.
- detailed reports on the previously synchronized products.
- Availability for: USA, UK, Germany, and Japan.
- Quick editing of SKU and UPC/EAN barcodes via export.
- Synchronization of product names, prices, and inventory.
- Automated currency conversion.
- Multiple values support (ASIN, EAN, UPC, ISBN).
- Amazon icon on synchronized products at the storefront.
Compatibility
The add-on is compatible with CS-Cart Ultimate and Multi-Vendor 4.5 and above, but only versions 4.11.x, 4.12.x and 4.13.x are supported.
Don’t know what archive to download to install the add-on? Read here.
Support
The add-on is developed and published by Simtech Development Ltd., a CS-Cart developer. You are guaranteed the ability to buy quality add-ons to support future versions. If you need help, please contact us via our help desk system.
Managing in the admin area
Installing the add-on
Install the Amazon Synchronization add-on on the add-ons list page (Add-ons → Manage add-ons). Click the + button in the top right corner, select an archive and click Upload & install. You can now find the installed add-on in the list of installed add-ons, just make sure it is set to Active.
Setting up the add-on
- Click on the add-on to open its settings.
- In the General tab, you will see commands that you can use to run a cron script according to a schedule. These commands will sync all the products and automatically import Amazon orders. path/to/cart is the path to your website and CRON_KEY is the access key specified in the Cron key field below.
Note
A cron script should be set up on your server. If you have any difficulties with it, please contact your server administrator or contact us for help.
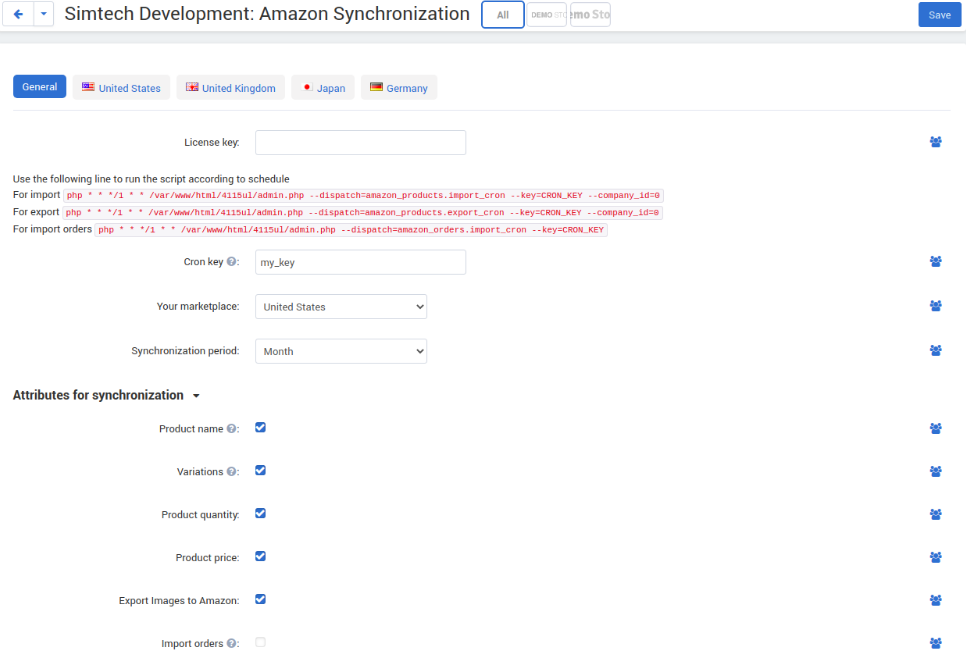
Cron key—Specify a cron key and replace CRON_KEY from the cron line with it.
Your marketplace—Select the region of your business. Available options are: UK, USA, Germany, Japan.
Synchronization period—Select the period of synchronization with Amazon. If you have more than 100 orders per month, choose Week of Day.
- Select the attibutes you want to synchronize: product name, quantity, price.
- Select the Import orders checkbox if you want to import orders from the Amazon store. If you want to skip order import, move to step 6.
- Configure the settings for the order import:
Note
The orders are imported via the LIstOrders API. Fore more details, refer to: ListOrders API.
Default shipping—Select the shipping method that will be used by default for orders imported from Amazon.
Unshipped status—Select the order status that matches the Unshipped status on Amazon. (Payment has been authorized and order is ready for shipment, but no items in the order have been shipped.)
Shipped status—Select the order status that matches the Shipped status on Amazon. (All items in the order have been shipped.)
Canceled status—Select the order status that matches the Canceled status on Amazon. (The order was canceled.)
Import users—Select the checkbox if you want to import users from Amazon to CS-Cart store. The users will be matched by email address. The user first name, shipping address and billing address will be imported. If you clear the checkbox, the user will be displayed as a guest in the order.
Default category—Select the category that should be assigned to products by default if the order contains products from Amazon that are unavailable in your CS-Cart store.
- Switch to the tab that corresponds to the region of your business. Here, select the Active box and enter the account details from your Amazon Merchant Account.
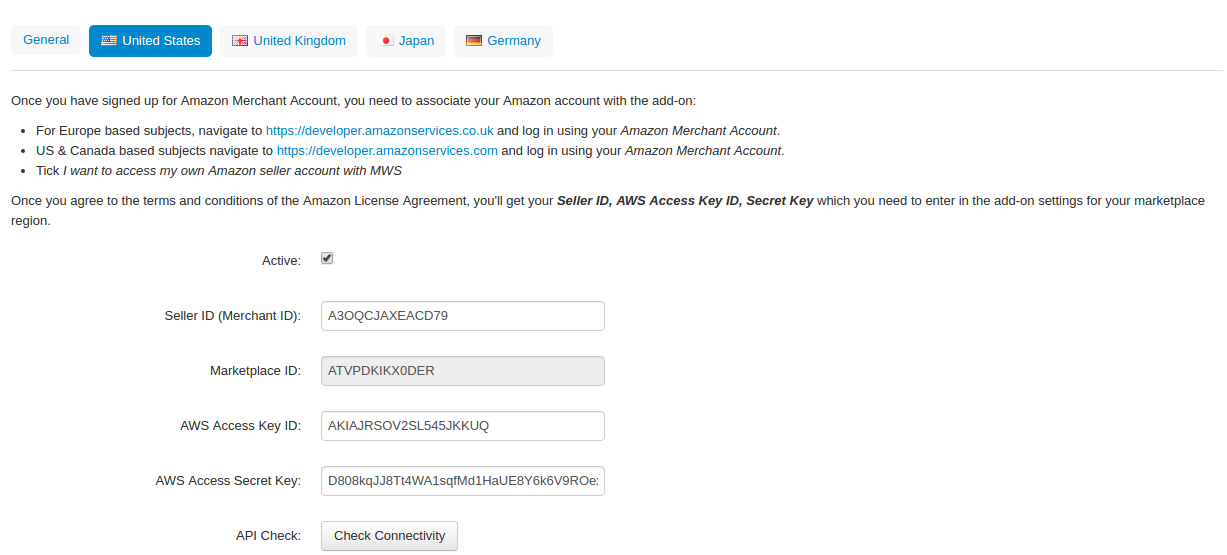
- Once you specify all the account details, click Check connectivity to make sure everything’s correct.
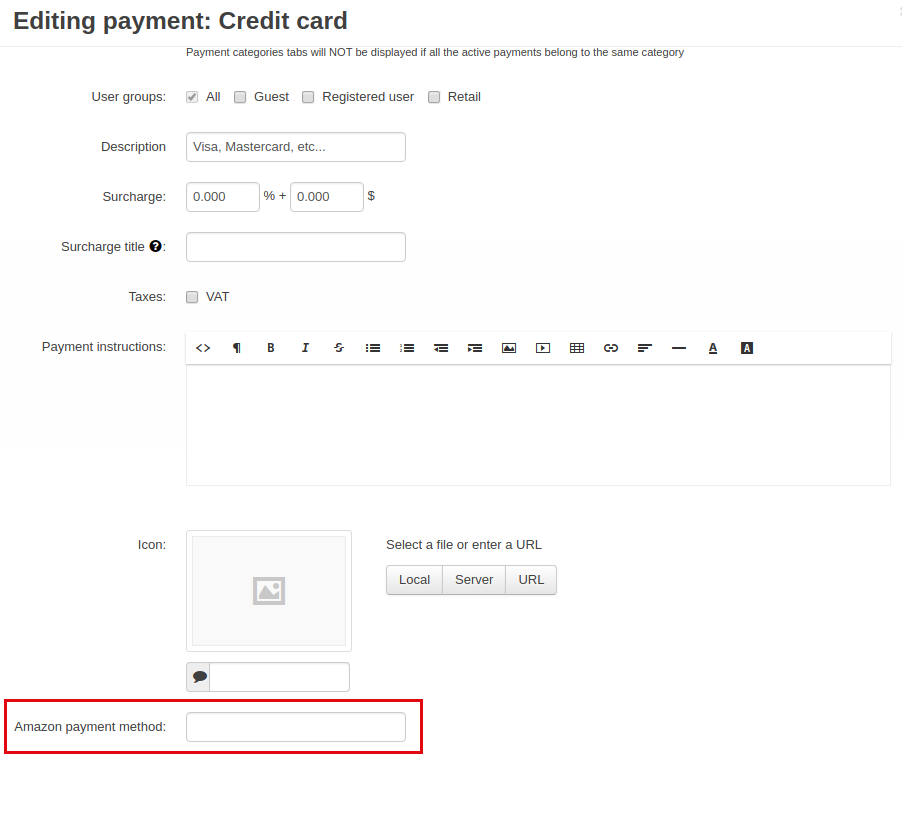
- One more thing you will need to do to make order import go smoothly is to match payment methods in your Amazon and CS-Cart stores. To do so, go to Administration > Payment methods. Open a payment method and define the Amazon payment method. Click Save.
Important
If you do not match payment methods, orders will NOT be imported.
Importing products
Importing/exporting a single product
- Go to Products > Products.
- Open a desired product.
- Switch to the Amazon tab. You will see available settings for importing/exporting a product, which are divided into General and Advanced.
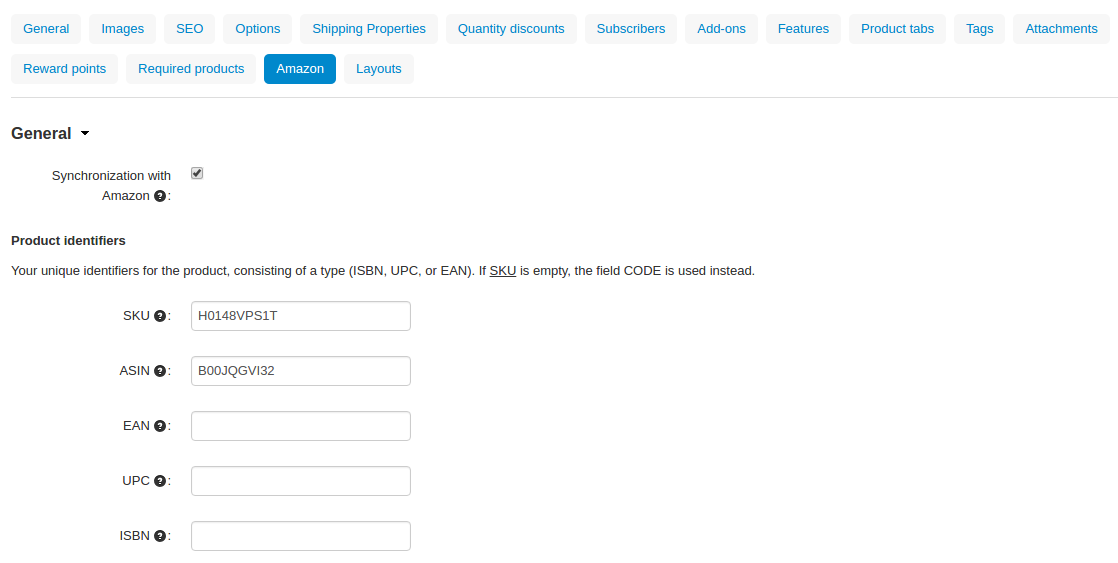
- Synchronization with Amazon—The checkbox is selected for the products synchronized with Amazon.
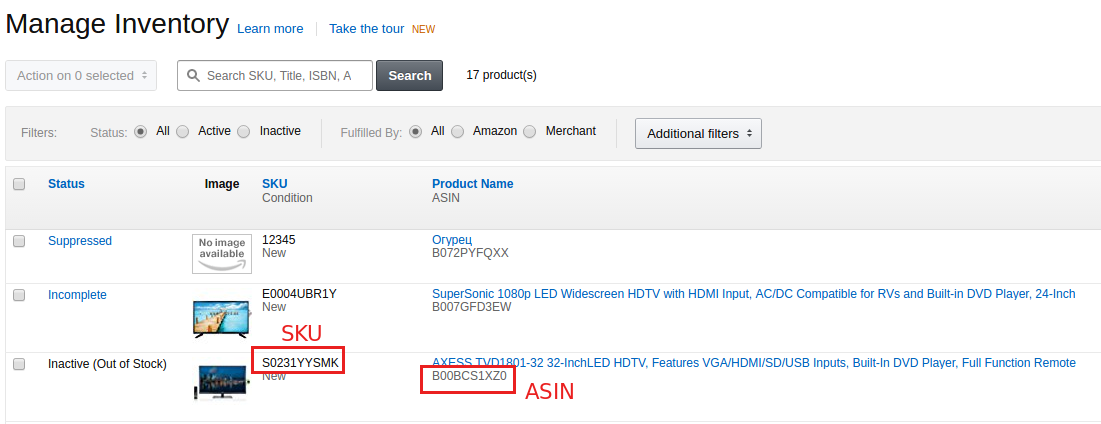
- SKU—(Stock keeping unit) Product id code. Each product must have an SKU, and each SKU must be unique. If SKU is empty, the product CODE is used instead.
- ASIN—(Amazon Standard Identification Number) 10-character alphanumeric unique identifier assigned by Amazon.com. It’s optional.
- EAN—(European Article Number) This type of bar code is specific to Europe and Japan, but is widely used internationally. It is a superset of the UPC code: all products marked with an EAN will be accepted in North America.
- UPC—(Universal Product Code) This type of bar code is widely used in the United States, the United Kingdom, Canada, Australia and in other countries.
- ISBN—(International Standard Book Number) 13-digit number that uniquely identifies books and book-like products published internationally.
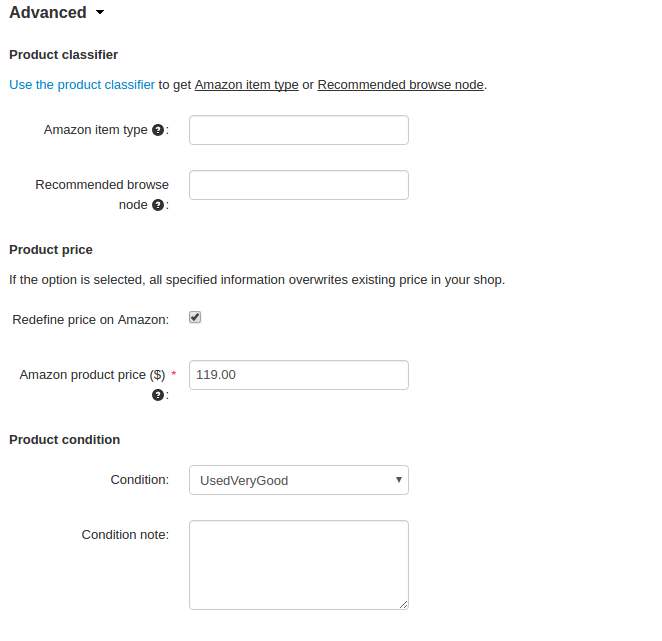
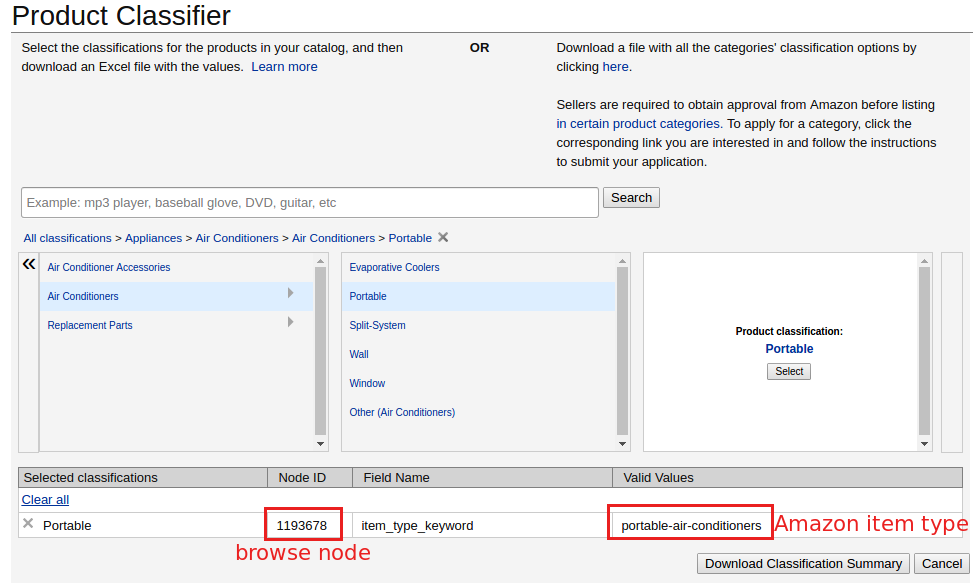
- Amazon item type—Pre-defined value that specifies where the product should appear within the Amazon browse structure.
- Recommended browse node—Value used to classify an item. Mandatory for Canada, Europe, and Japan; not used in the US. Use a comma to separate nodes.
Use the product classifier to get these values.
- Redefine price on Amazon—If selected, the price set in the CS-Cart store will be overwritten.
- Amazon product price ($)—Price of a product on Amazon. This value will overwrite the price in the CS-Cart store.
- Product condition—The condition of the product. Select the necessary one from the list.
- Once you specify the necessary settings, click Save.
- In the top right corner, click the gear button and select Export to Amazon or Import from Amazon.
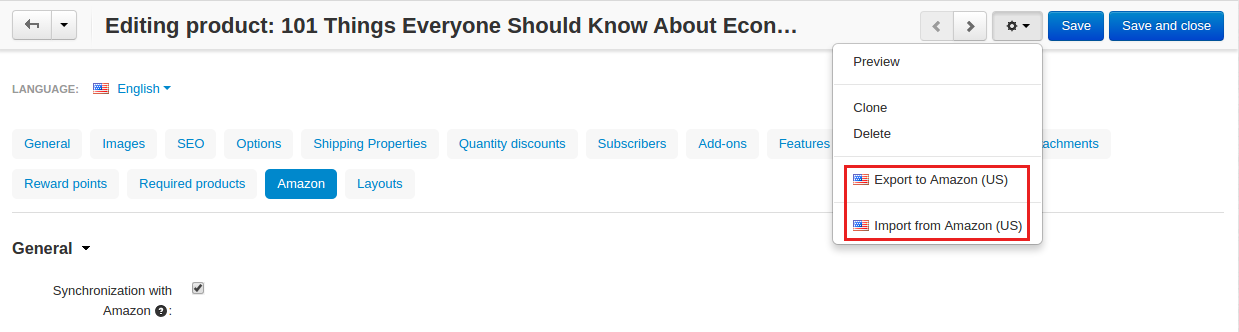
The process will start.
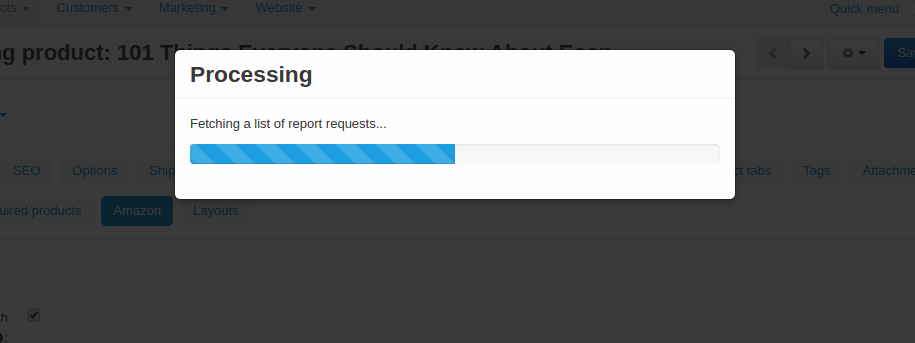
Once the process is complete, you will see a brief report.
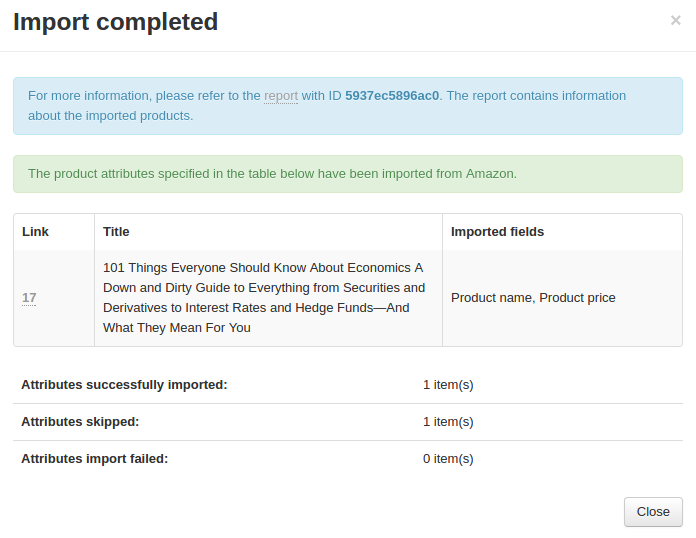
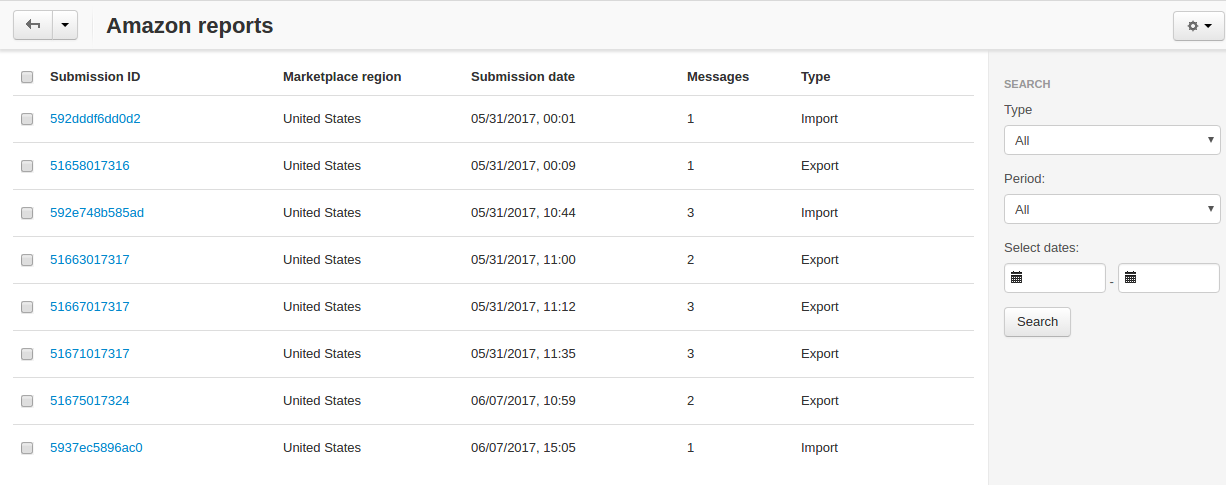
To view a detailed report, click on the report link. It will bring you to the Amazon reports page.
Importing/exporting multiple products
- Go to Products > Products.
- Decide which of the products you want to export and prepare them for import/export. See the explained settings above.
Instead of configuring each product separately, you can select the necessary products, click Edit selected under the gear button.
Then, select the checkboxes assosiated with Amazon.
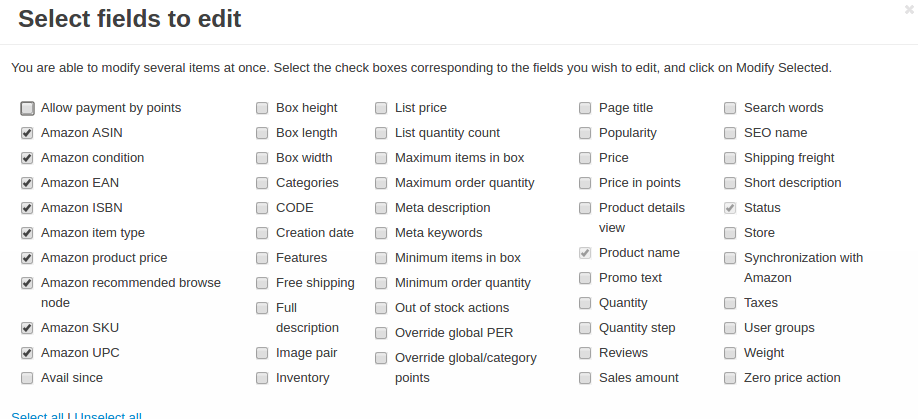
On the opened page, enter the necessary values and click Save.
- Go back to the products list page, click the gear button in the top right and select Export from Amazon or Import to Amazon.
The process will start.
Once the process is complete, you will see a brief report.
To view a detailed report, click on the report link. It will bring you to the Amazon reports page.
Importing orders
To import orders from your Amazon store to your CS-Cart one, follow these steps:
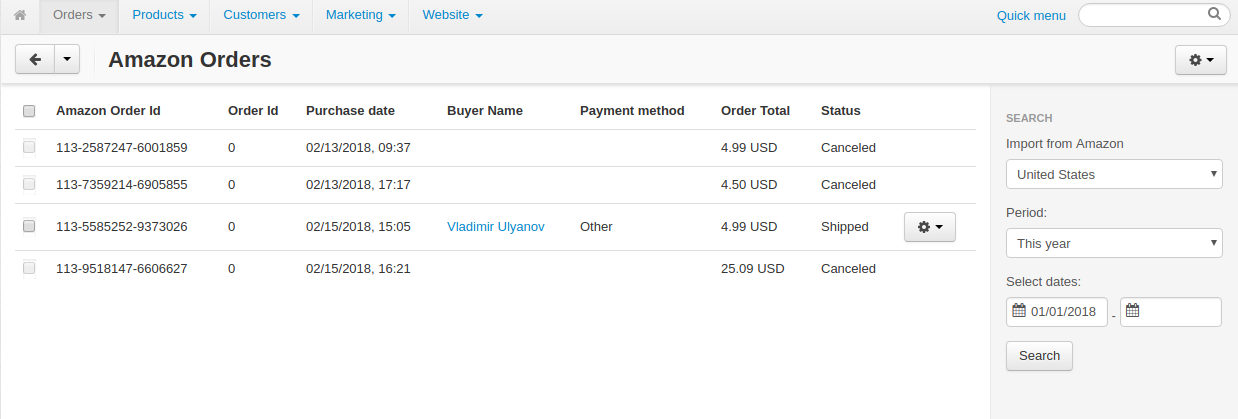
- Go to Orders > View Amazon orders.
- Select the store location, period and dates for orders you want to see. Click Search.
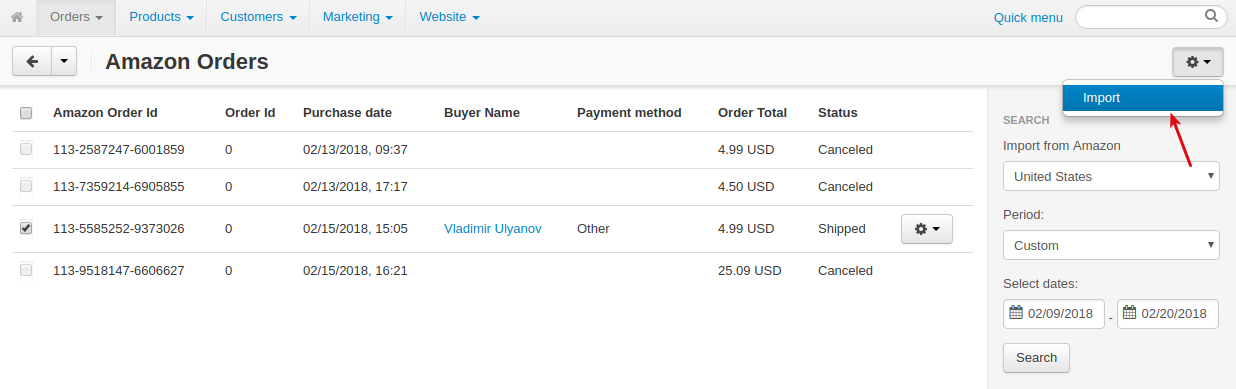
- Select the orders you want to import to your store and under the gear button select Import.

Alternatively, you can select multiple orders and select Import from the top right corner under the gear button:
Note
You can import orders with Shipped and Unshipped statuses only. Also, make sure you have matched the payment methods. For details, see Setting up the add-on.
- Once you import orders, you will see a corresponding notification:
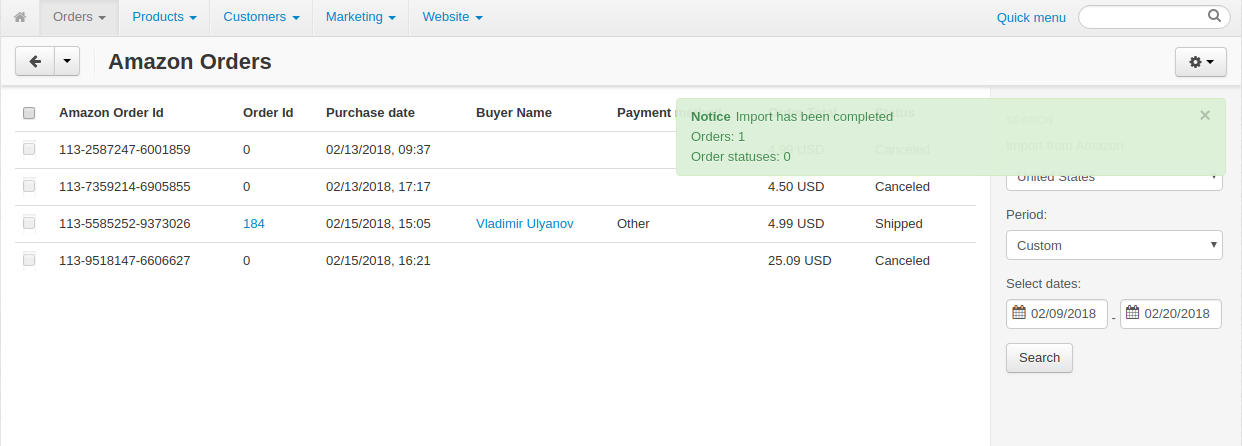
- That’s it. Imported orders will aquire order IDs. Clicking on the order ID will take you to the order editing page.
On the list of orders, orders imported from Amazon will have the Amazon Order checkbox selected.
