Pay by Link
Overview
With the Pay by Link add-on, you can easily create payment links and deliver them directly to your customers’ inbox. All you need is to create an order, copy the order’s link in your admin panel, and send it automatically with an invitation letter containing a link to view and pay the order. The Pay by Link add-on provides you with new abilities:
- create payment links for orders;
- send a customer an invitation to view the order details;
- send a customer an invitation to pay the order (for some payment methods);
- avoid customer’s mistakes in orders;
- improve cash-flow by giving your customer a quick way to pay;
- enhance customer experience with a ‘pay the order’ or’view the order’ button in emails.
To learn how to use the new functionality, follow the quick and easy steps below.
Compatibility
The add-on is compatible with CS-Cart and Multi-Vendor 4.2. and above, but only versions 4.11.x, 4.12.x and 4.13.x are supported.
Don’t know what archive to download to install the add-on? Read here.
Support
This add-on is developed and published by Simtech Development Ltd., a CS-Cart developer. You are guaranteed a quality add-on supported by future versions. If you need help, please contact us via our help desk system.
Demo
Check out the Pay by Link add-on in our demo store.
Note
Every half an hour the demo store is reset to the default state.
Managing in the admin panel
Installing the add-on
Install the Pay by Link add-on on the add-ons list page (Add-ons → Manage add-ons). Click the + button in the top right corner, select an archive, and click Upload & install. You can now find the installed add-on in the list of installed add-ons, just make sure it is set to Active.
Setting up the add-on
Here are available settings of the Pay by Link add-on:
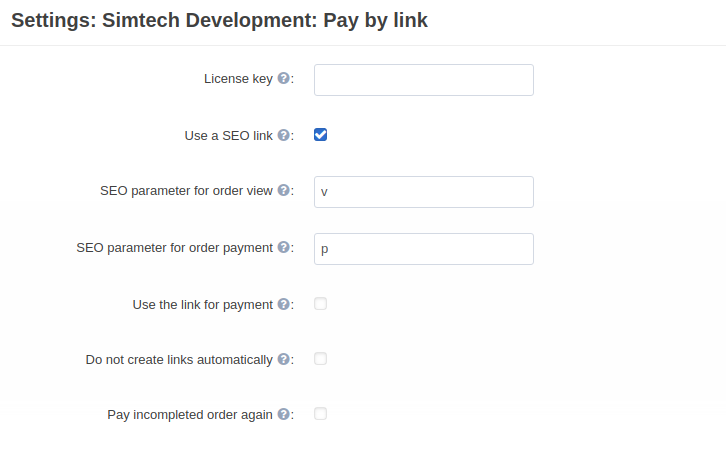
- License key—Enter the license key to activate the add-on. You will receive this key in the order confirmation email. You can also see license keys for all your purchased add-ons in your HelpDesk account.
- Use a SEO link—Use the short format of links. Compare the long format:
your_domain/index.php?dispatch=pay_by_link_invitation.pay_order&invitation_id=xwith the short one:your_domain/pay-by-link/x.- SEO parameter for order view—Specify the parameter in the SEO link for Link to view. The value should be entered without spaces. For example, if you add
vin that field, the link will look like this:your_domain/v/xxx. The Use a SEO link setting should be enabled.- SEO parameter for order payment—Specify the parameter in the SEO link for Link to pay. The value should be entered without spaces. For example, if you add
pin that field, the link will look like this:your_domain/p/xxx. The Use a SEO link setting should be enabled.- Use the link for payment—Create a direct link to the payment gateway to pay for the order. Note that Link to pay is not available for all payment methods.
- Do not create links automatically—Links to orders will not be created automatically.
- Pay incompleted order again—Allows paying the order again by the link with the Incomplete status. Clicking the link will change the order status to Open.
Additional configuration
Decide for which order statuses you want to let customers pay orders by link and enable the Pay order again option for them (Administration > Order statuses).

For example, if you enable Pay order again for Open orders, customers will be able to pay for the order by the link.
Otherwise, they view the order details only without the ability to pay.
What’s new on the order details page
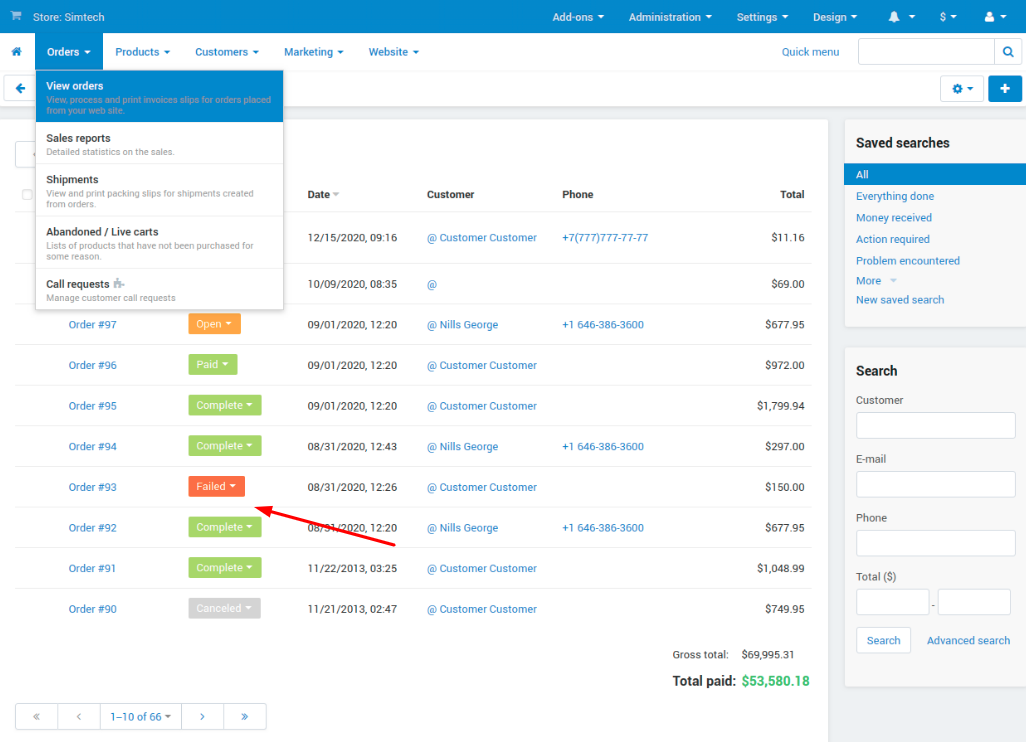
Navigate to Orders - View orders and select the order.
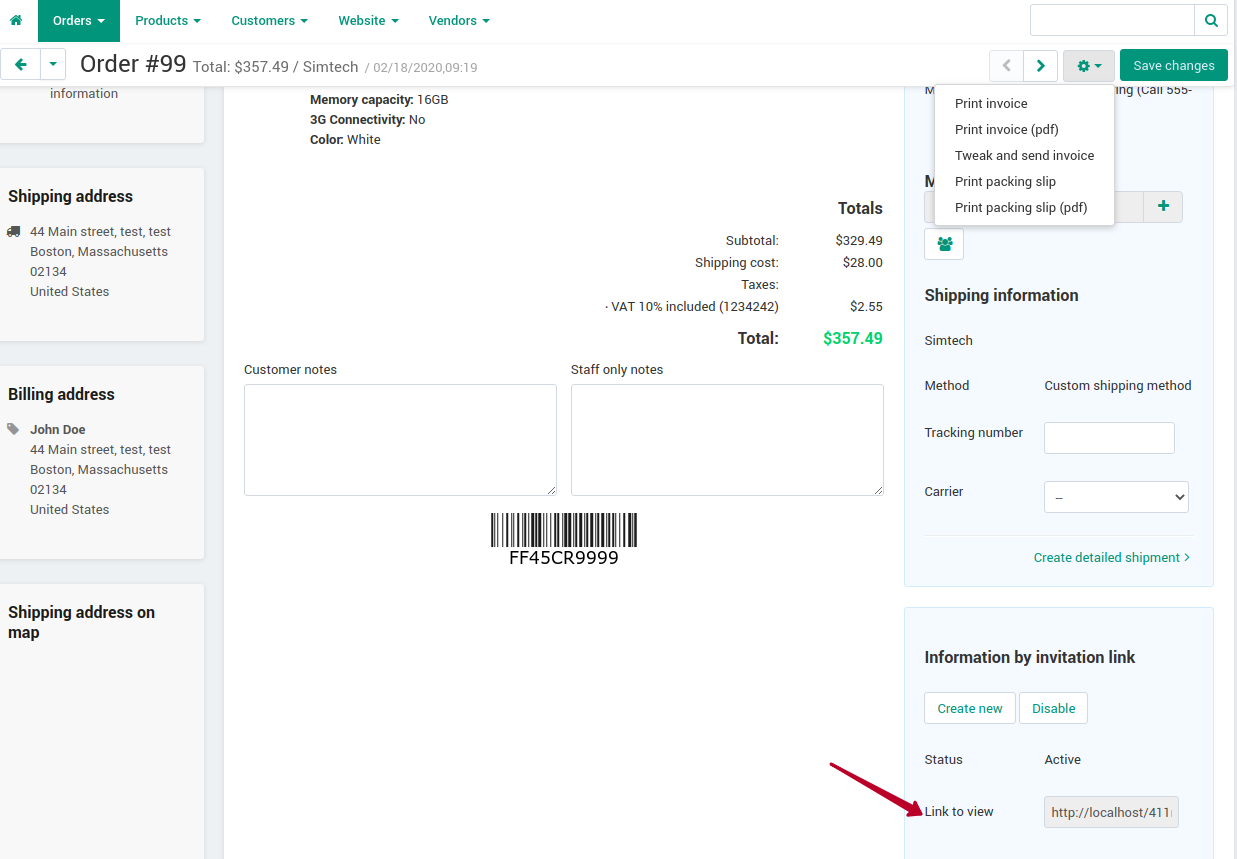
On the opened order details page, find a new Information by invitation link block with two short links:
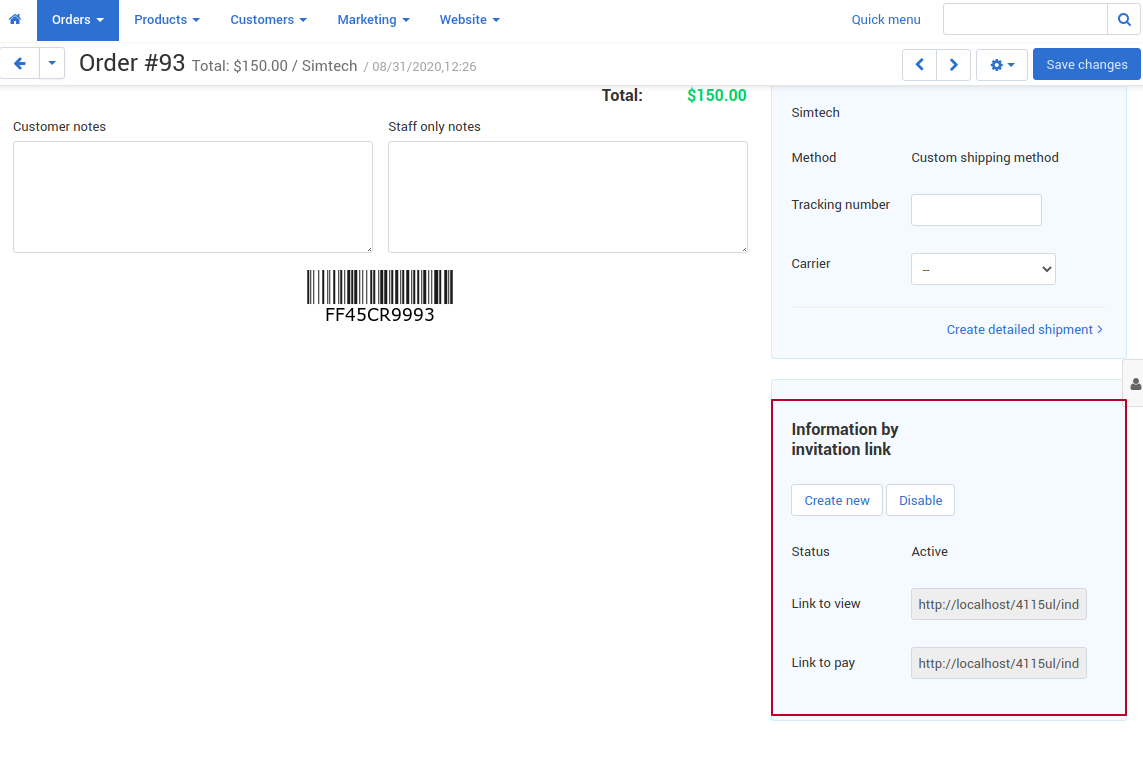
- Create new button—Create a new link to view and a link to pay; previous links will become inactive.
- Disable button—Disable links for this order.
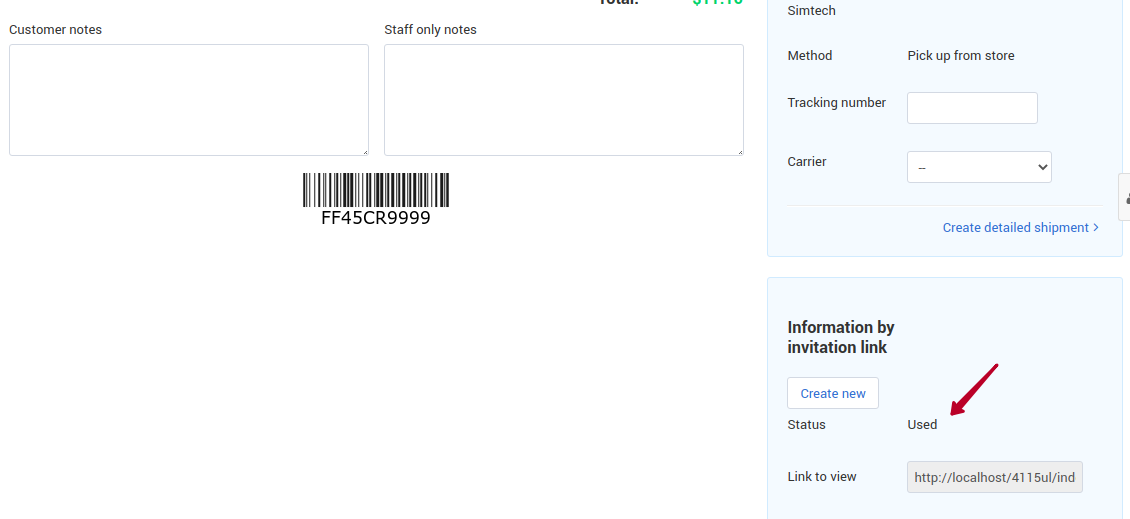
- Status—Two options: Active - links to view and to pay are active, the order is not paid; Used - the link is used.
- Link to view—A link to view the order details.
- Link to pay—A link to pay for the order.
Important
The Link to pay is created only for external payment methods which use
cc_outside.tpl. Check the template for your payment method on the Administration > Payment methods page in the payment method properties. The add-on is incompatible with the custom payment methods and generates the link to pay only for the CS-Cart default payment methods.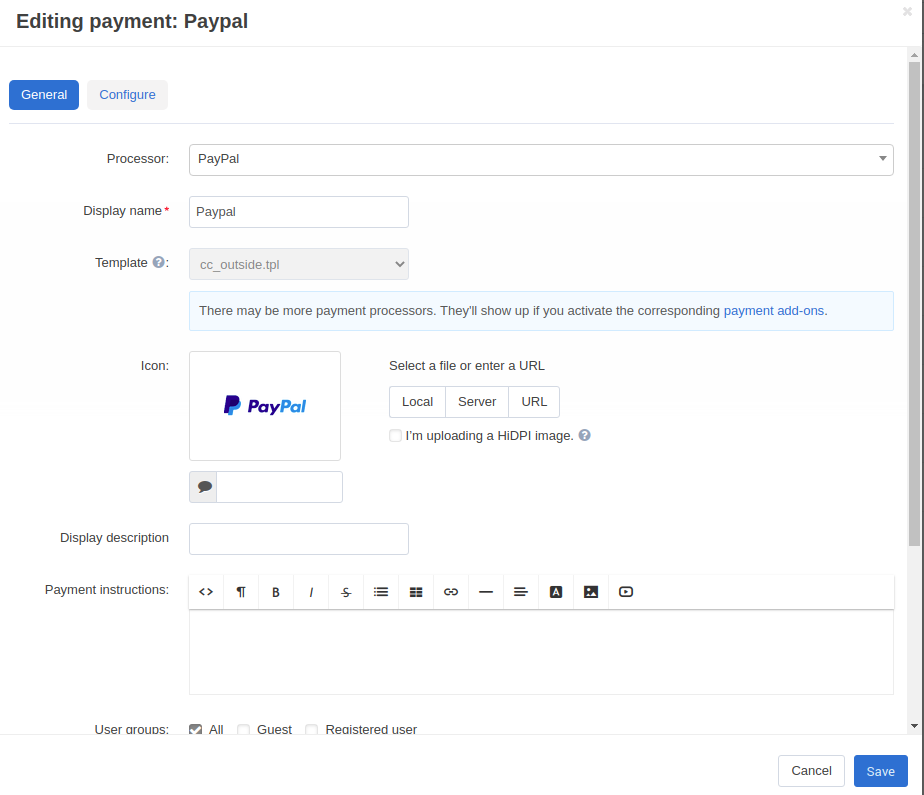
If the payment method uses another
tpl, the Link to pay will not be created and the customer will not get this link in the email.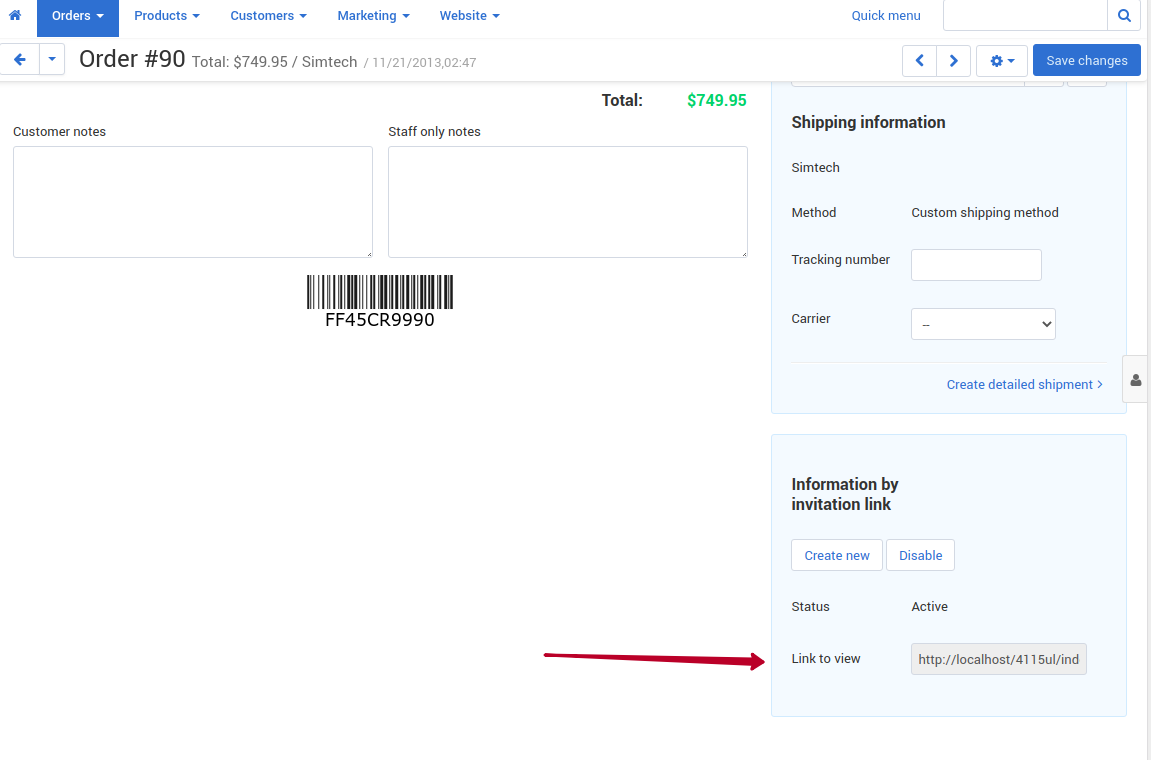
How to share order links with customers
Just copy the link and send it to the customer in any convenient way or use the built-in ability to send the link in the e-mail in just a few clicks.
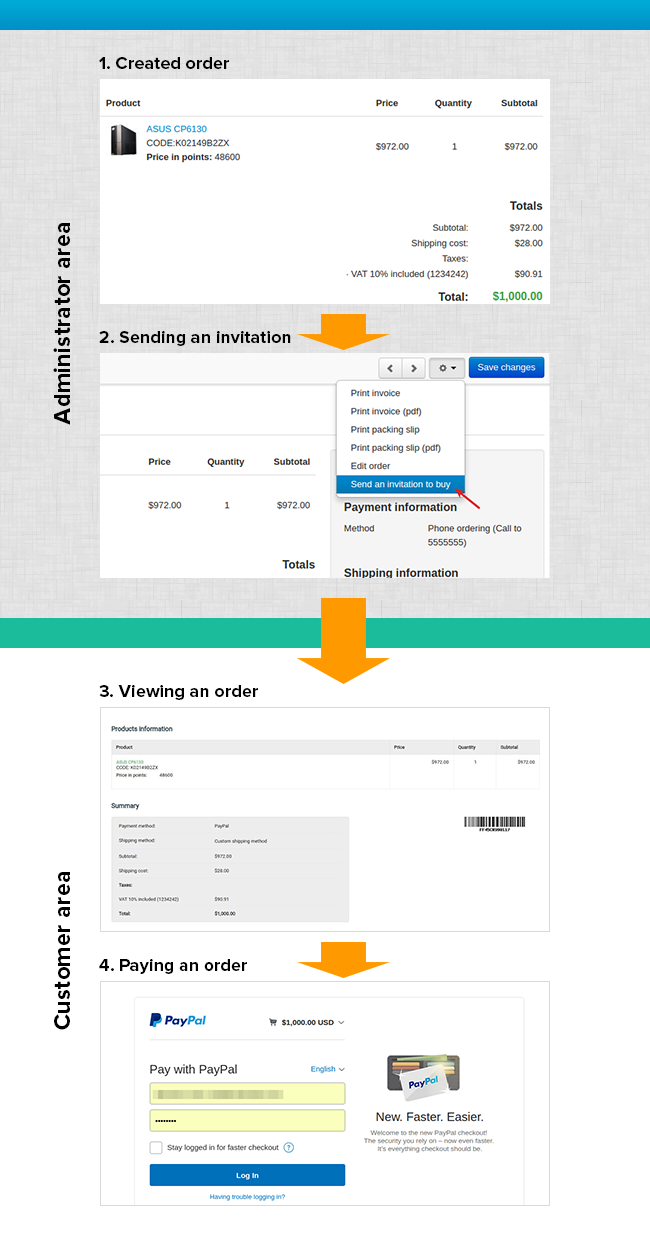
Sending an invitation to buy
To send the e-mail to a particular customer, navigate to Orders - View orders and select the order.
Click the gear button at the top and select Send an invitation to buy.
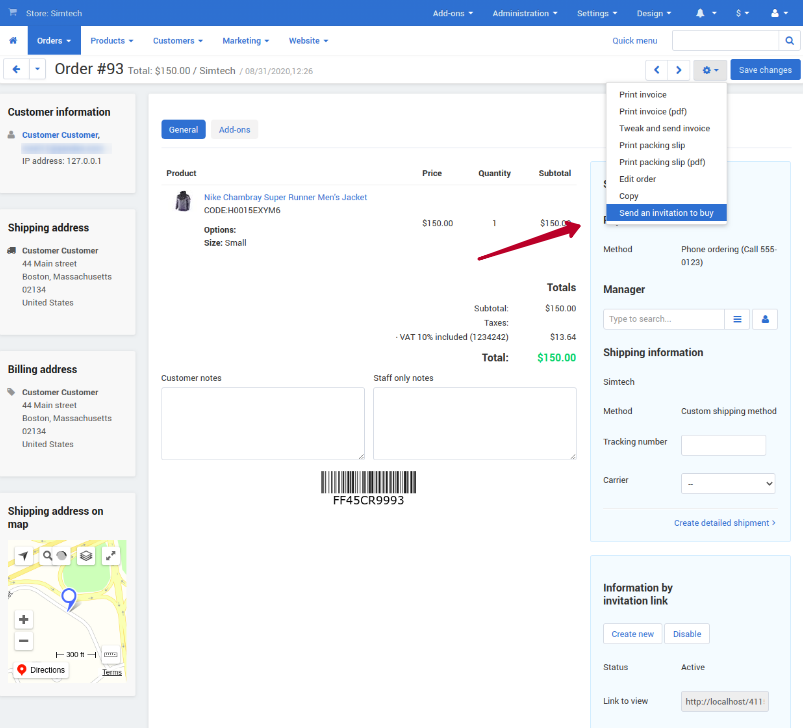
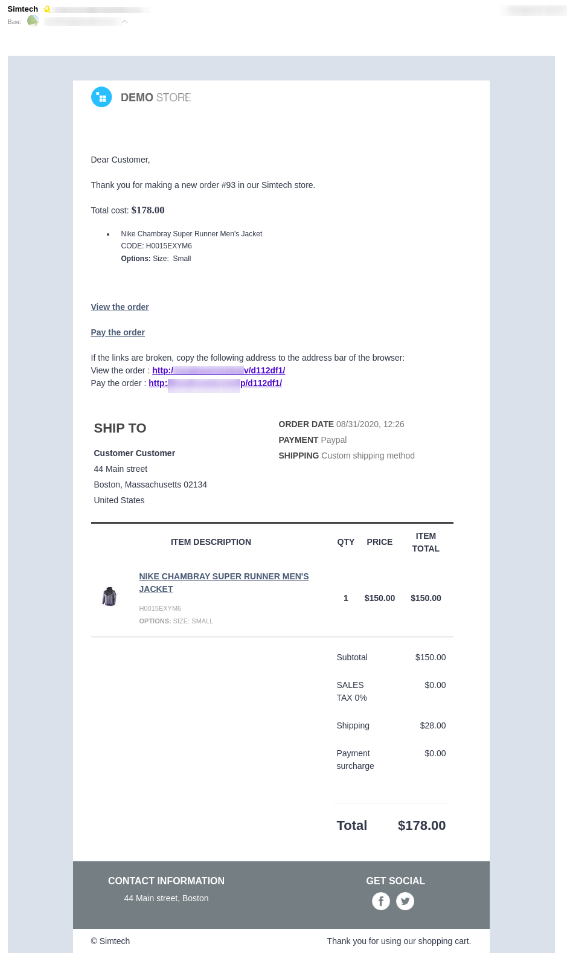
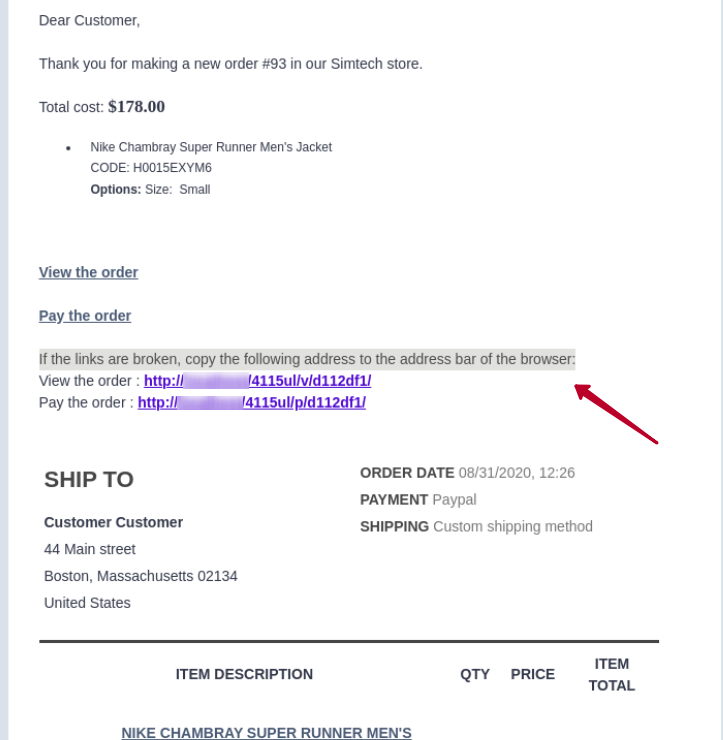
The user will get an email notification with the View the order and Pay the order links.
Clicking the View the order link will open the order details page:
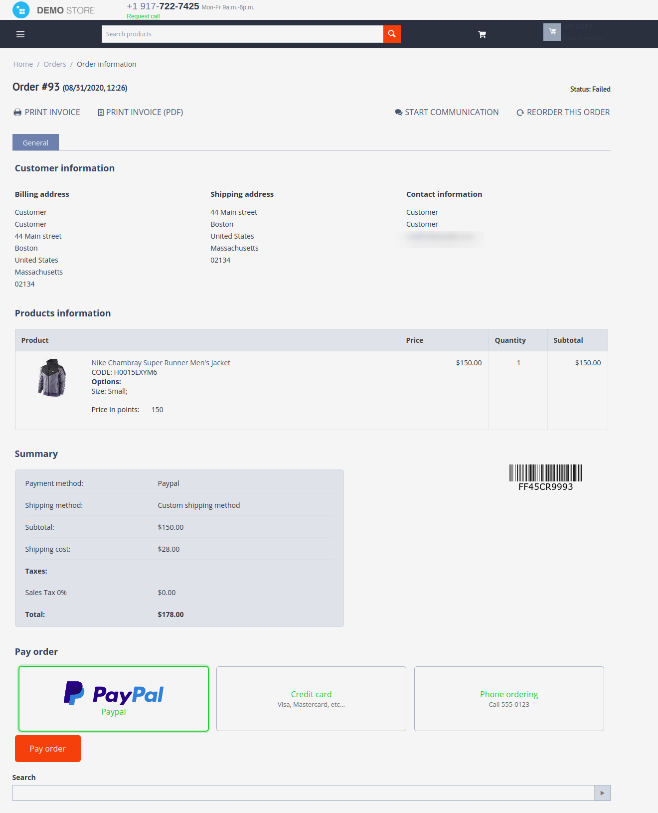
Check the Additional configuration paragraph for more information on how to provide customers with the ability to pay the order on that page.
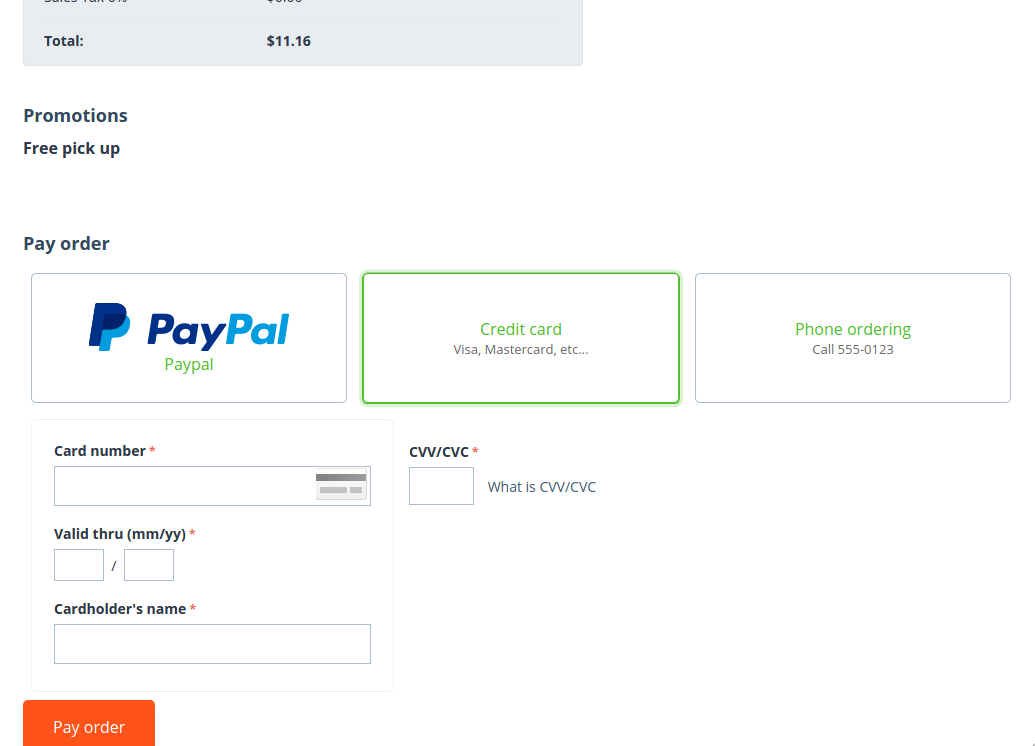
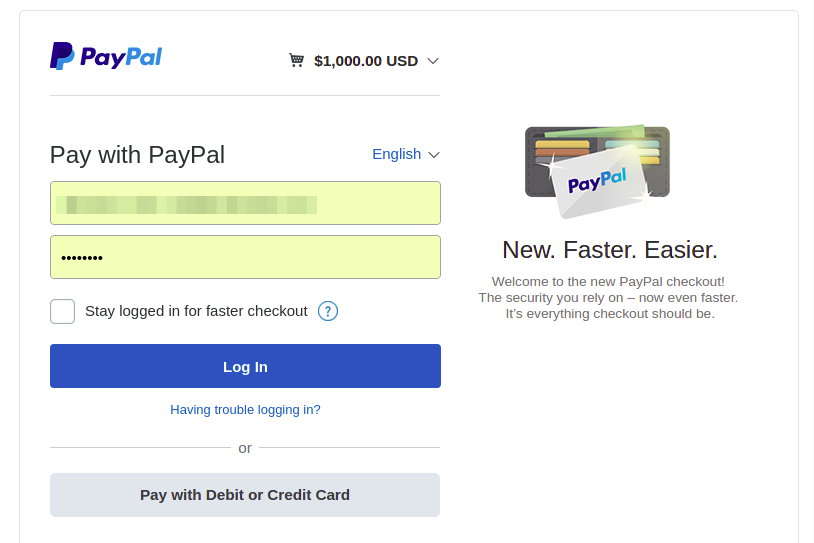
Clicking the Pay the order link will redirect the customer to the corresponding payment method page:
Sending bulk invitations
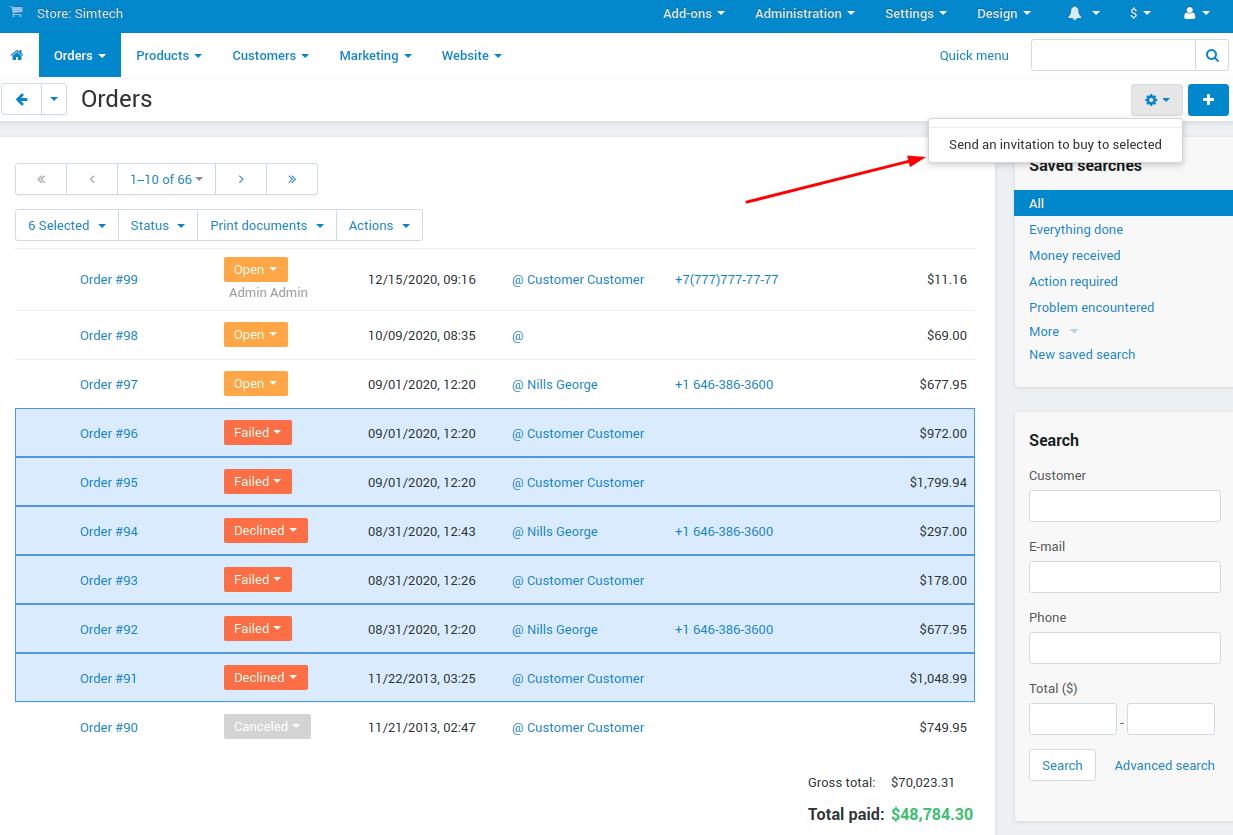
Navigate to Orders - View orders and select all the necessary orders.
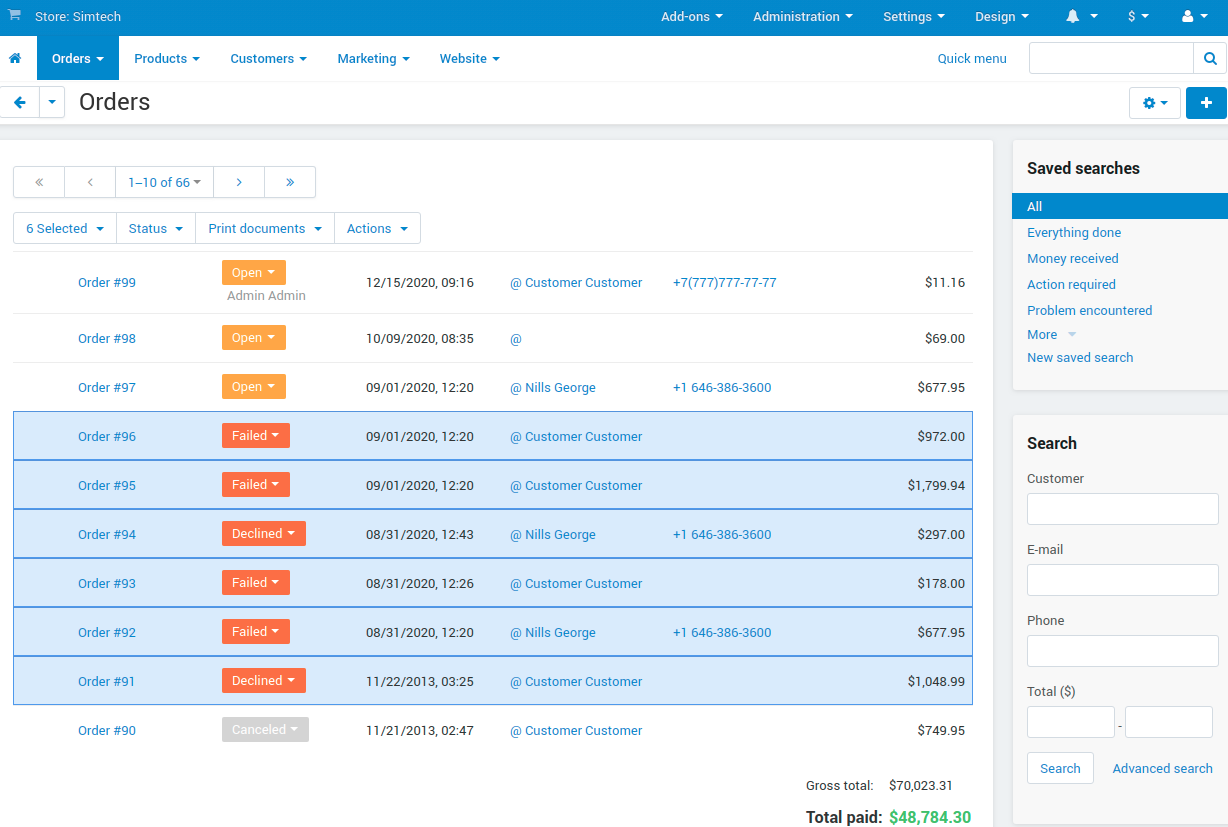
Click the gear button in the top right and select Send an invitation to buy to selected.
How to change the text of the email notification
You can easily change the text of the email notification that the admin sends to the customer as an invitation to buy a product or translate it into another language by following the steps below.
Editing the email notification
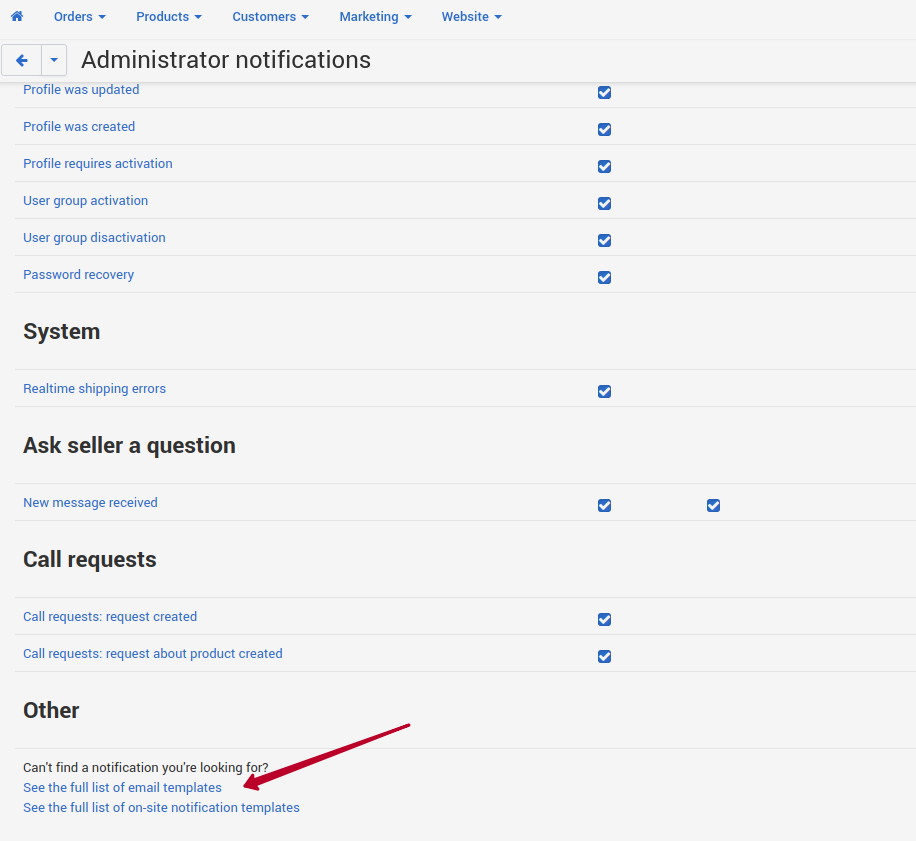
- Navigate to Administration > Notifications > Administrator notifications.
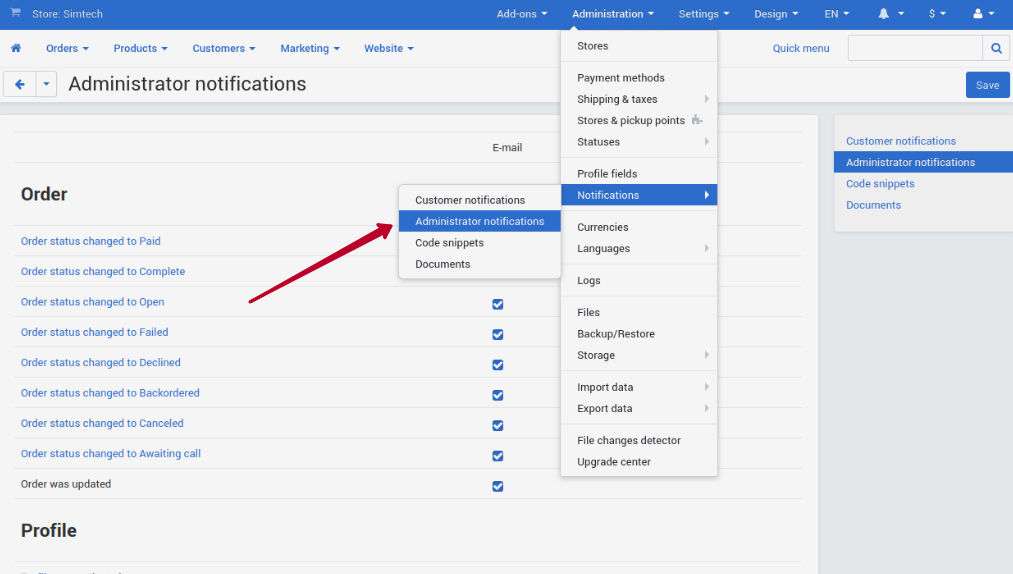
- Scroll down the page and click See the full list of email templates and find the Pay by link: Invitation to buy template there.
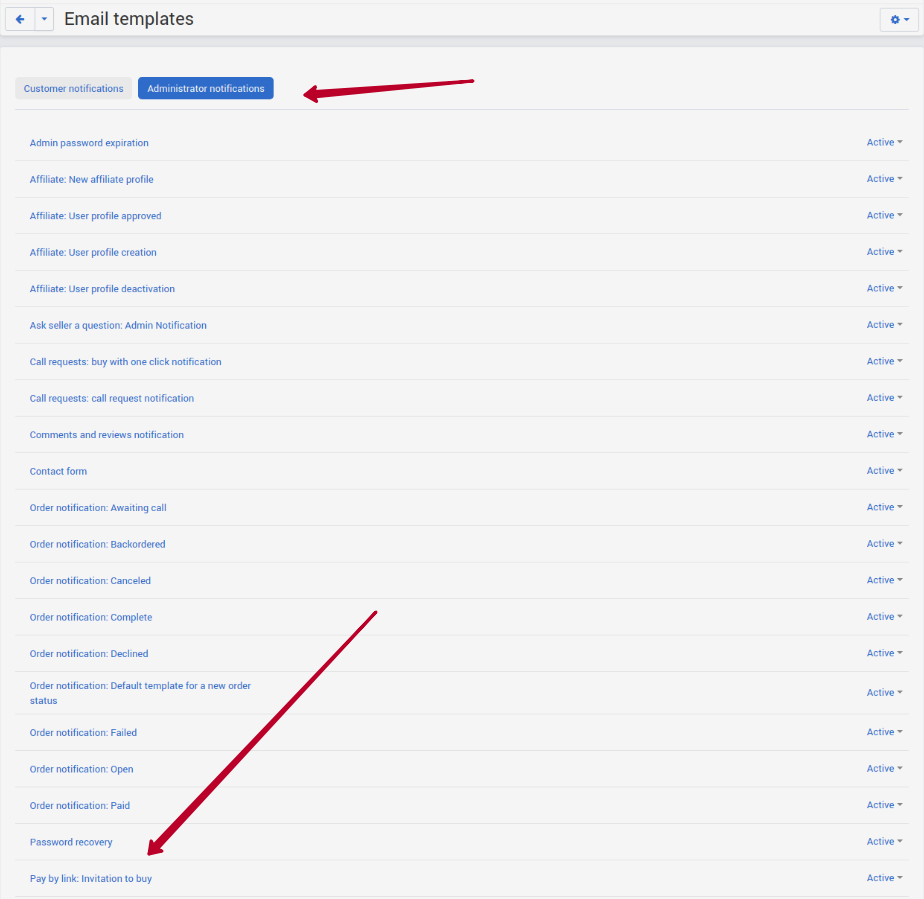
- Switch to the Administrator notifications tab and find the Pay by link: Invitation to buy template there.
- Edit it the way you like!
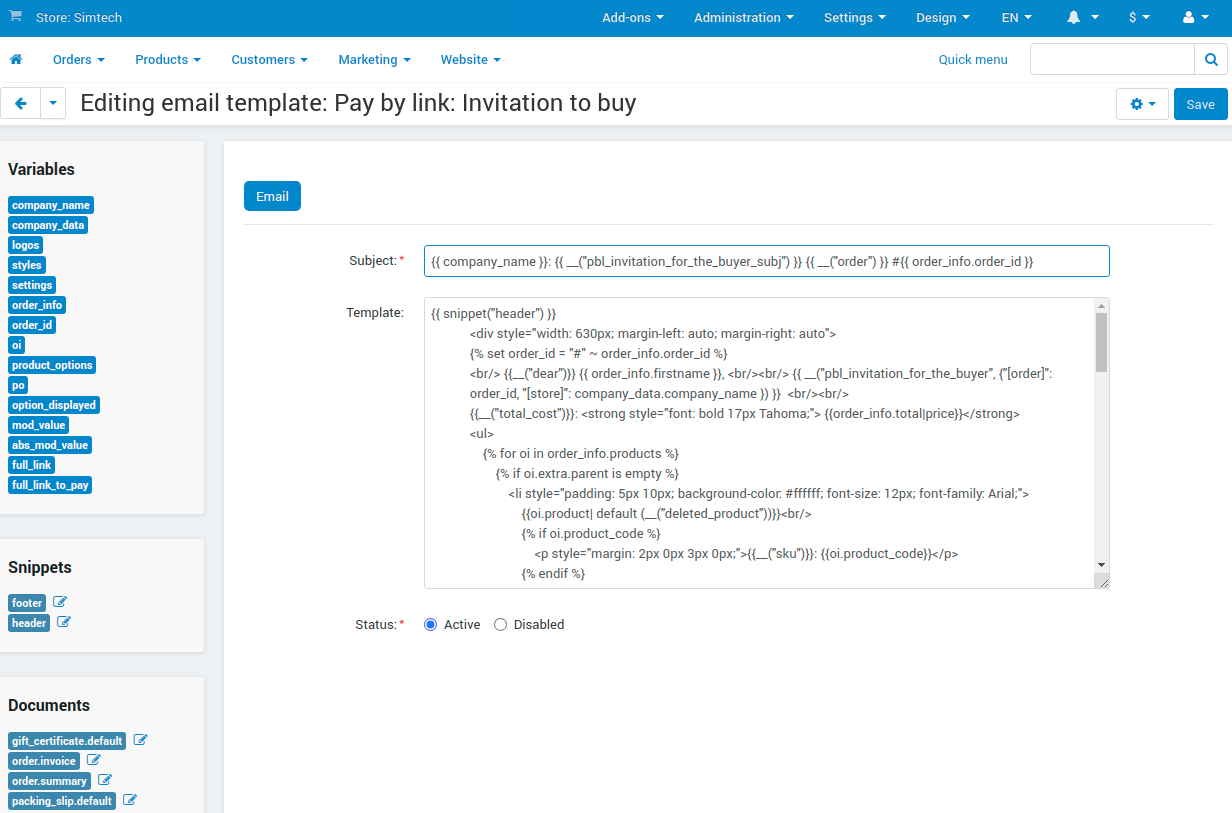
Note that the add-on adds two new variables (
full_linkfor the Link to view andfull_link_to_payfor the Link to pay) which you can you in the template.
Translating the individual language variable
- Send yourself a test email and copy the text from the message you’d like to change.
- Navigate to Administration > Languages > Translations.
- Enter the text you copied into the Search for pattern field and click Search. You will find the corresponding variable.

- Switch to the language you need to translate the text into and type in the translation.
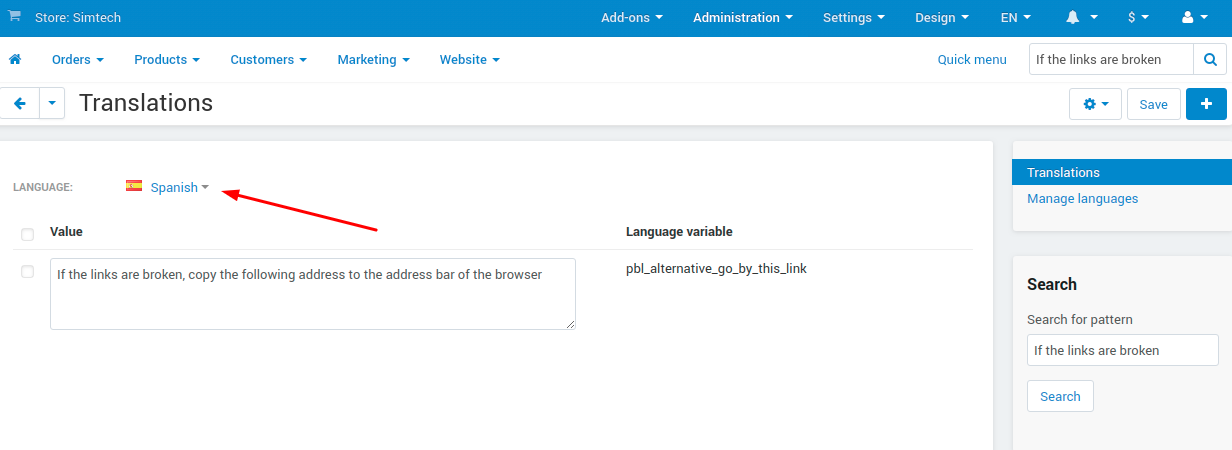
- Click Save.
FAQ
Can I use the add-on on CS-Cart Ultimate with several storefronts?
Yes, the add-on is compatible with this edition, but you can’t set up different settings for storefronts. Currently, all the setting can only be equal.
Can my vendors use the add-on?
Yes, but they have access to restricted functionality. Vendors can view and copy the link, but can’t create links by themselves or send an automatic email with the invitation to pay the order.