
Product Labels (up to 4.9)
Important
This user guide contains information about functionality of the old version of the Product Labels add-on, compatible with CS-Cart 4.3.x-4.9.x. This version is not supported. If you have CS-Cart 4.10 or higher, upgrade to the refactored add-on version. If you are interested in purchasing this version, contact us or your account manager.
Overview
The CS-Cart Product Labels add-on allows to show unlimited promotional tags like “NEW”, “HIT”, “BLACK FRIDAY”, “CYBER MONDAY”, “NEW SEASON”, “NEW COLLECTION”, “ONLY AT”, “FREE SETUP”, “PRESENT” for products on the product listing page and product details page, which will help you make your business stand out and attract customers’ attention.
The add-on also allows you to create custom labels. You can write text for labels, pick the background color and text color.
Key features
- add labels to products on the product details page
- add labels to products on the product listing page
- label products as Hit and New automatically
- add labels for quick view of the product
- hightlight products with bright tags
- attract customers with your special offers
- use multiple labels for each product
- filter products by labels
- export/import products in a CVS format with additional Label fields
- add labels to products in bulk

To learn how to use new functionality, follow quick and easy steps below.
Compatibility
The add-on is compatible with CS-Cart and Multi-Vendor 4.3.4 - 4.9.3.
Don’t know what archive to download to install the add-on? Read here.
Support
This add-on is developed and published by Simtech Development Ltd., a CS-Cart developer. You are guaranteed a quality add-on supported by the future versions. If you need help, please contact us via our help desk system.
Managing in the admin panel
Installing the add-on
Install the “Product Labels” add-on on the add-ons list page (“Add-ons” → ”Manage add-ons”). Click the + button in the top right corner, select an archive and click Upload & install. You can now find the installed add-on in the list of installed add-ons, just make sure it is set to Active.
Setting up the add-on
Here are available settings for the add-on:
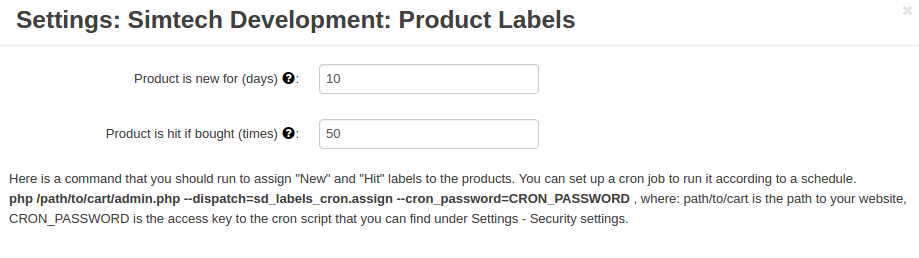
- Product is new for (days)—Number of days for which the product is considered as “New”. For example, if you enter 10, the product you add to the store will have the “New” label for 10 days.
- Product is hit if bought (times)—Number of purchases that makes the product “Hit”. For example, if you enter 50, after the product is purchased 5o times, the “Hit” label will be assigned to it.
Note
To assign “New” and “Hit” labels to the products, you should set up a cron script and run it according to a schedule.
Use this command:
php /path/to/cart/admin.php –dispatch=sd_labels_cron.assign –cron_password=CRON_PASSWORD ,
where:
path/to/cart is the path to your website
CRON_PASSWORD is the access key to the cron script that you can find under Settings - Security settings.
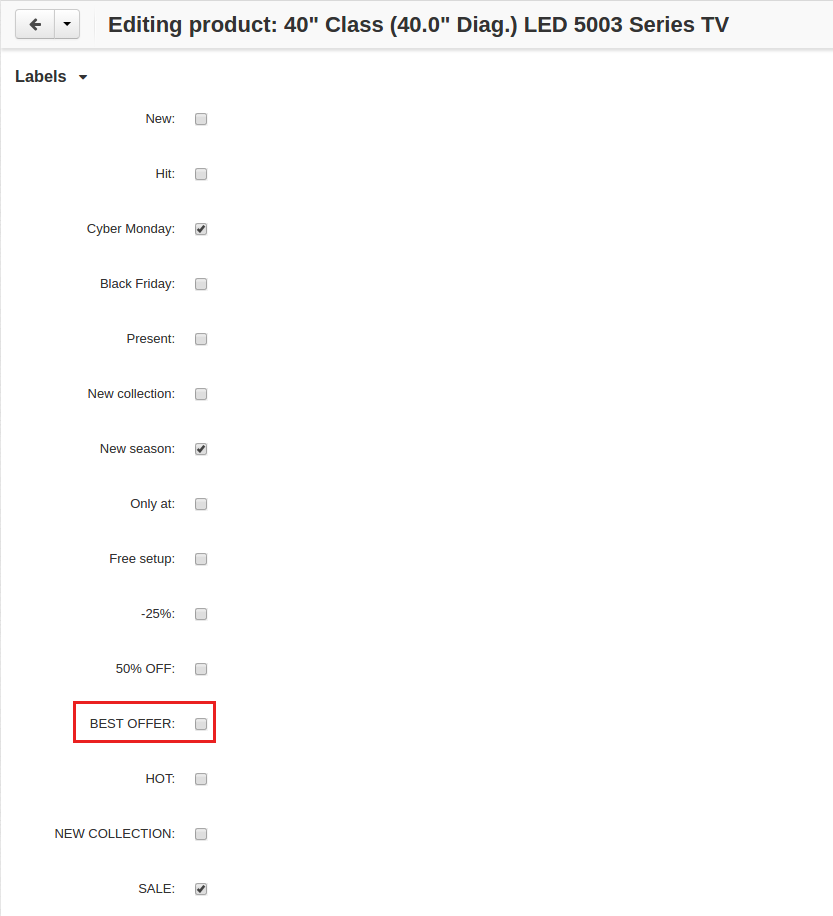
Adding labels to products
To add a product label, follow these quick steps:
- Go to Products - Products.

- Select the necessary product. Use quick search on the right if needed.
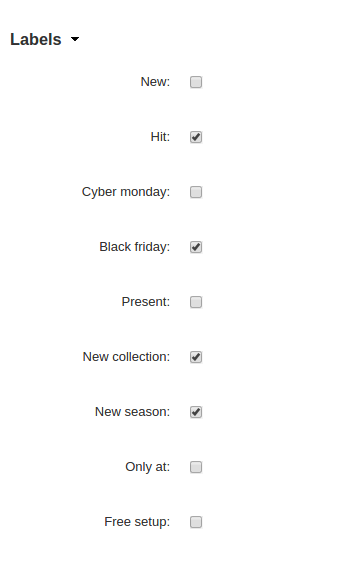
- Open the Add-ons tab, and in the Labels section, select the checkboxes next to the labels you’d like to display for this product.
- Click Save or Save and close.
- Go to the storefront to check the changes:
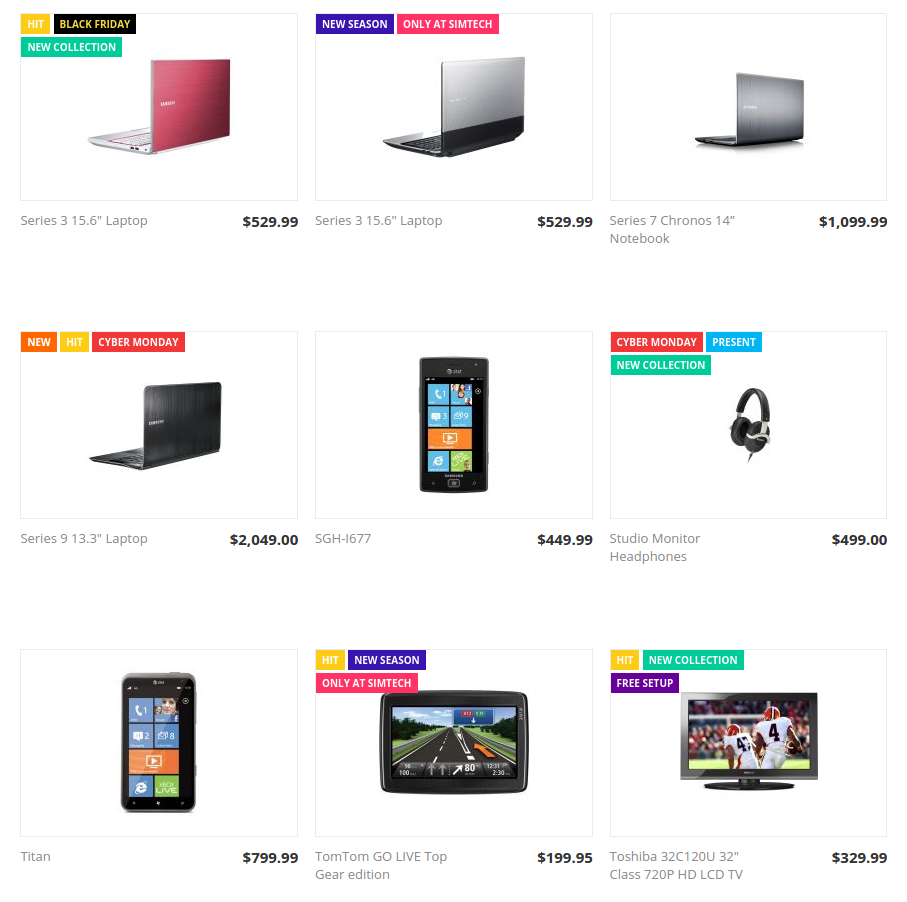
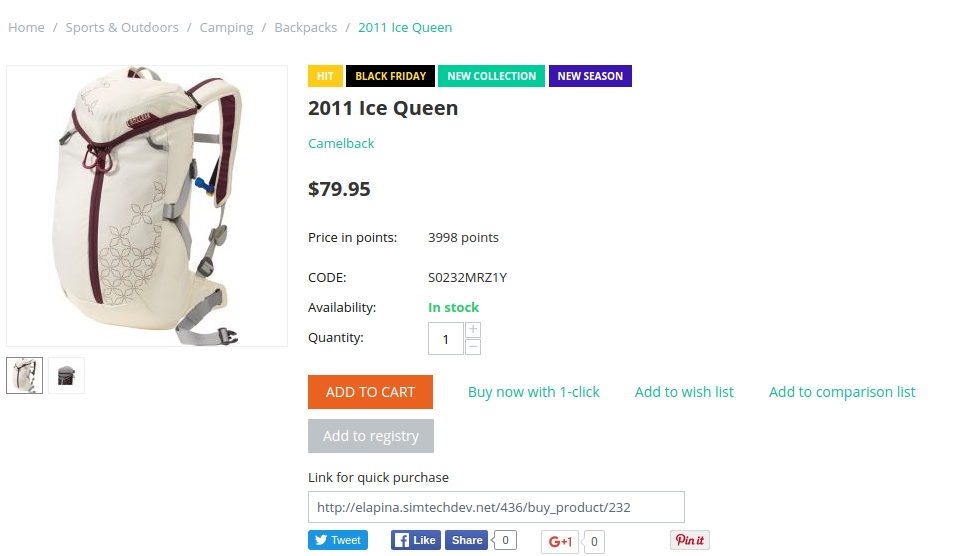
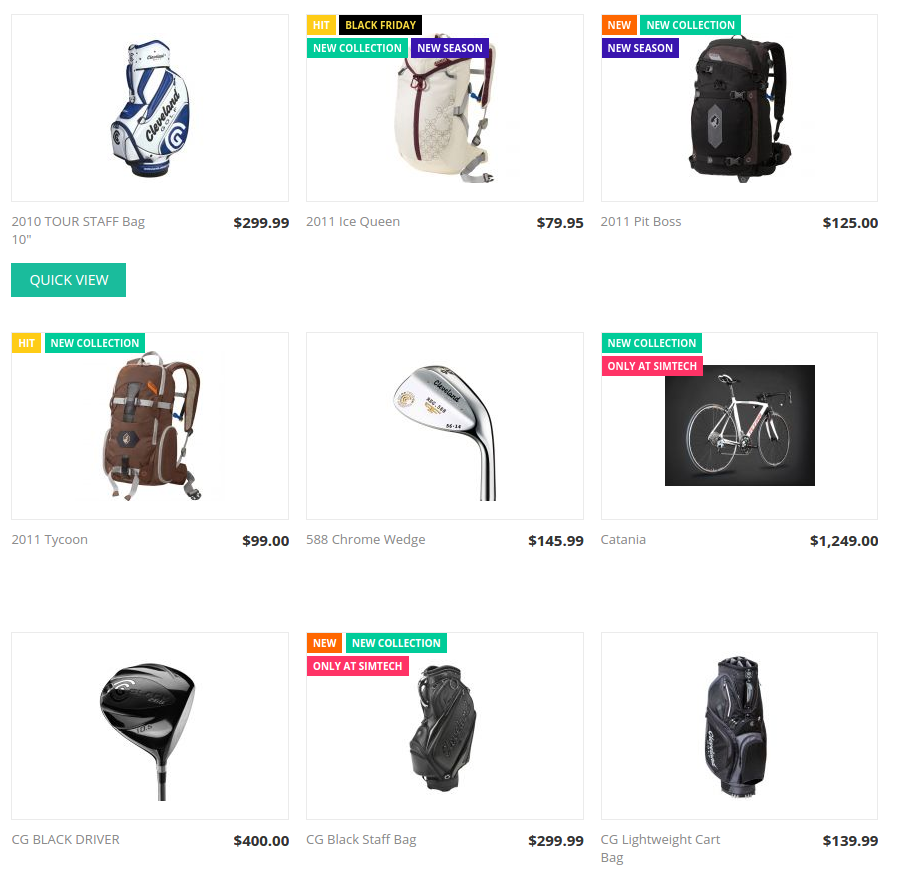
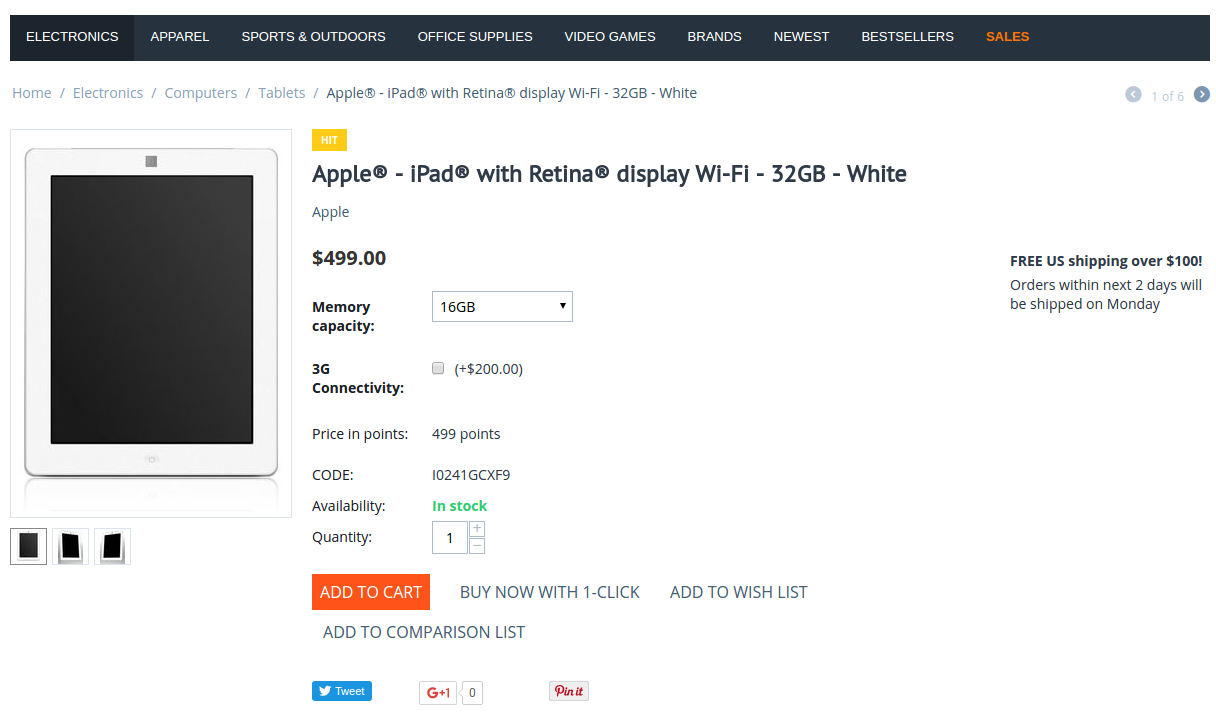
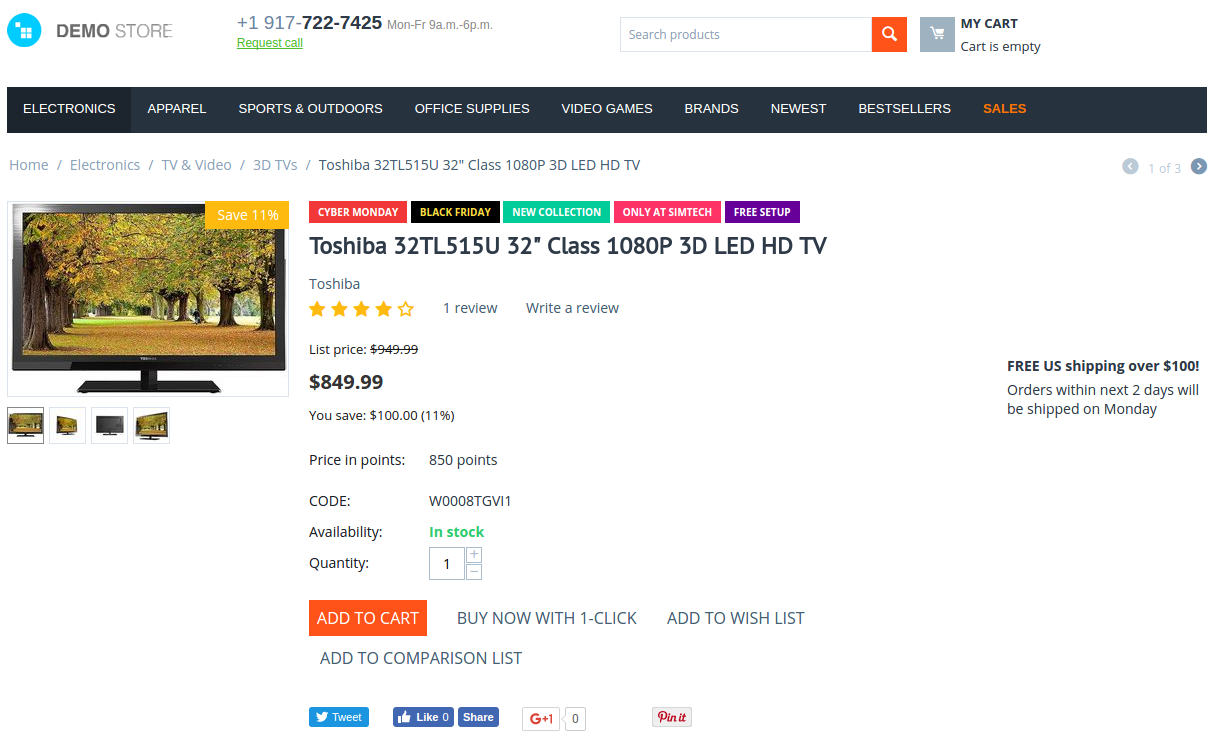
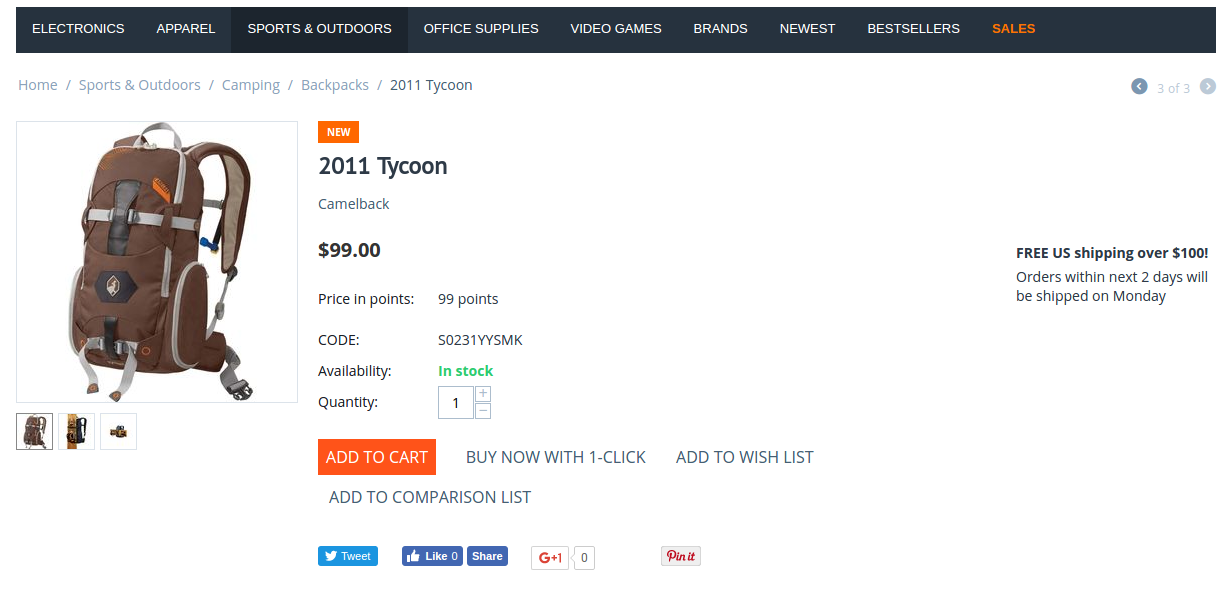
- on the product details page:
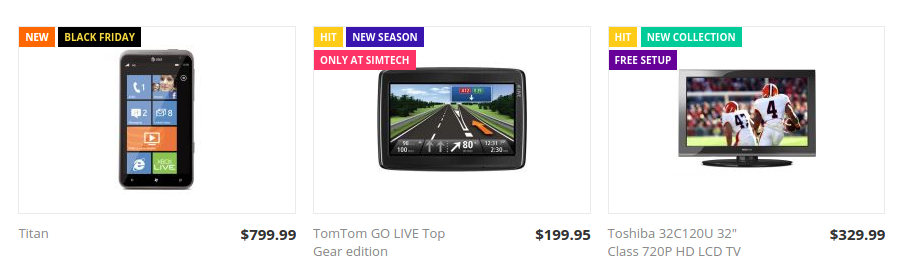
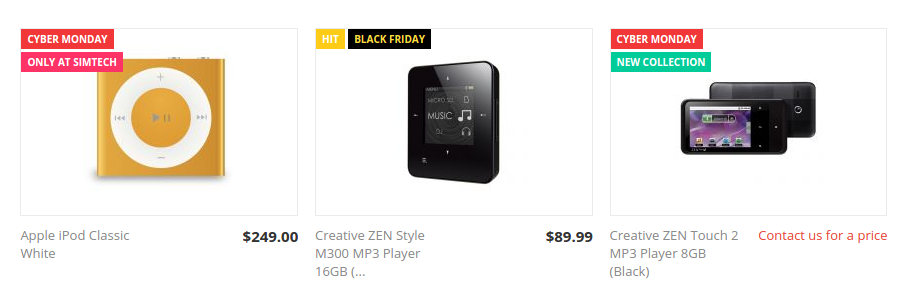
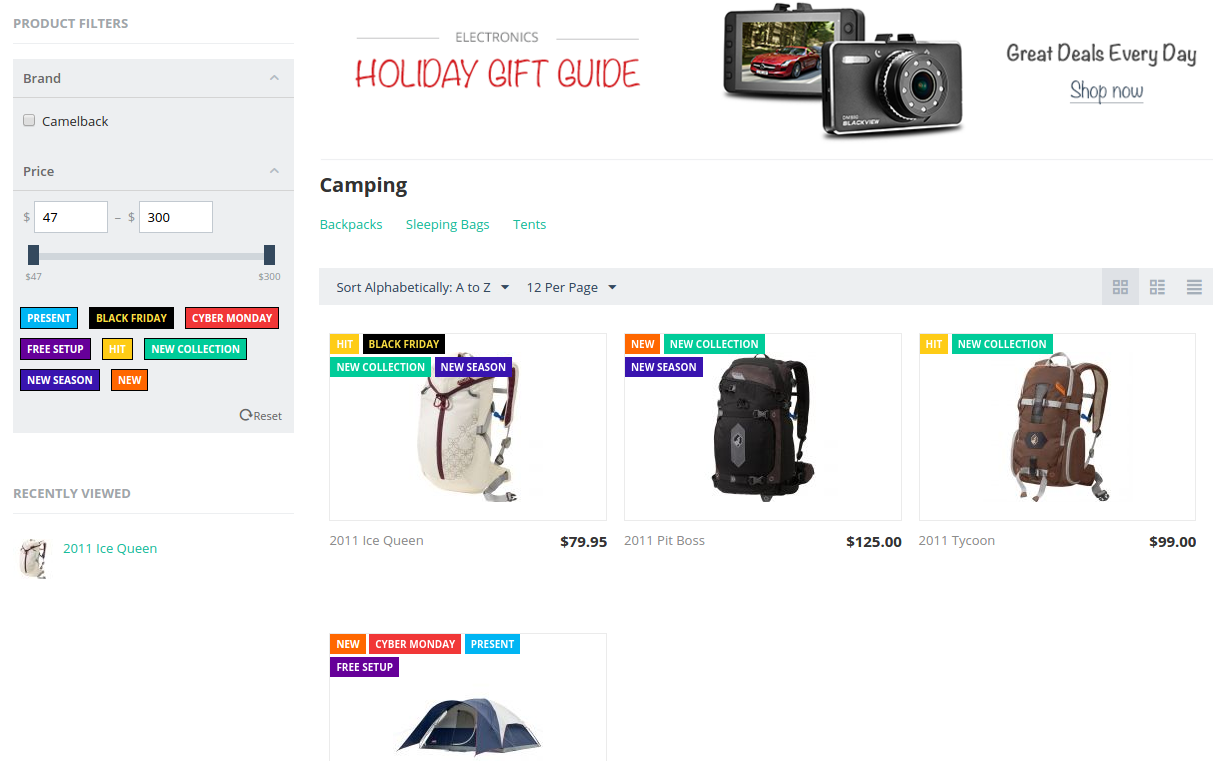
- on the product listing page:
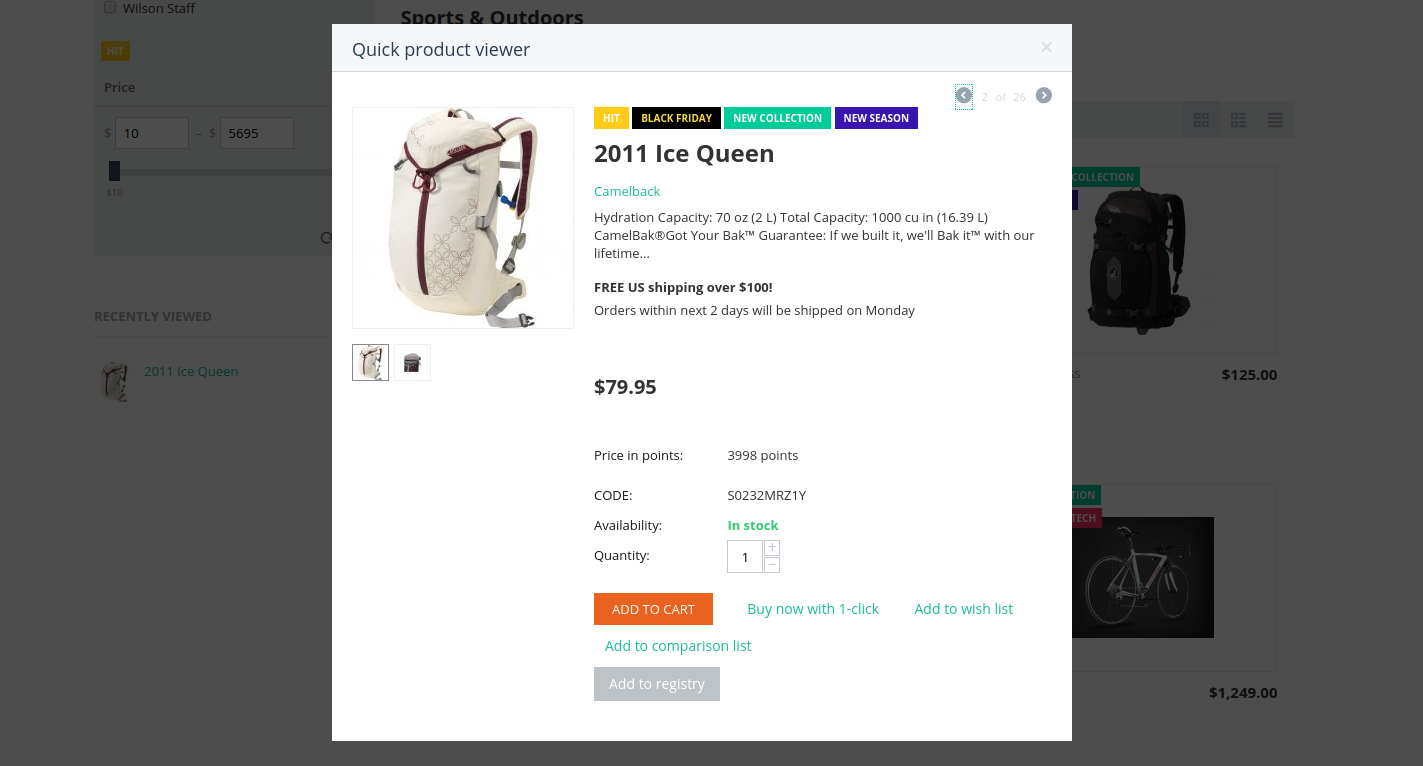
- quick view of the product:
Creating custom labels
To create your own label:
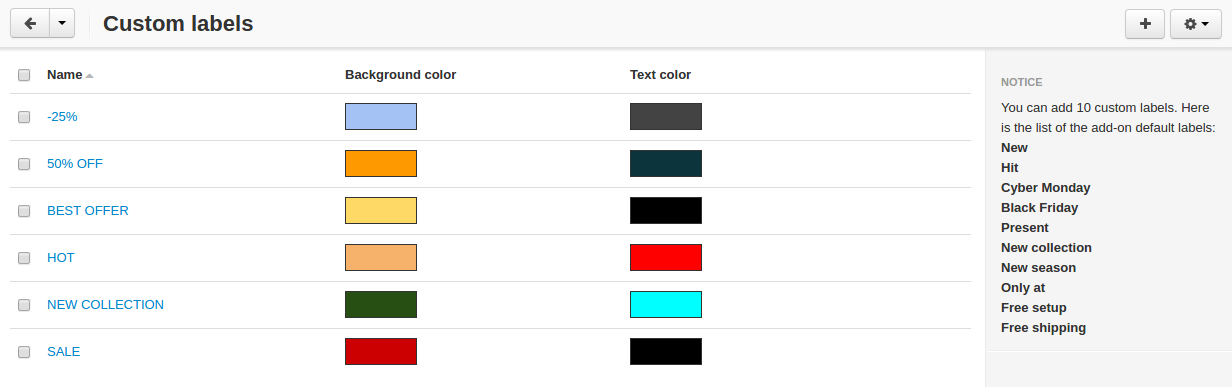
- Go to Marketing > Custom labels.
- Click the + button to add a new label.
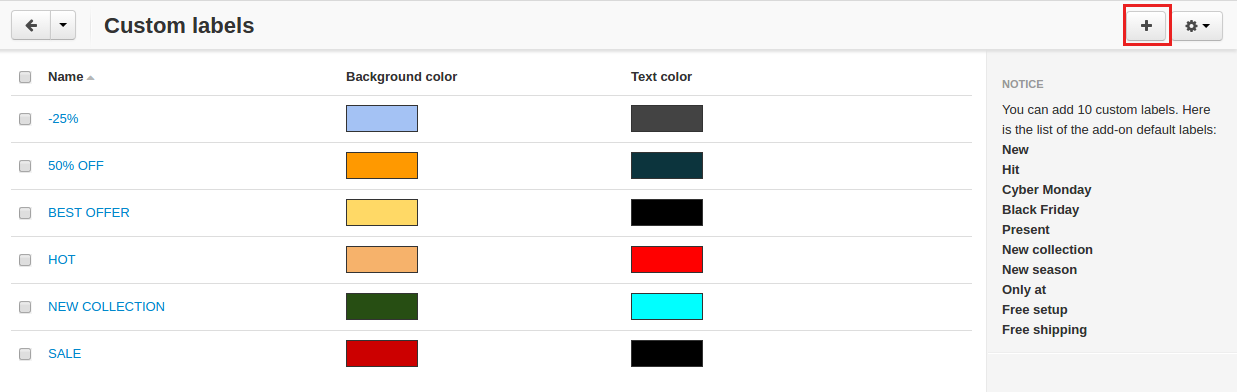
- Name the label. Note that this is the text that will be shown on the created label on the storefront. Pick a desired background color and text color.
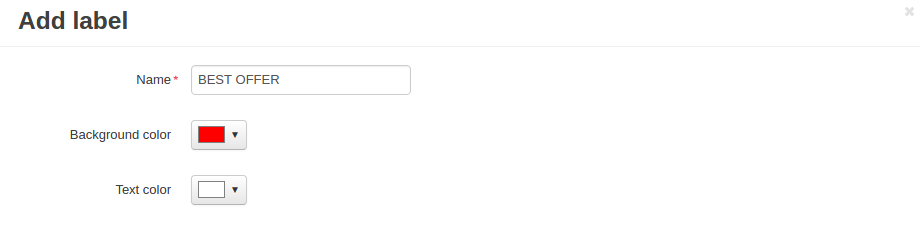
- Click Create.
The created label will appear on the list of available labels in the product settings.
Translating labels
You can easily translate labels into a desired language. Follow these steps:
- Go to Administration > Languages > Translations.
- Search for the necessary label.
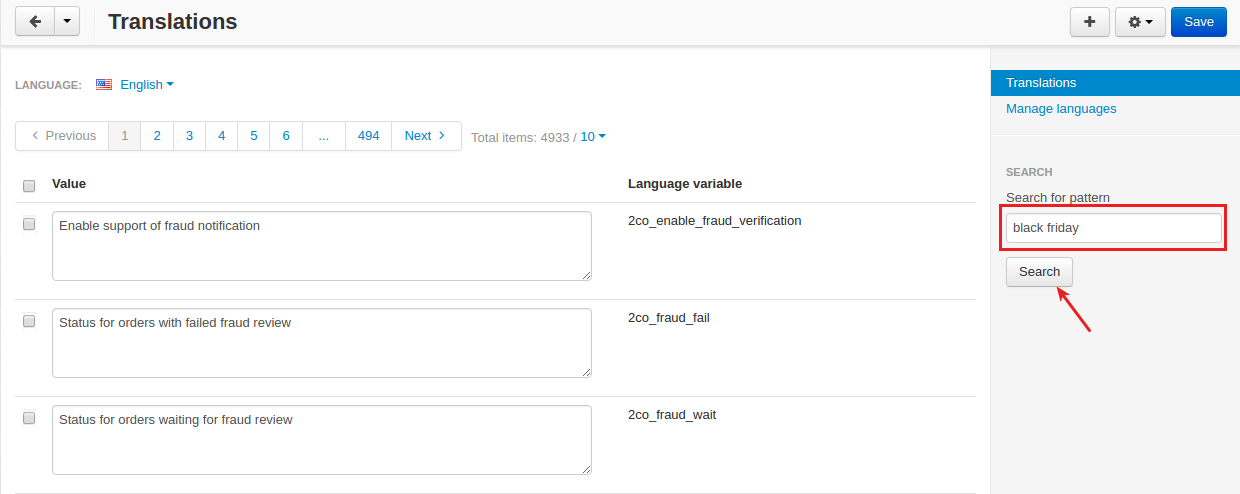
- Find the capitalized text. This is the label we need.

- Switch the language to the target one. Input the translation. Click Save.

Important
Save your changes on every page where you translate language variables. If you open the next page with language variables without clicking the Save button on your current page, the translations you made on the page will be lost.
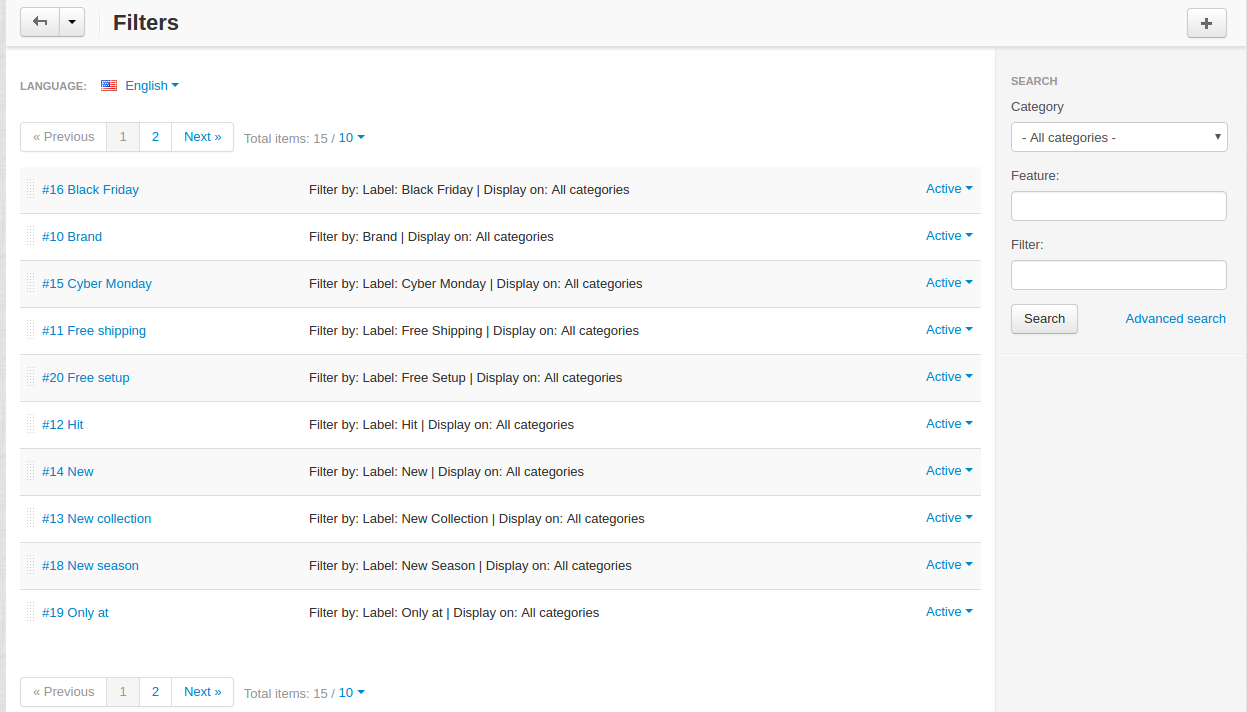
Creating product filters
To create a product filter:
- Go to Products - Filters.

- Click the + button in the top right.
- Select a filter in the Filter by selectbox and specify a name for it.
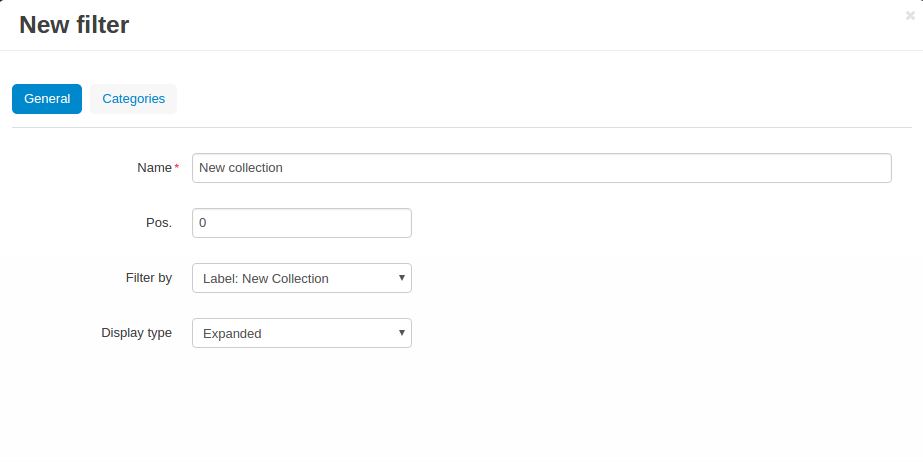
- Click Create.
- Repeat these steps for all Label filters.
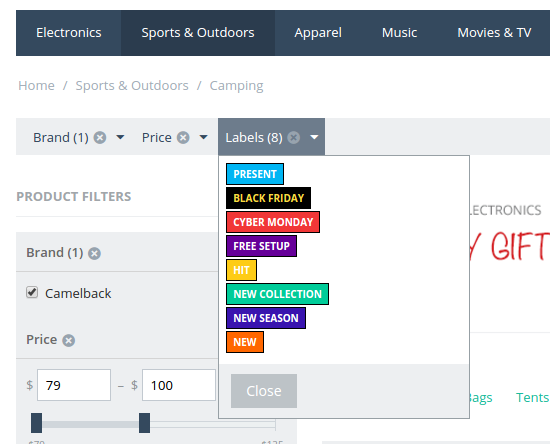
- Go to the storefront to see the changes:
- vertical filters
- horizontal filters
For more information about product filters, please visit CS-Cart User guide.
Bulk labels editing
To add labels for multiple products:
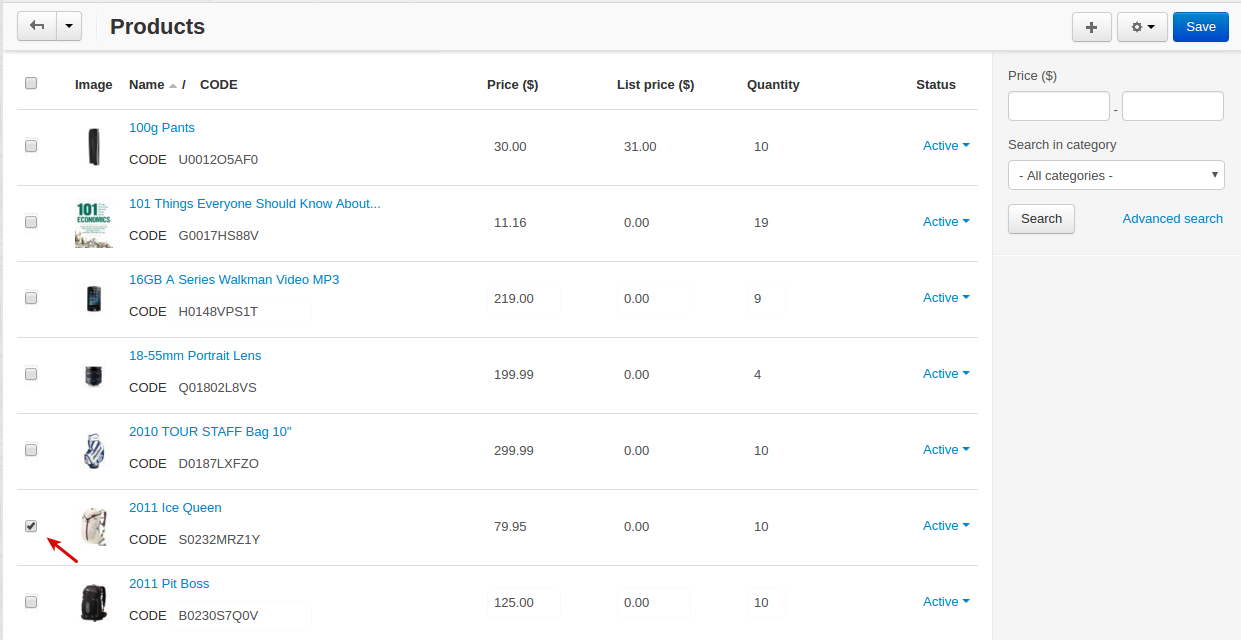
- In the admin panel, go to Products - Products.
- Select the checkboxes next to products you want to edit. Use the quick search on the right in needed.
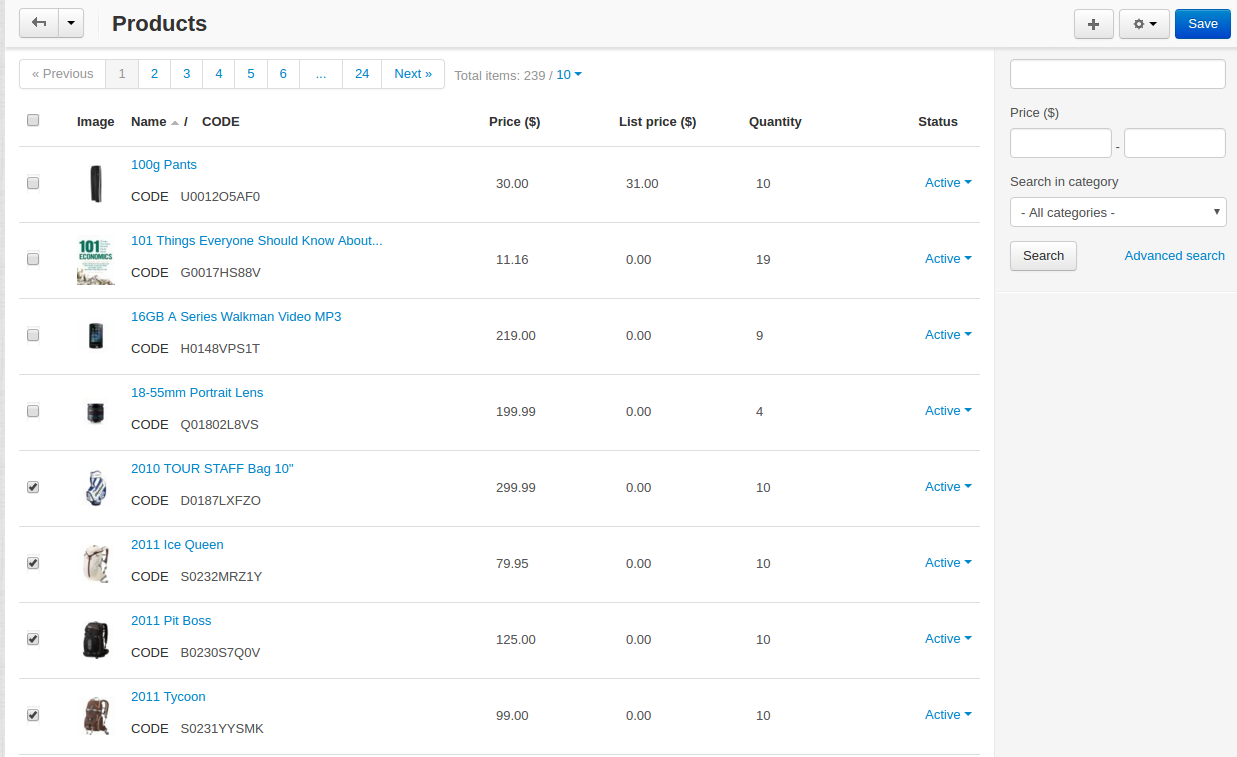
- Click the gear button in the top right and select Edit selected.
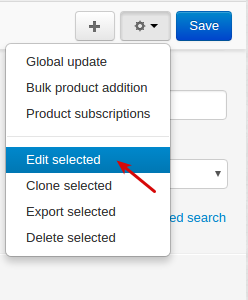
- In the opened window, first click Unselect all, then select the checkboxes of the necessary labels and click Modify selected.
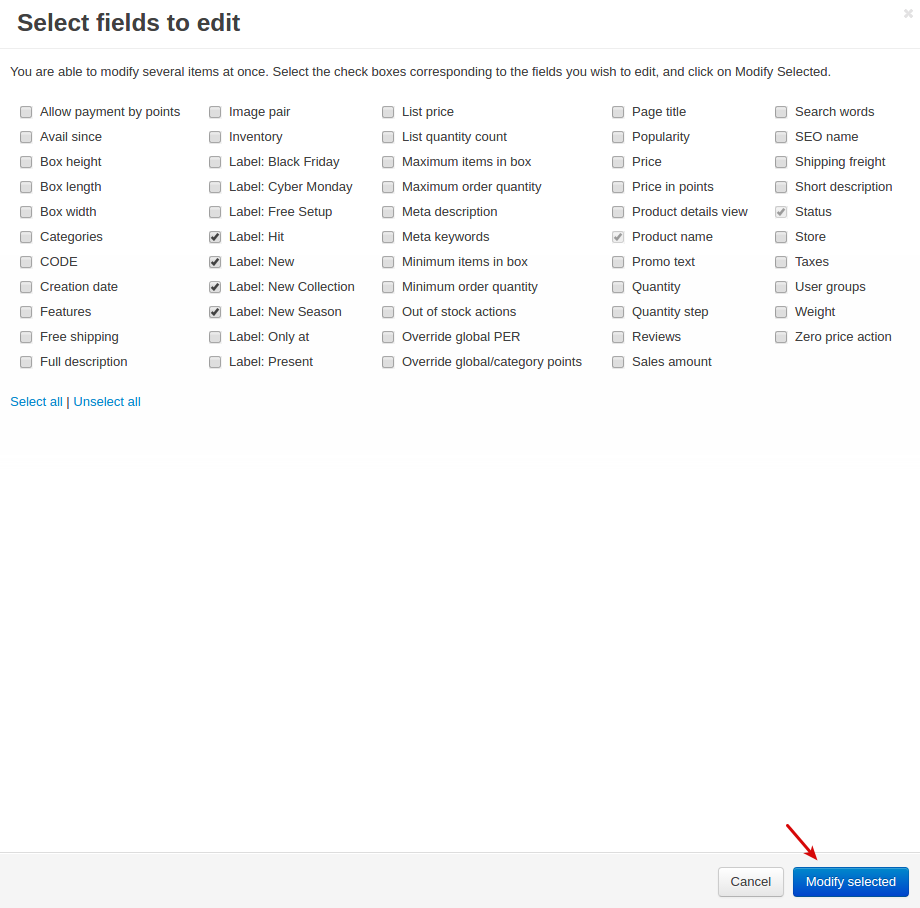
- Tick the required labels and click Save.
- Check the changes on the storefront.
Exporting product data
Go to Administration - Export data - Products.
Find Label fields and move them to the Exported fields section.
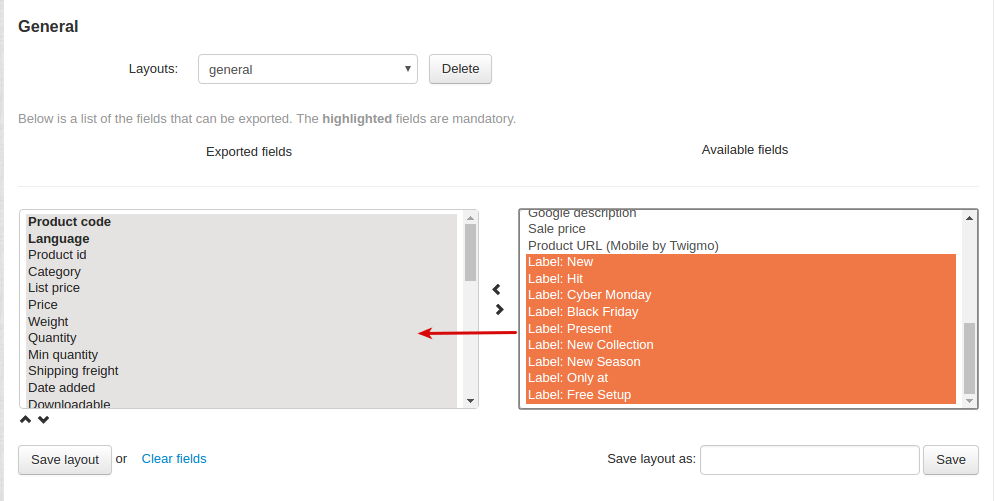
Specify all the required information and export products.
Importing product data
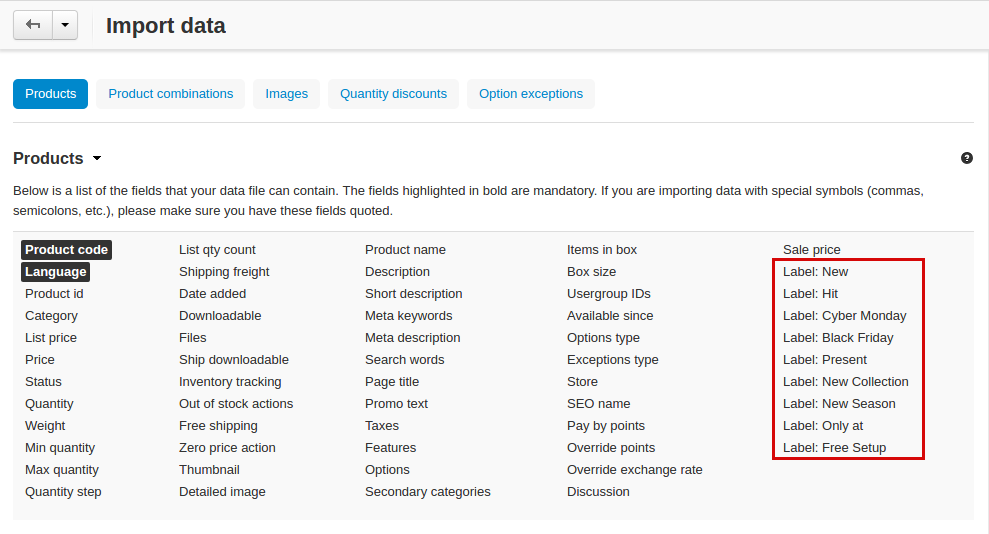
Go to Administration - Import data - Products.
You can see new fields added:
Specify all the required information and import products.
To learn more about import and export, visit the CS-Cart documentation.