Delivery Date
Overview
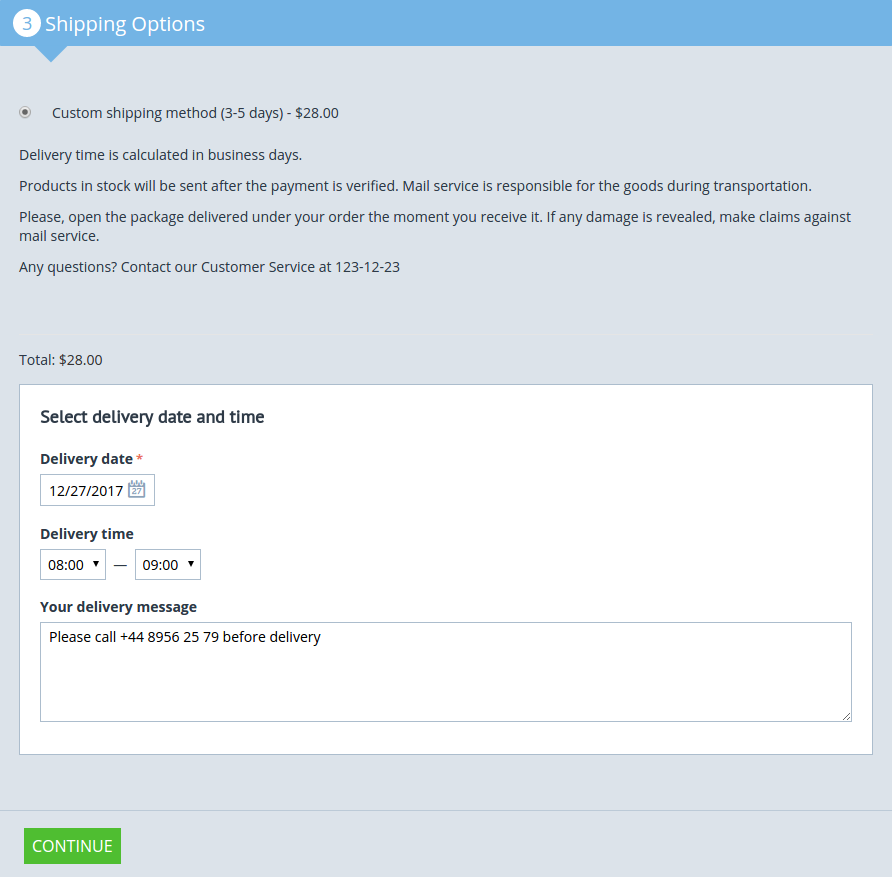
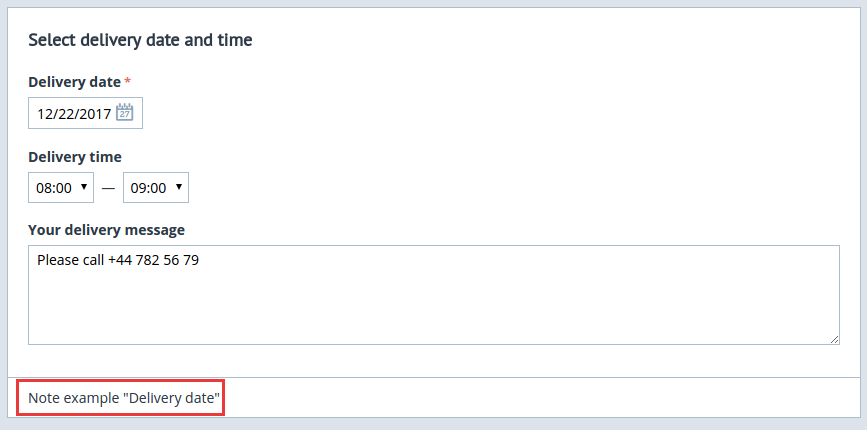
The Delivery Date add-on creates a nice date picker at the Shipping options step at checkout to let customers select a date and time when they’d like to receive the order. Customers can also leave a message if they want.
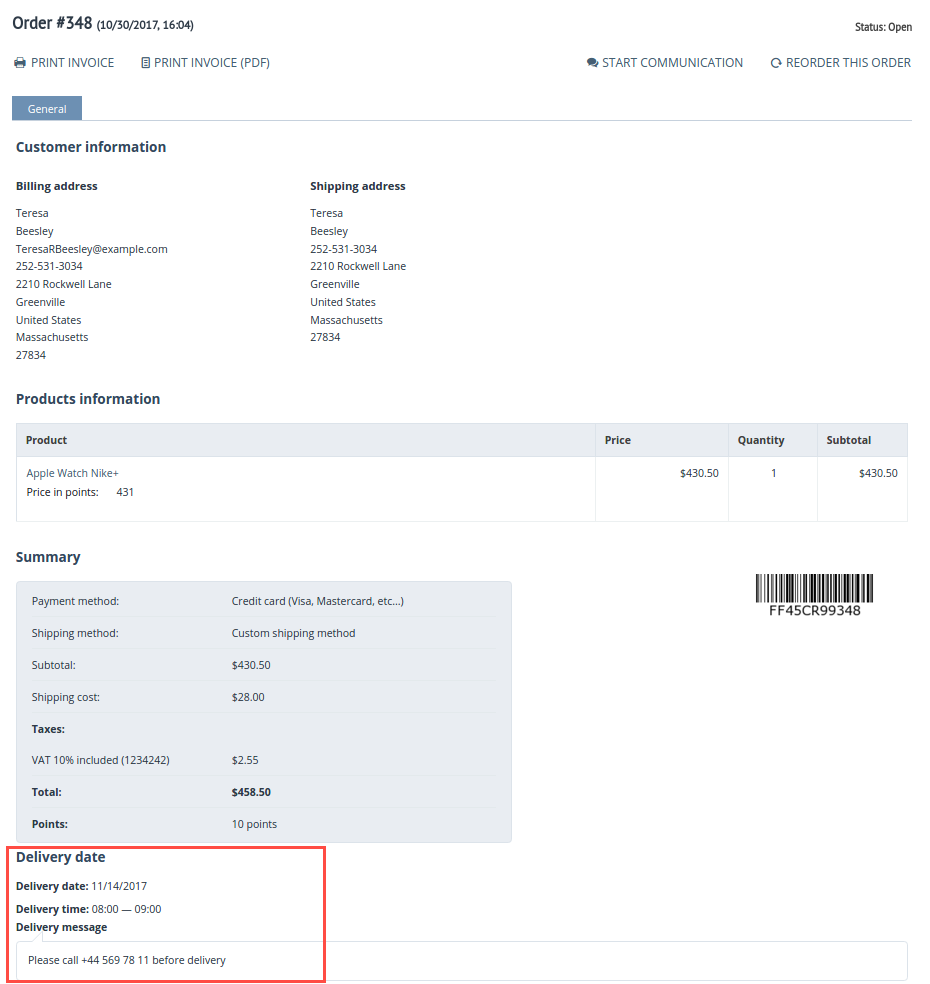
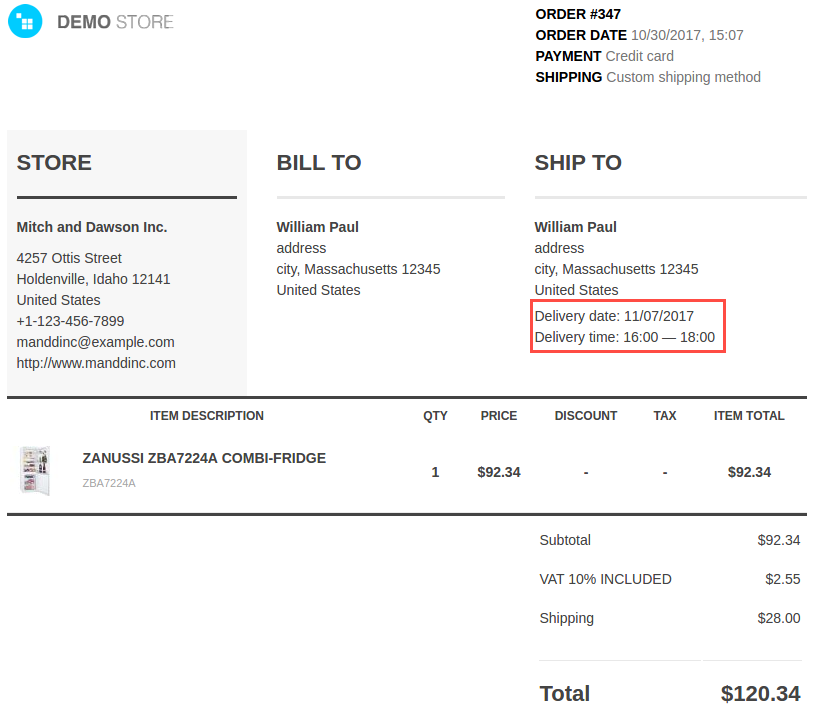
Once the order is placed, the customer will see the selected delivery date and time in the order details.
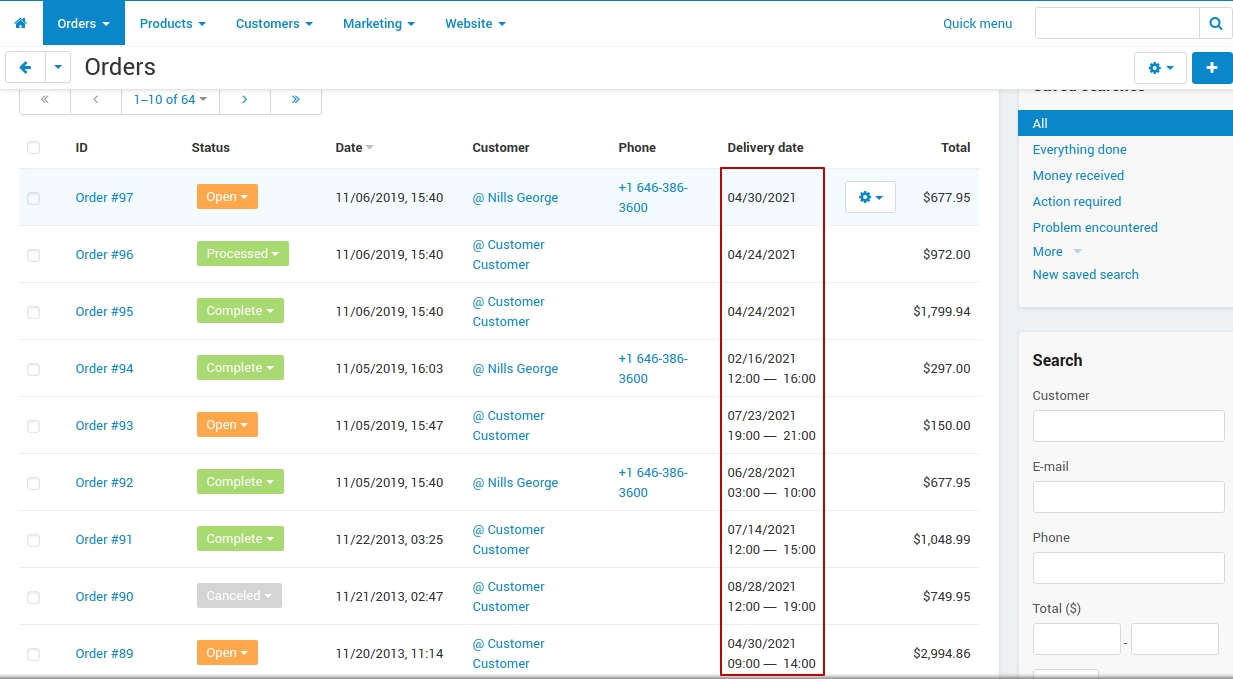
You can see delivery dates on the orders list page so you can very quickly see when orders are due to be fulfilled.
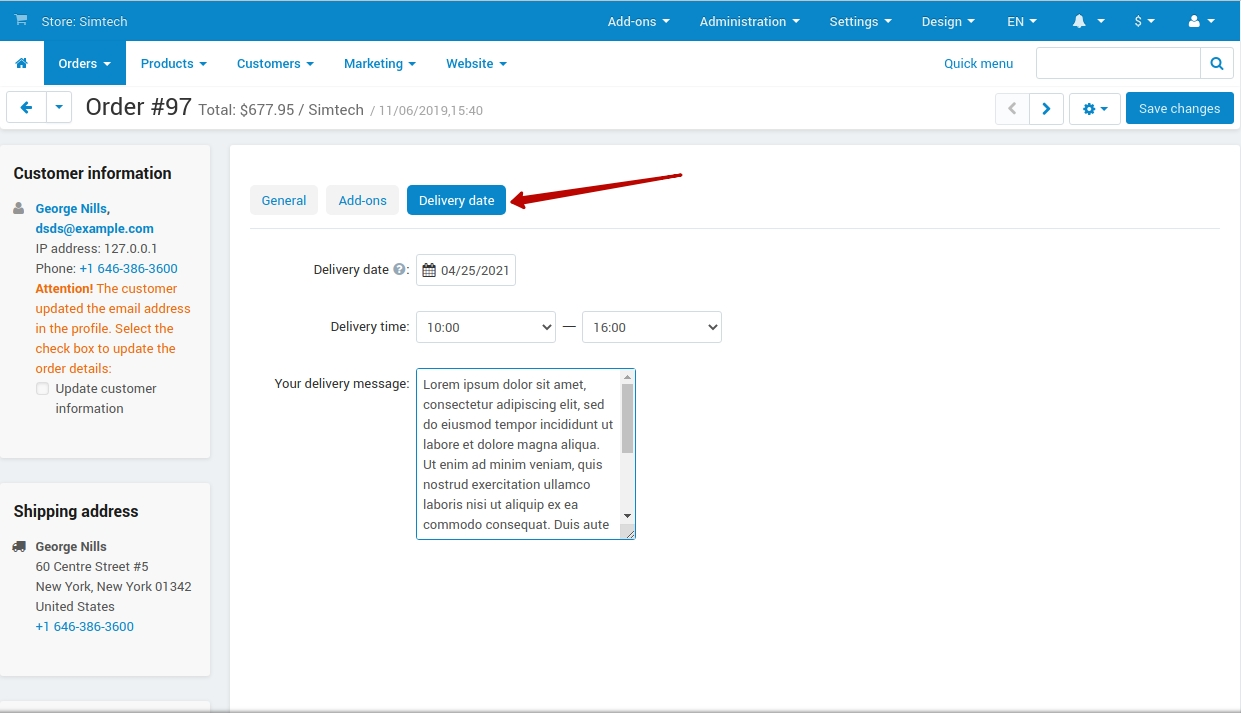
You can edit the selected delivery date via the admin panel on the order details page, if needed.
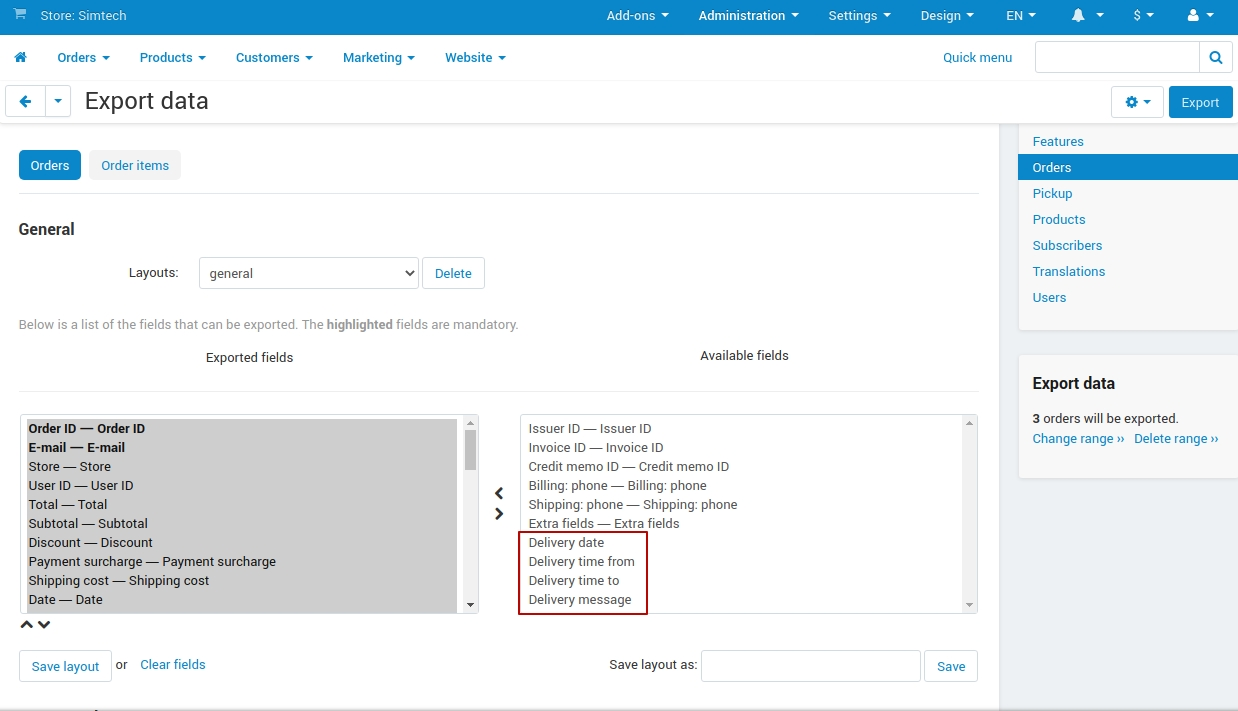
Orders can also be exported/imported with the delivery date field in the CSV format to share with shipping services.
Compatibility
The add-on is compatible with CS-Cart and Multi-Vendor 4.4.1 and above, but only versions 4.11.x, 4.12.x and 4.13.x are supported. PHP 7.1 and higher is required.
Don’t know what archive to download to install the add-on? Read here.
Support
This add-on is developed and published by Simtech Development Ltd., a CS-Cart developer. You are guaranteed a quality add-on supported by the future versions. If you need help, please contact us via our help desk system.
Demo
Check out the Delivery Date add-on in our demo store.
Note
Every half an hour the demo store is reset to the default state.
Managing in the admin panel
Installing the add-on
Install the Delivery Date add-on on the add-ons list page (Add-ons → Manage add-ons). Click the + button in the top right corner, select an archive and click Upload & install. You can now find the installed add-on in the list of installed add-ons, just make sure it is set to Active.
Setting up the add-on
CS-Cart stores
Click on the add-on name in the list of add-ons to open its settings.
Note
In CS-Cart Ultimate, you can set individual settings for each store. Simply select the store at the top and open the add-on settings.
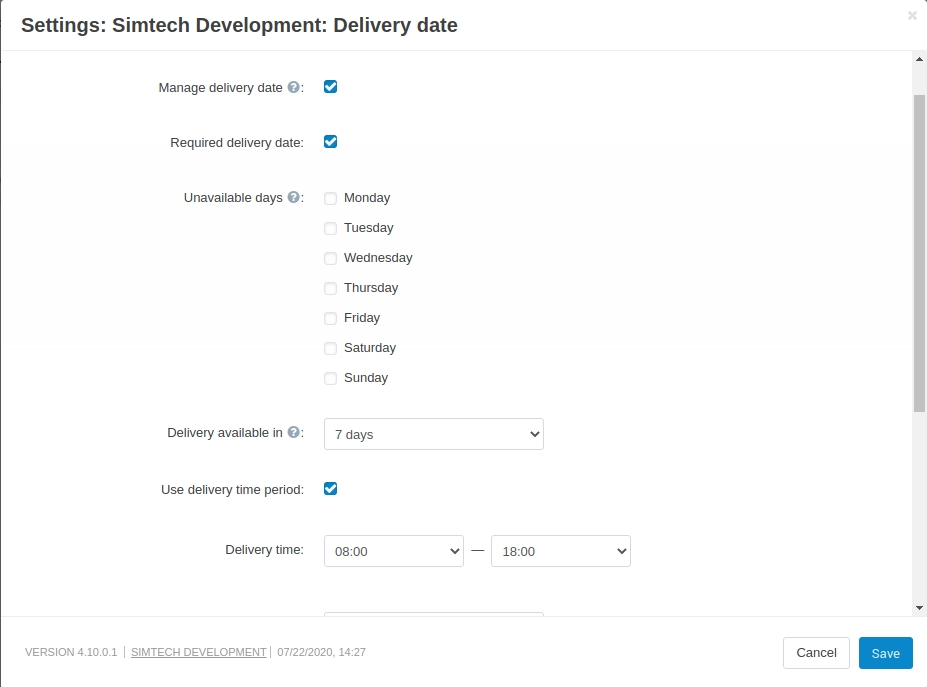
- Manage delivery date—Allows to define delivery date and time and show a comment at checkout. If disabled, this information will be hidden from the storefront.
- Required delivery date—If enabled, the Delivery date field will be required at checkout.
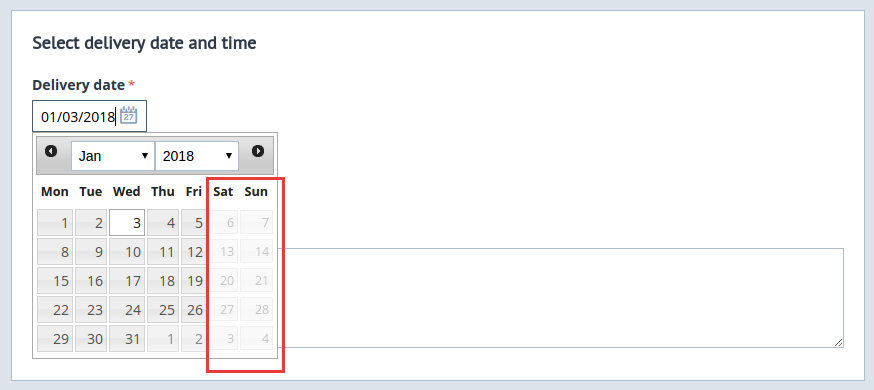
- Unavailable days—Select days when delivery is not available. For example, if you select Saturday and Sunday, these days will be unavailable to choose on the calendar at checkout.
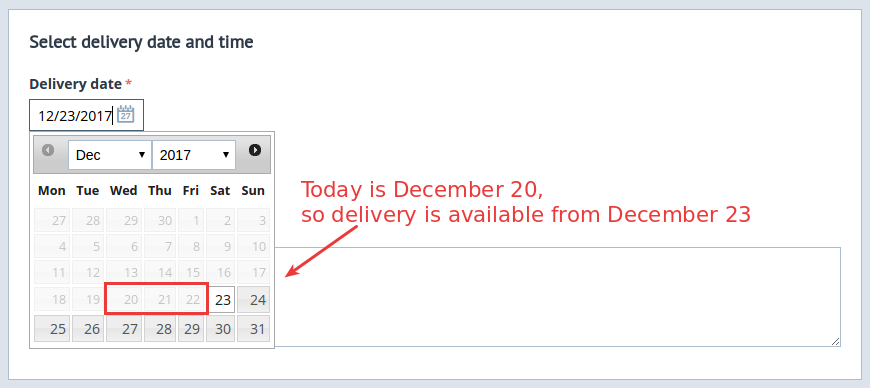
- Delivery available in—Set minimum required days (starting from today) before delivery gets available. For example, if you select 3 days, the delivery will be available on the third day starting from today.
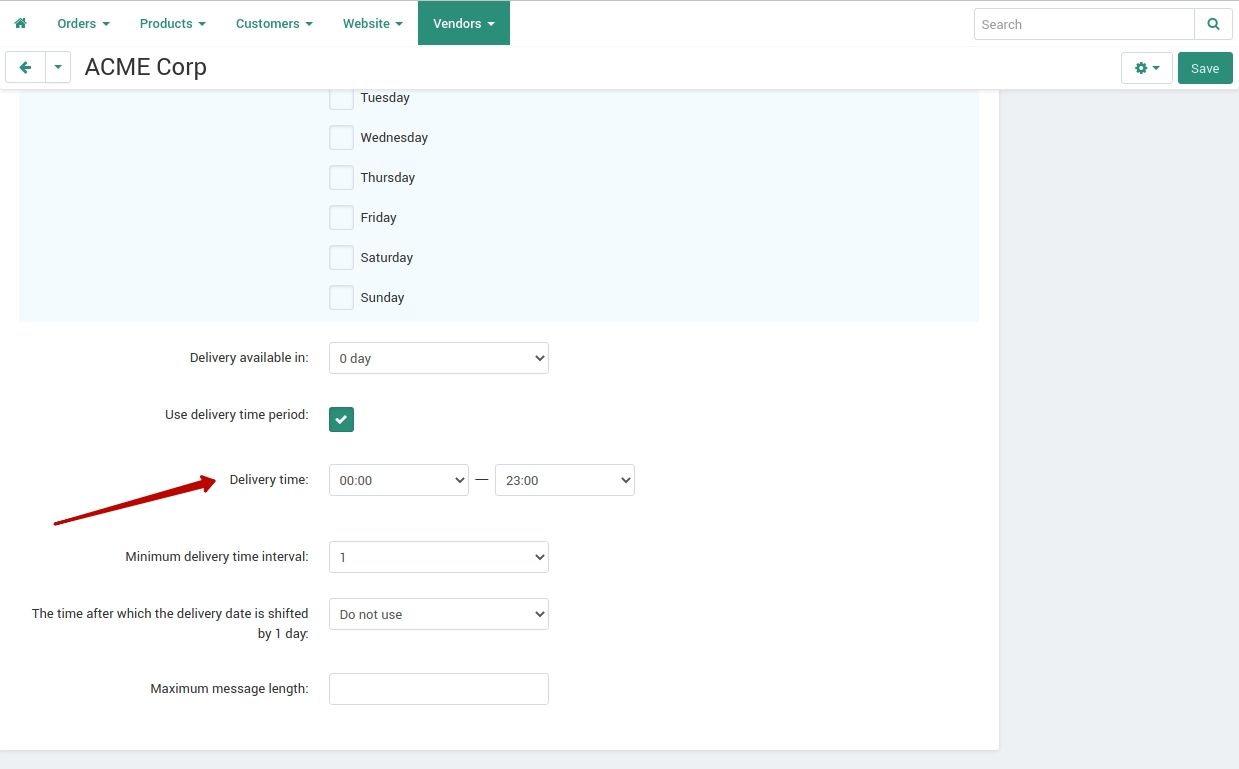
- Use delivery time period—If enabled, customers will be able to select delivery time at checkout.
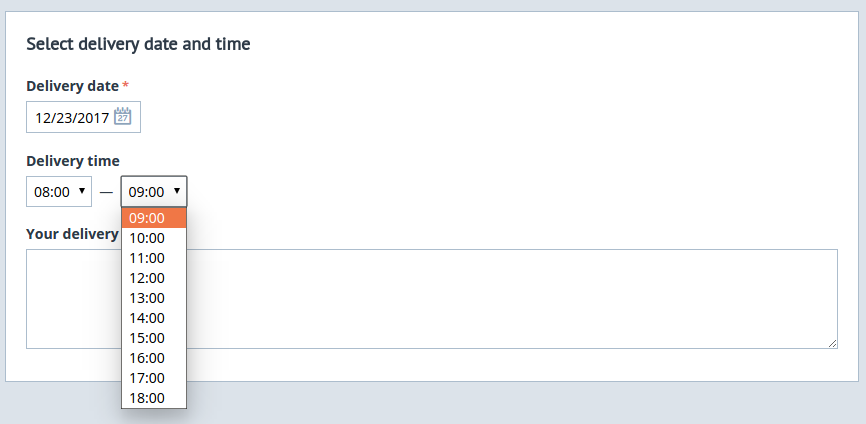
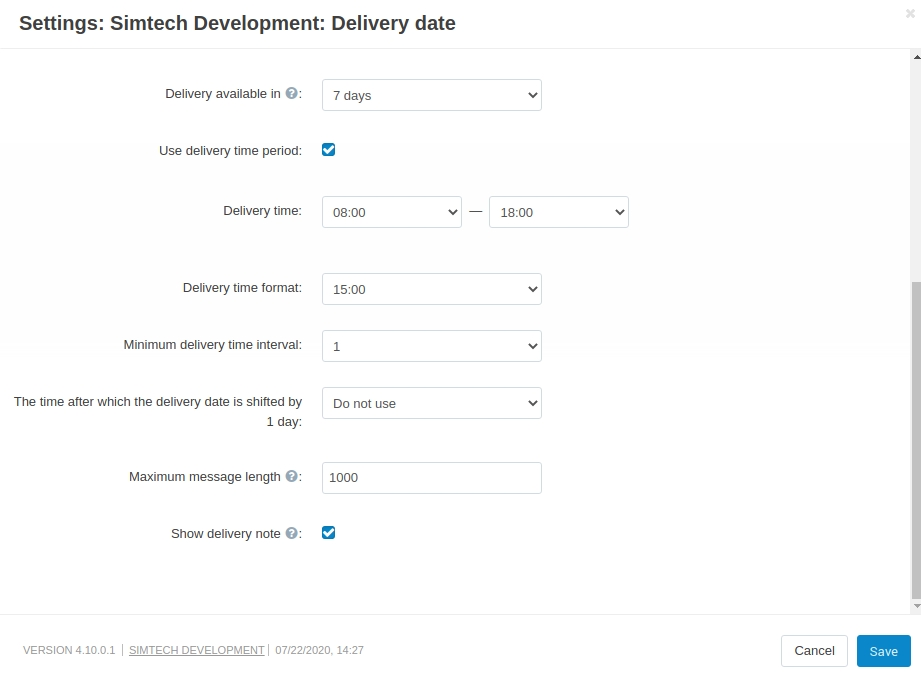
- Delivery time—Define the available delivery time period that customers can select at checkout.
- Delivery time format—Decide whether you want to use 12-hour clock or 24-hour clock for delivery time format. In the former case, select 3:00 PM, in the latter case, 15:00.
- Maximum message length—Define the allowed number of symbols for the message. If left empty or equals 0, no restrictions on the number of symbols will be applied.
- Show delivery note—Show the delivery note at the “Shipping Options” step at checkout. You can change the text of the note using the “addons.sd_delivery_date.delivery_date_notice” language variable (Administration > Languages > Translations).
Multi-Vendor stores
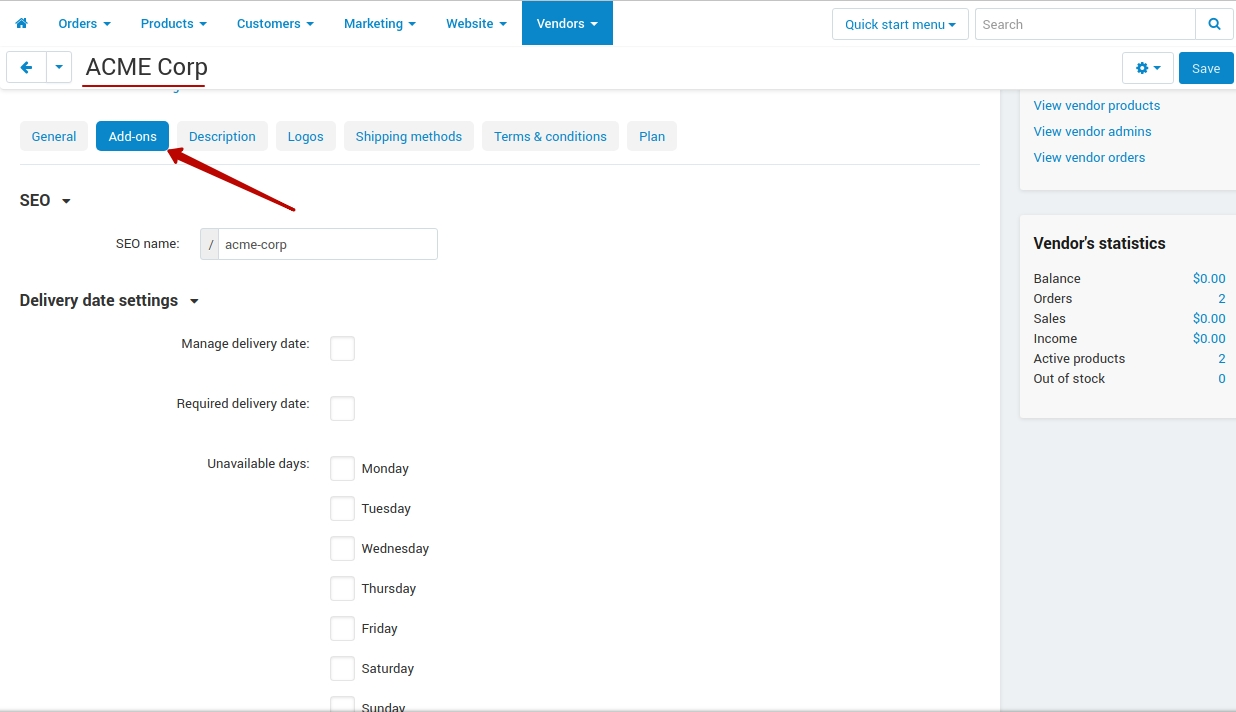
For multi-vendor stores, the settings can be found under Vendors > Delivery date settings (the setting is unavailable for vendors).

Under the All vendors mode, you will see only the global settings:

To see the rest of the settings, open the add-on settings on Vendor settings tab
Vendors can also manage delivery date and time:
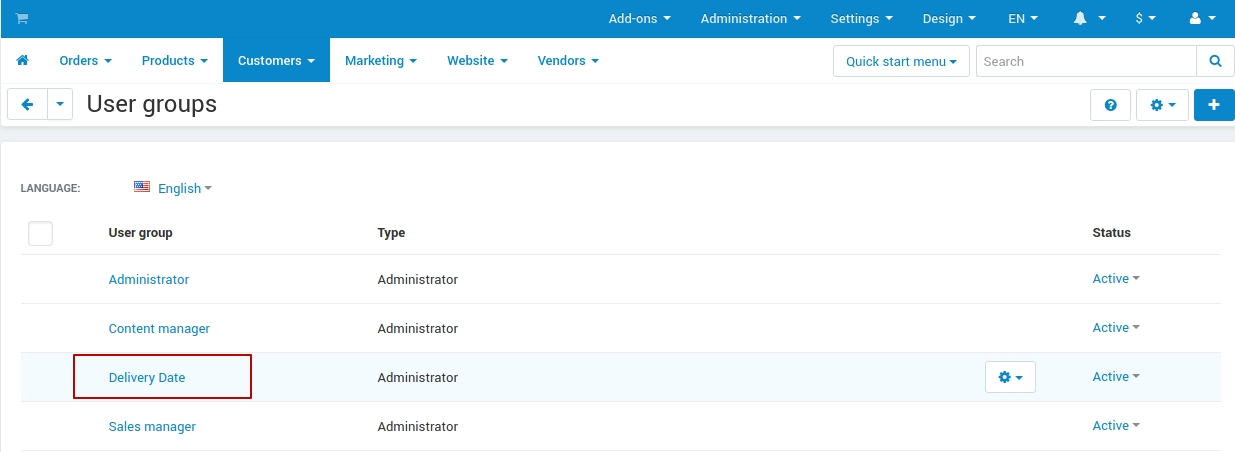
How to allow vendors to manage delivery date settings
- Go to Customers > User groups.
- Create a user group or select an existing one.
- Click the Gear icon and open Edit tab
- Scroll down to the Vendor Privileges and select one of the Delivery Date options

- Click Save.
- Assign this user group to necessary vendors.
Managing orders
On the orders list page you will see a new column with delivery dates defined for each order:
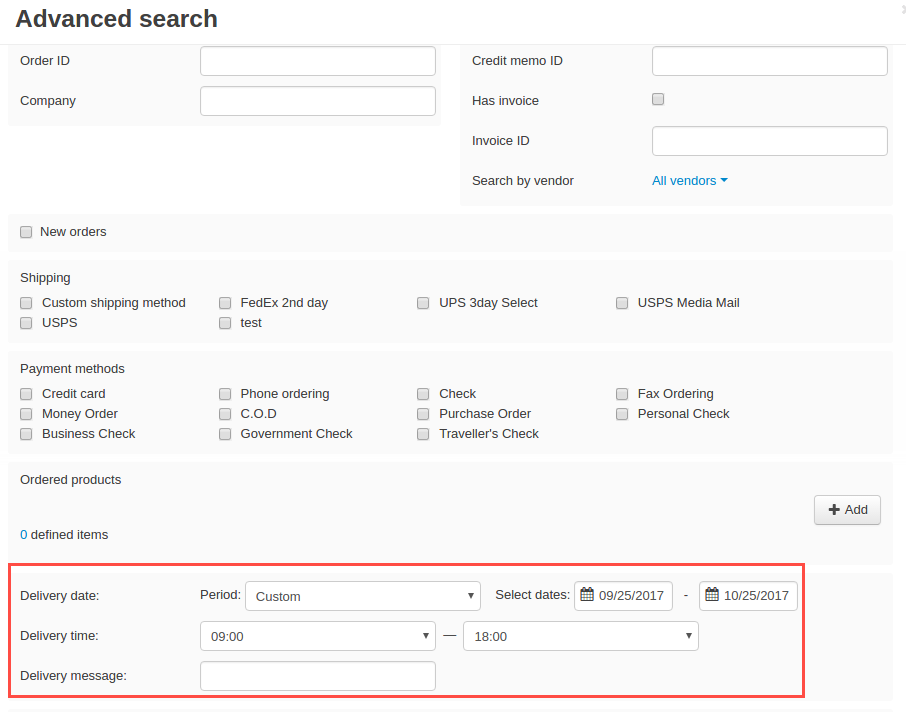
You can search for products with a specific delivery date using Advanced search:
On the editing order page in the Delivery date tab, you can edit delivery date or time or add/edit a note.
Invoices will also include delivery date and time:
Importing/Exporting data
The add-on adds new fields to available fields of order export/import.
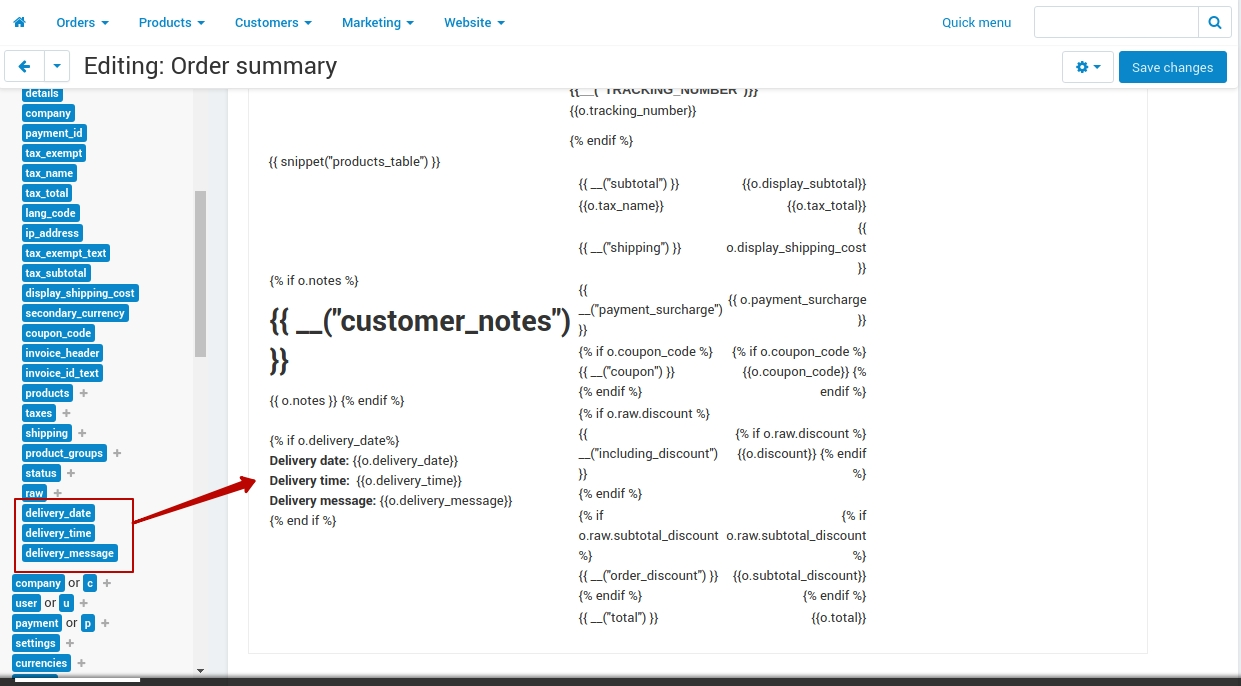
How to add variables to documents
To add these fields, you need to select the desired document in the Administration → Notifications → Documents menu and insert the variables {{o.delivery_date}}, {{o.delivery_time}} and {{o.delivery_message}} in the document in the required place (variables can be selected in the order or o drop-down list to the left of the document template).